This tutorial will cover how to start creating a brand new Closed Deal from the Home page, review the options and settings on the first form that comes up, and explain a little bit about templates.
Instructions
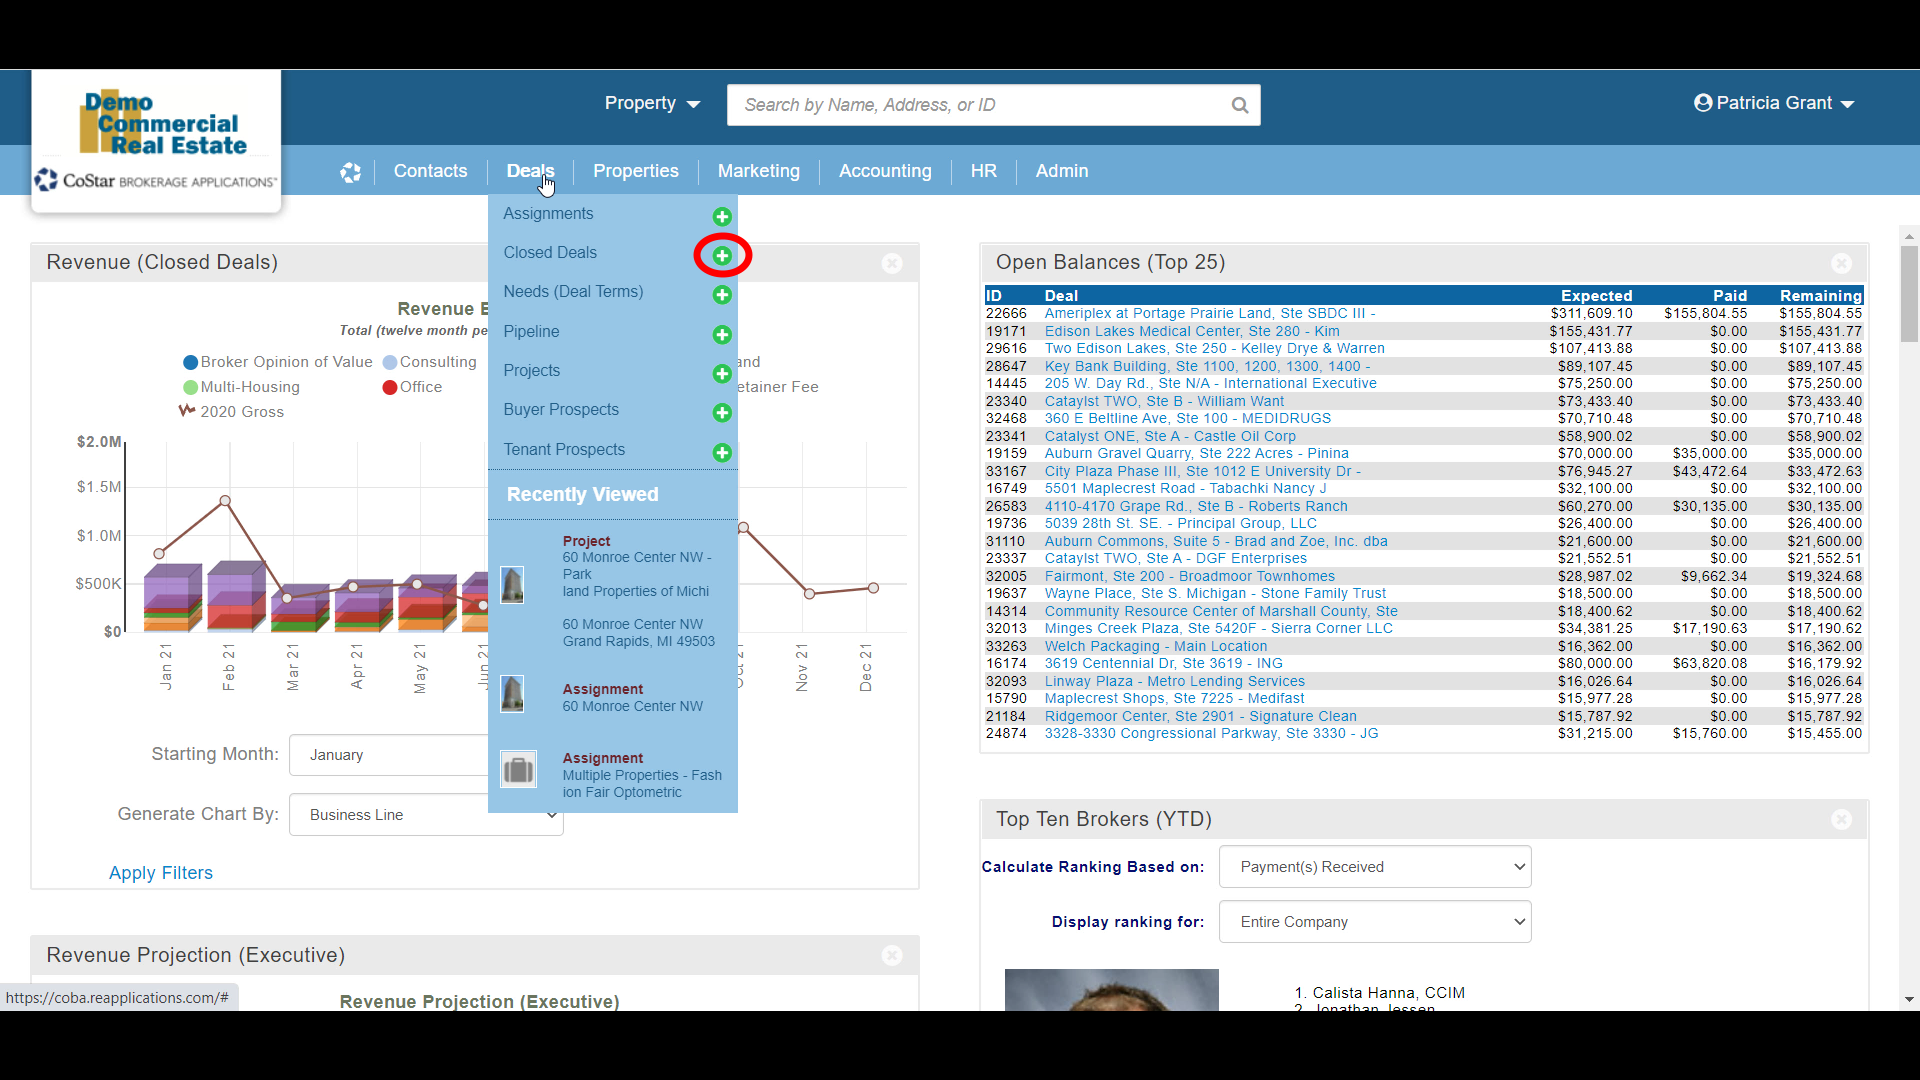
There are a few different ways to create a new Closed Deal. We’re going to start at the Home page. The Deals menu at the top includes a Closed Deals option with a green plus icon next to it. Any time you see that green icon, it means you can create a new record. If you don’t see a green plus icon, then either the option doesn’t exist, or you don’t currently have permission to create that kind of record. Click on the icon to start the process.
The form that pops up is going to gather the information the system needs for a very basic closed deal record. It will also determine which additional steps you might need to complete for this type of deal. Any field which has a red asterisk next to the label is a required field. You will need to populate at least all of those fields before you can submit this form and move on to the next step.

You’ll notice that some of the fields are already populated. In some cases, there are system settings that determine what goes in those fields. The Deal Closed date, for example, defaults to today’s date. In other cases, such as Location and Business Line, your individual settings will determine what the default entries are. You can always change the default values as needed.

Deal Type is a customizable pulldown that will list the various services your firm provides for which you bill commissions and other fees, such as Landlord Rep, Tenant Rep, Investment Sales, etc.
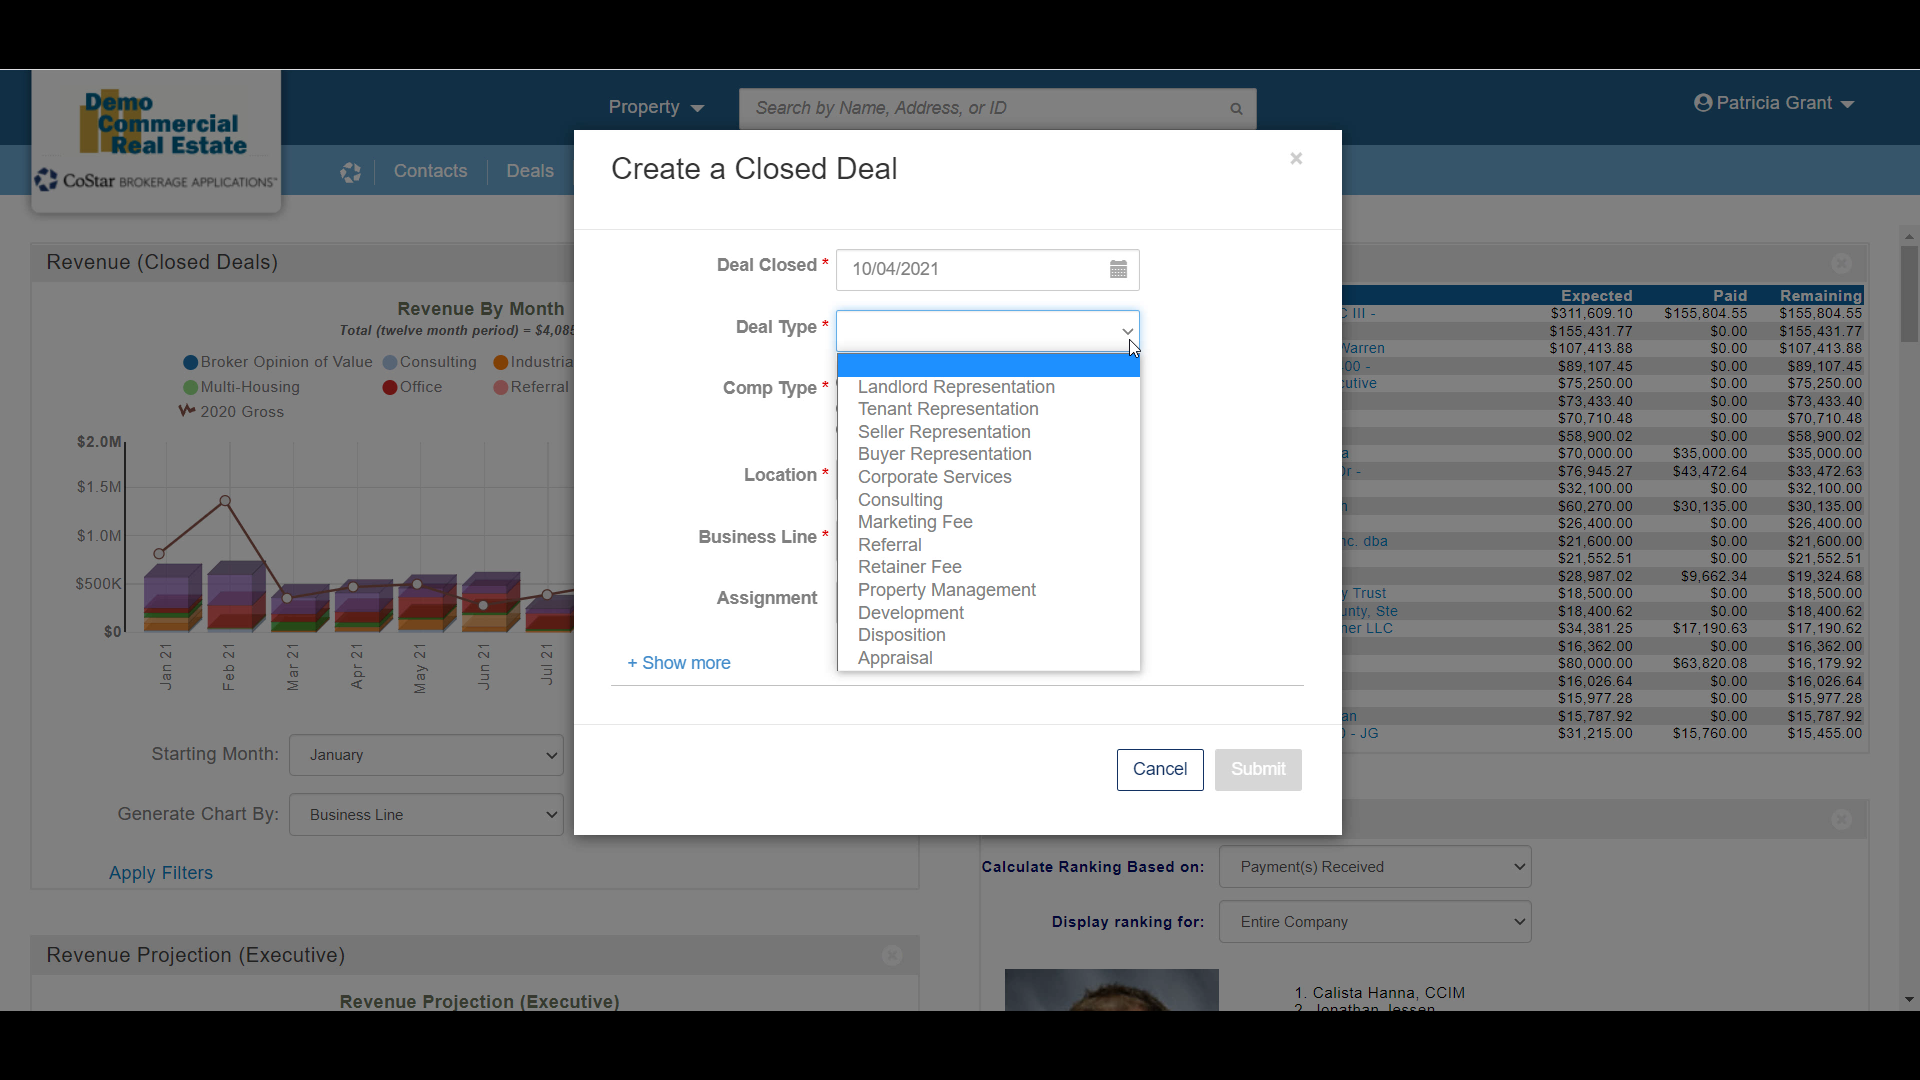
When you select a Deal Type, the appropriate Comp Type should be selected automatically. The Comp Type determines what kind of record the system will create – a lease comp, a sale comp, or a generic deal that doesn’t create a comp.

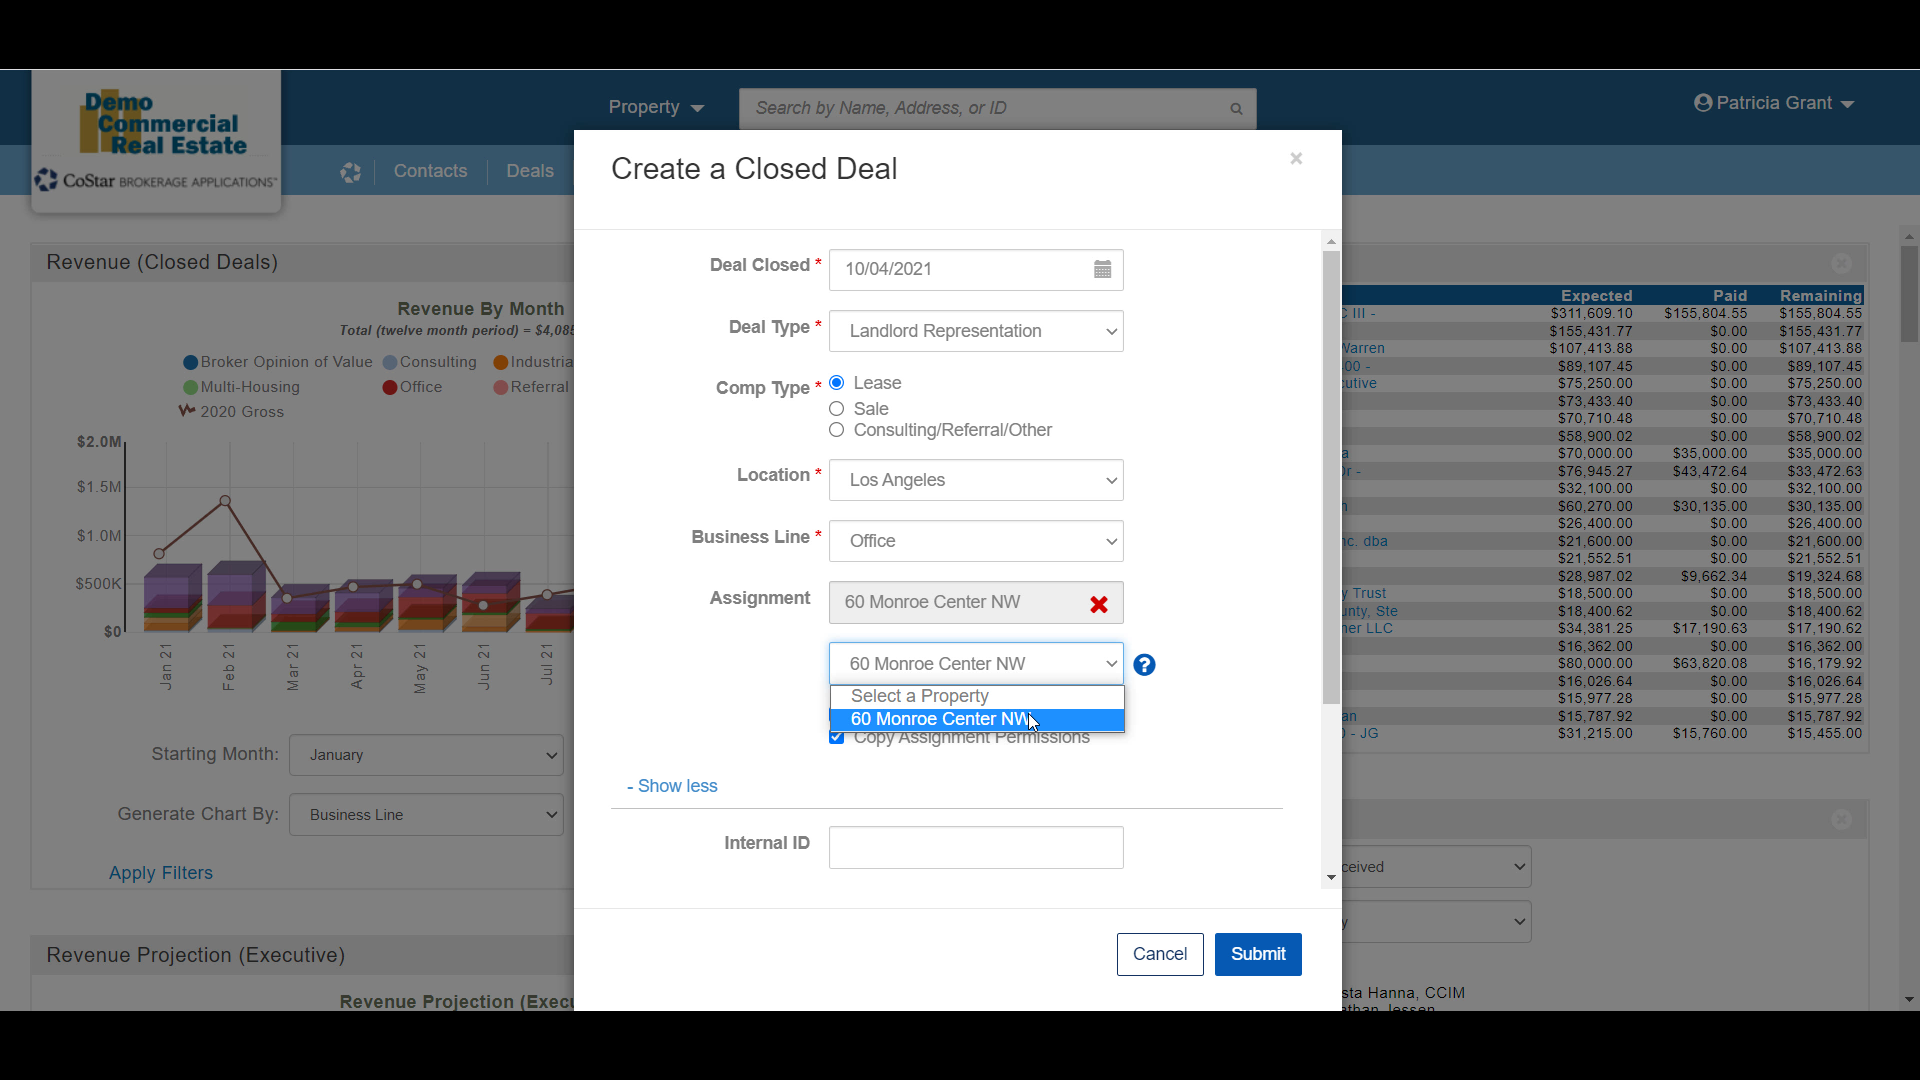
If your firm manages your client representation agreements –what we call Assignments – in CoStar Brokerage Applications, you can search for the appropriate Assignment by typing in the Assignment name, the Client’s name, or the ID of the Assignment record.

Select the correct record from the results to link your new Closed Deal to that Assignment.

If you do link an Assignment, you now have the option to select any Property that is currently associated with that Assignment.
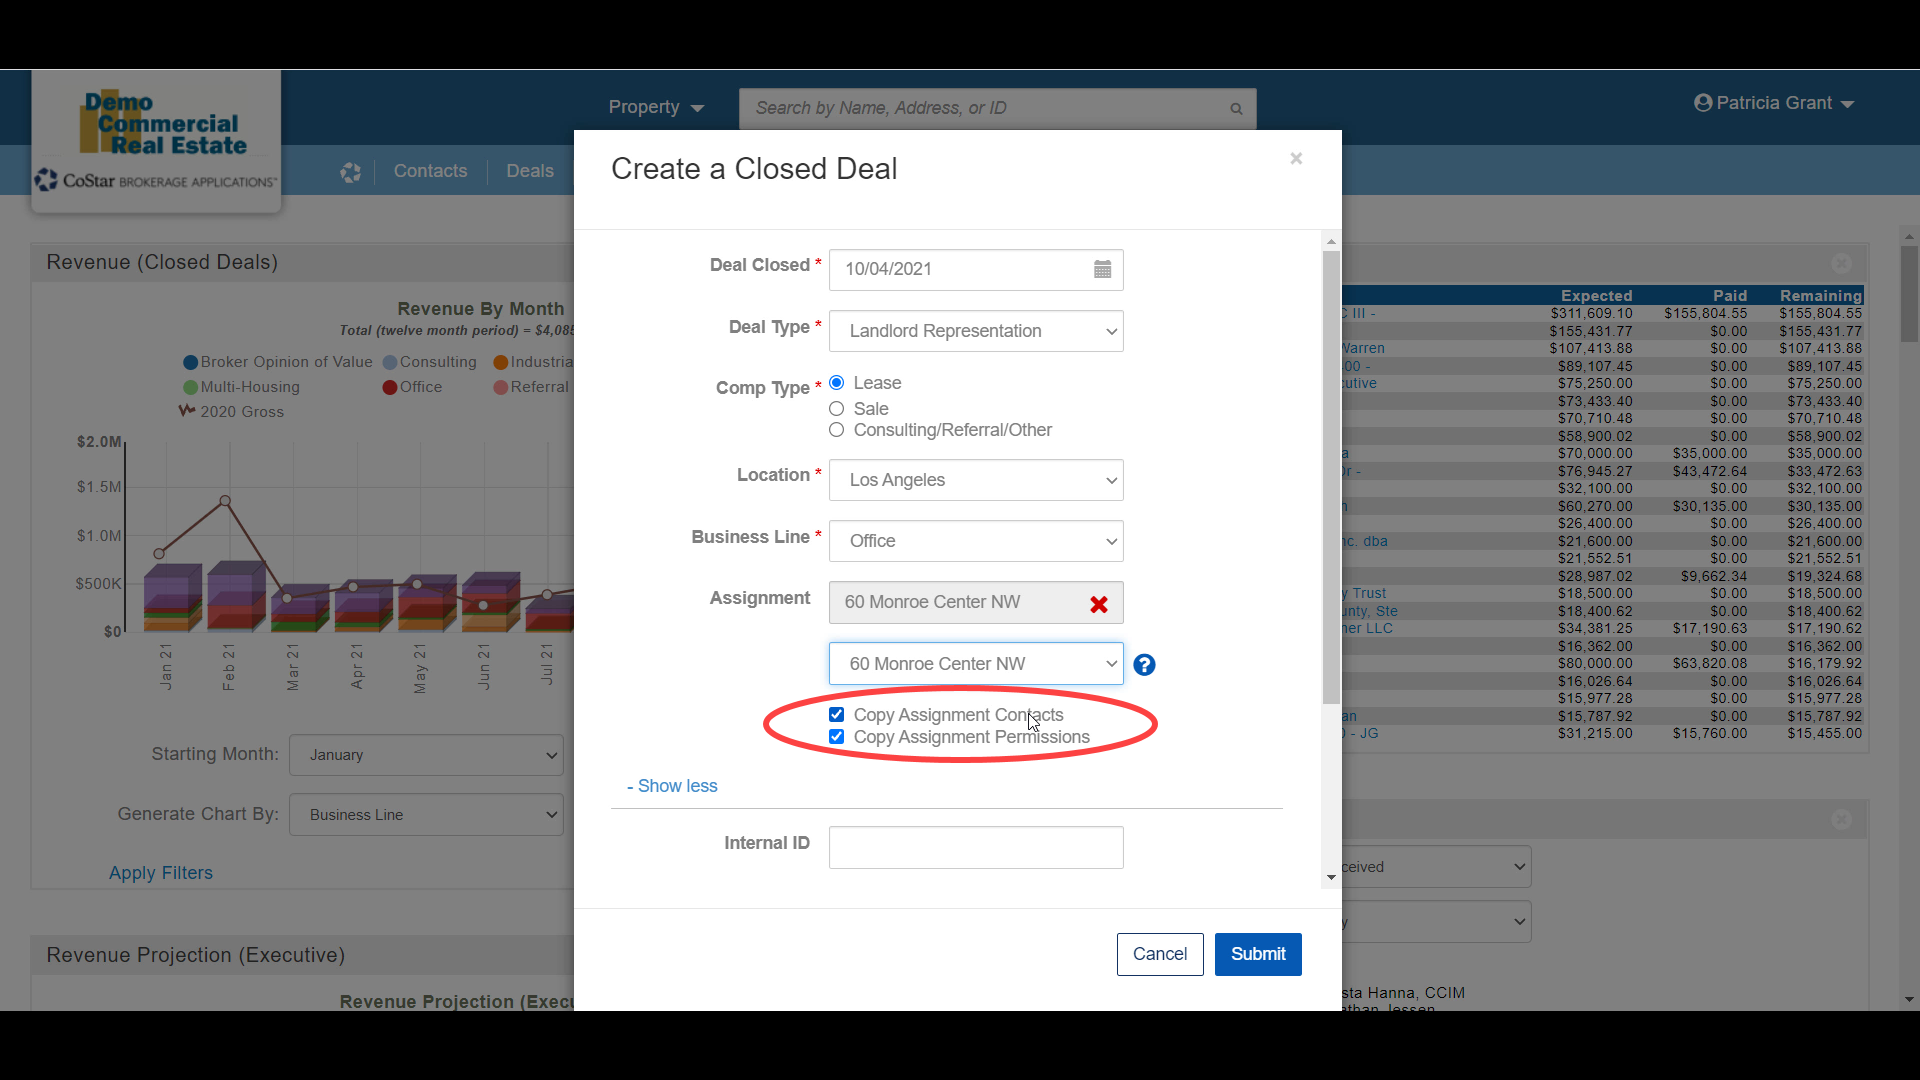
You can also choose to copy Contacts and/or record Permissions from the Assignment to your Closed Deal. Those options are checked by default to save you time later.
The Show more option tells you that there are more fields on this form. They are usually less important or may already be populated with a default setting that is seldom changed. Click anywhere on the Show more line to see those fields.
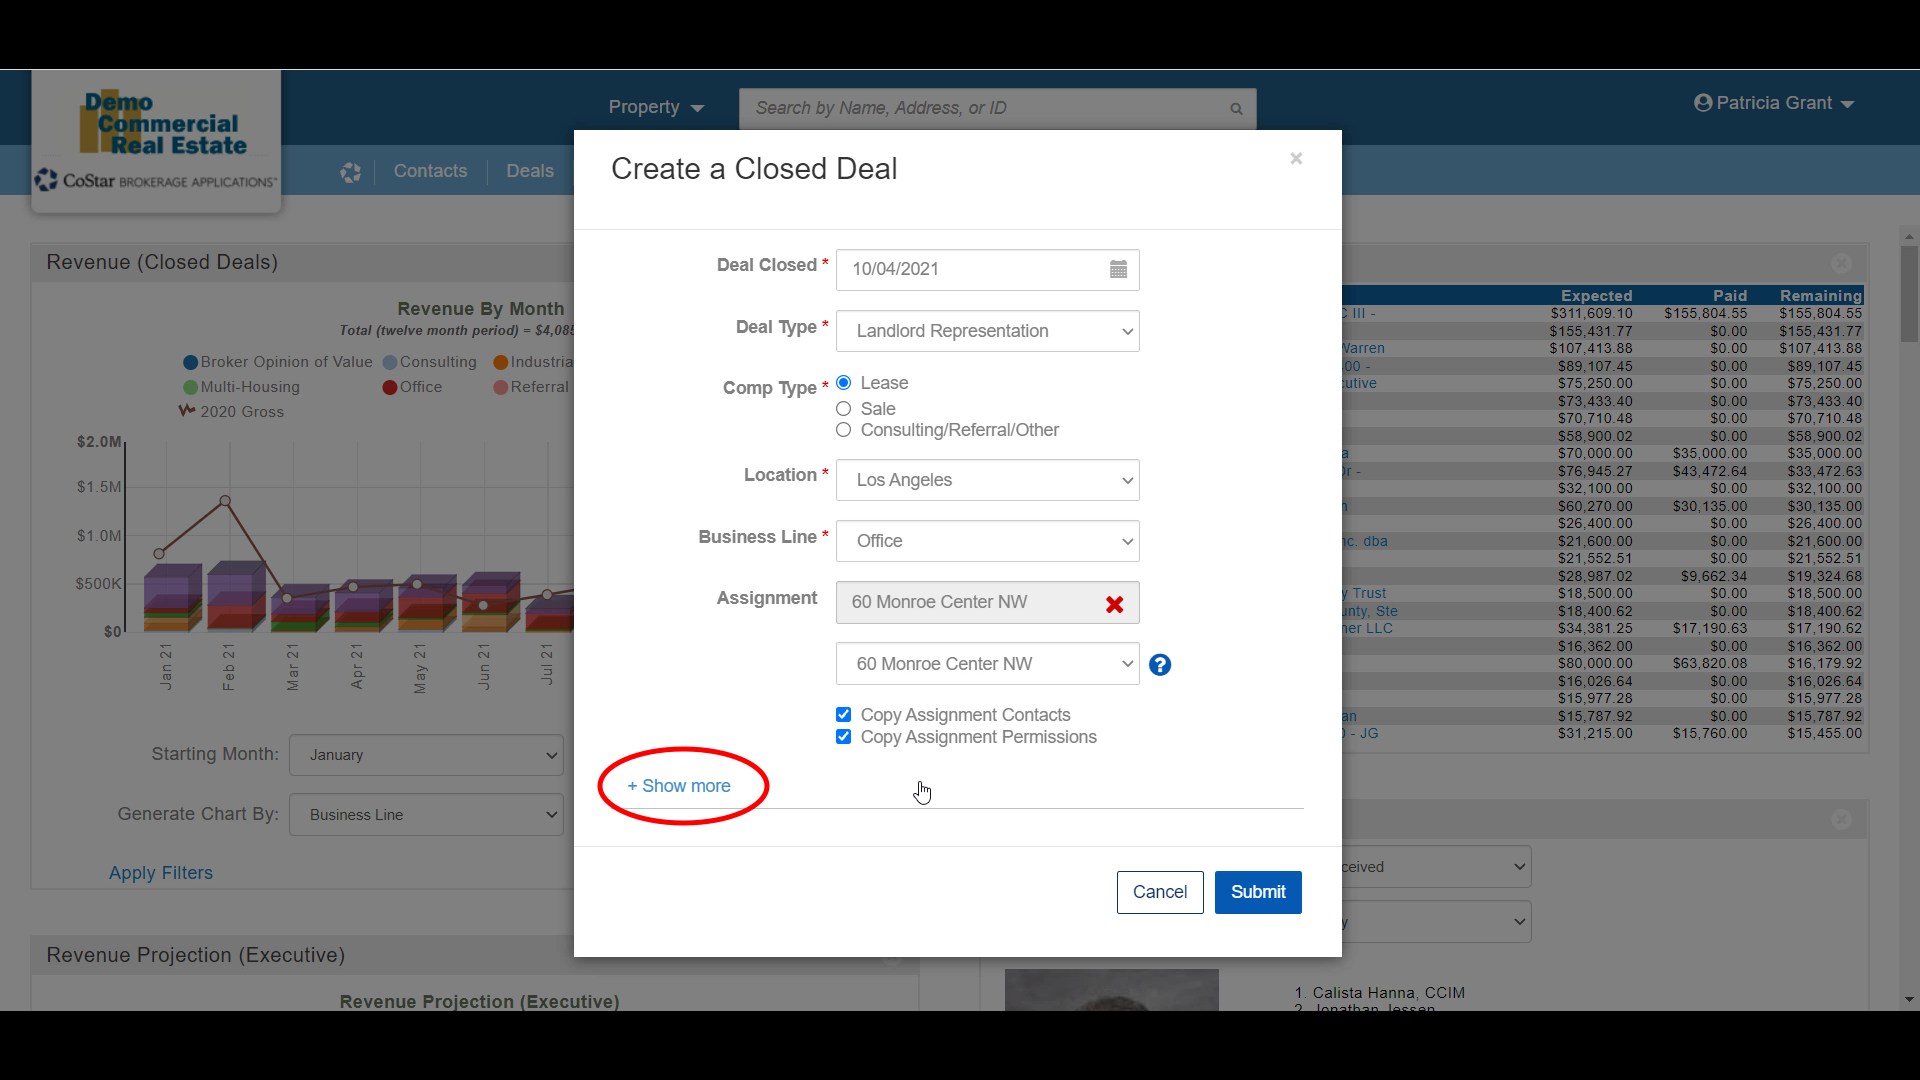
In this case, we have an option to assign this Deal an internal ID or reference number, such as a file number or code. You can use letters and numbers in this field.
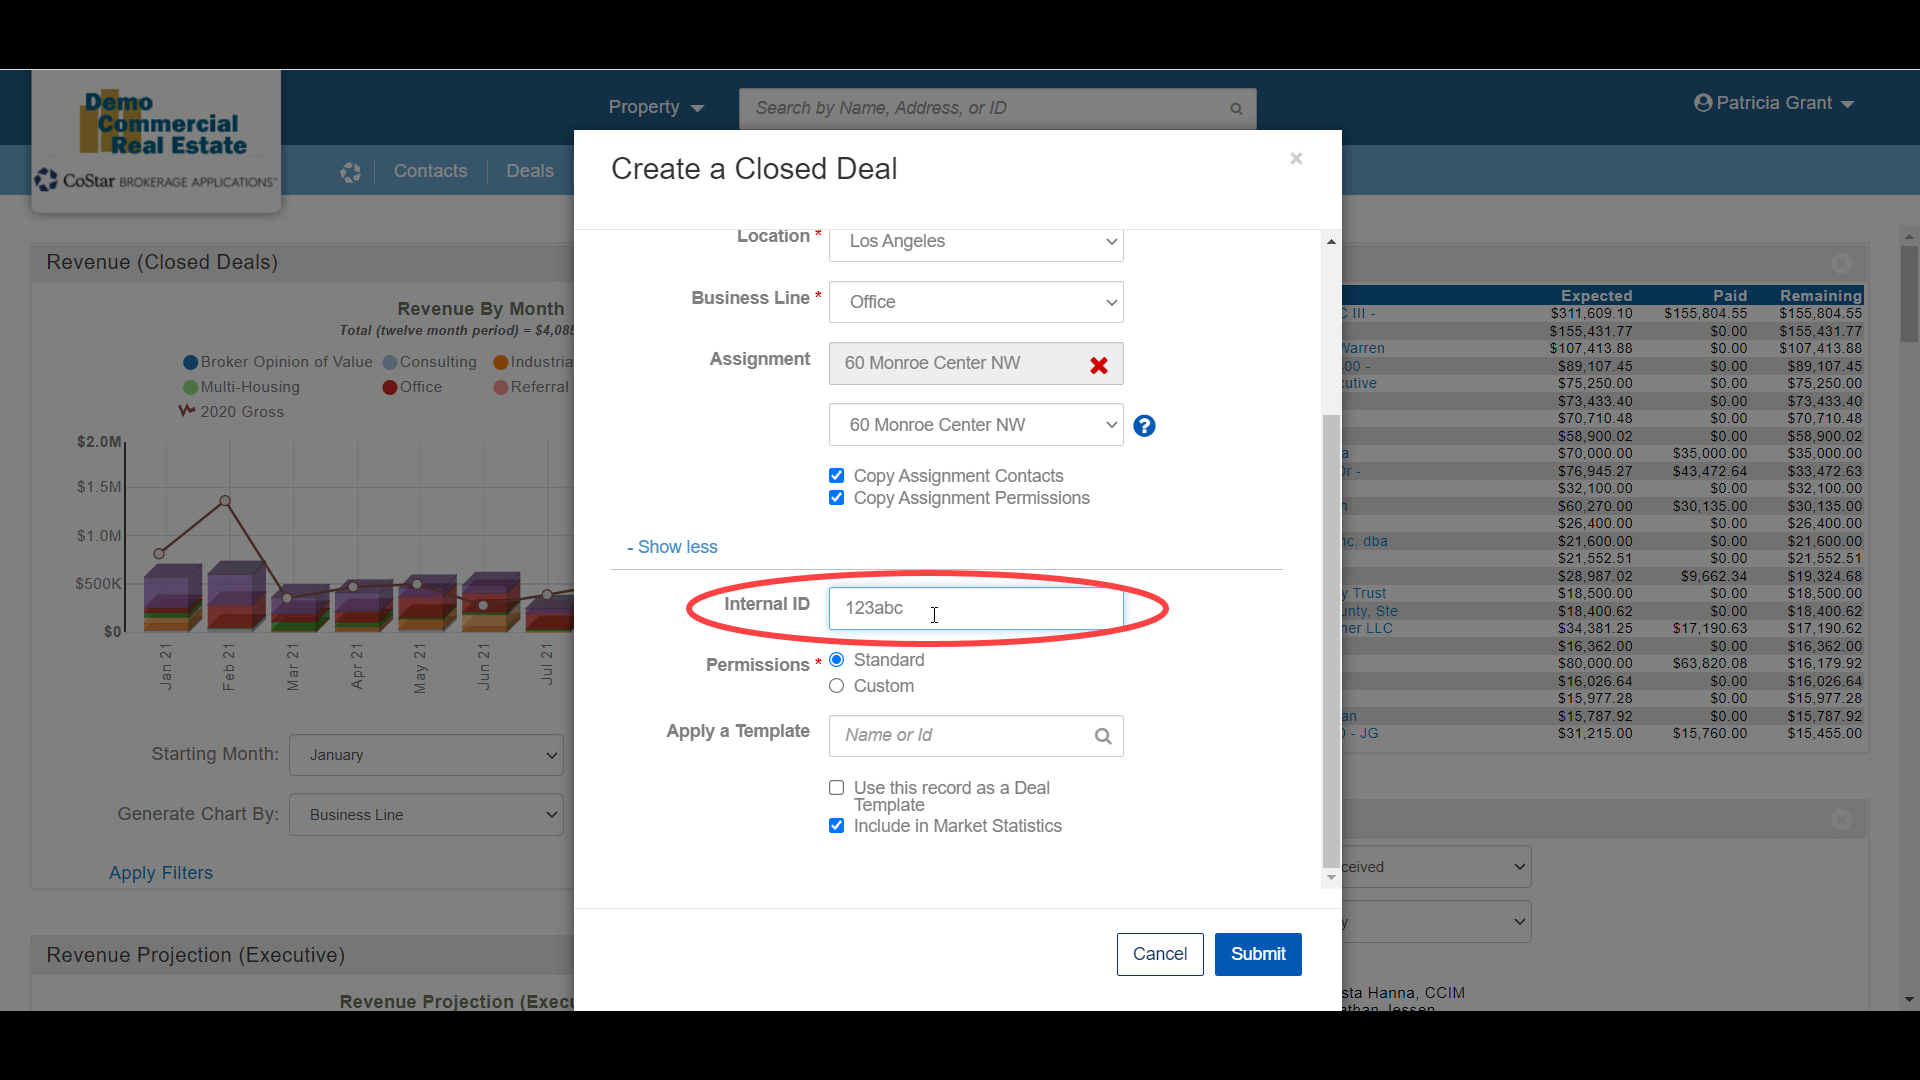
Permissions determine who can see, edit, or deactivate a deal, and who can change Permissions on that deal. New Closed Deals are automatically assigned Permissions when you create the deal. Unless you want to change the default permissions for this deal right now, keep the Standard setting. You can always change the deal’s Permissions later if you need to.

The next option is to apply a template. Templates allow you to set up a pre-defined list of deal contacts (such as a team of brokers and staff who commonly work together), tasks, and milestones. Tasks in particular are useful for creating checklists.
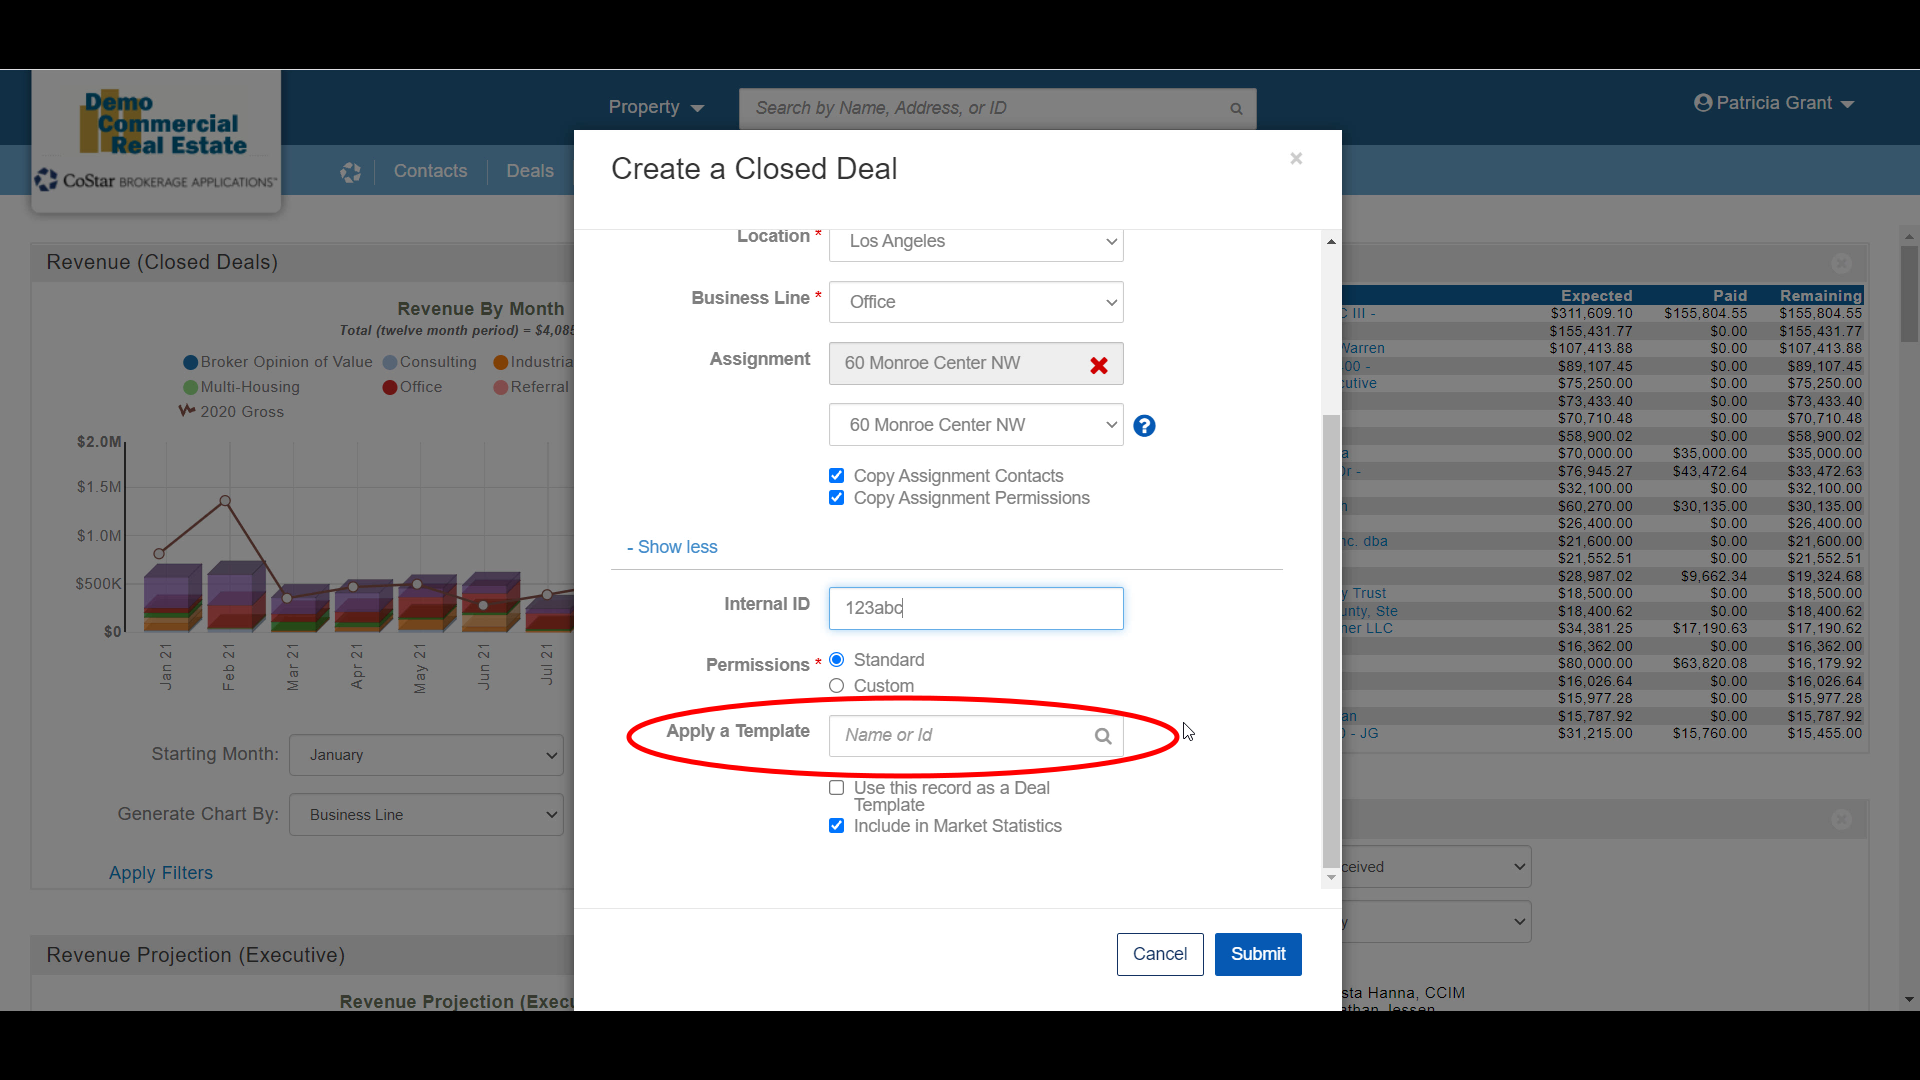
The last two options are rarely changed. You can use this deal as a template for future deals, and you can remove this transaction from your market analysis if you subscribe to the Market Statistics module.
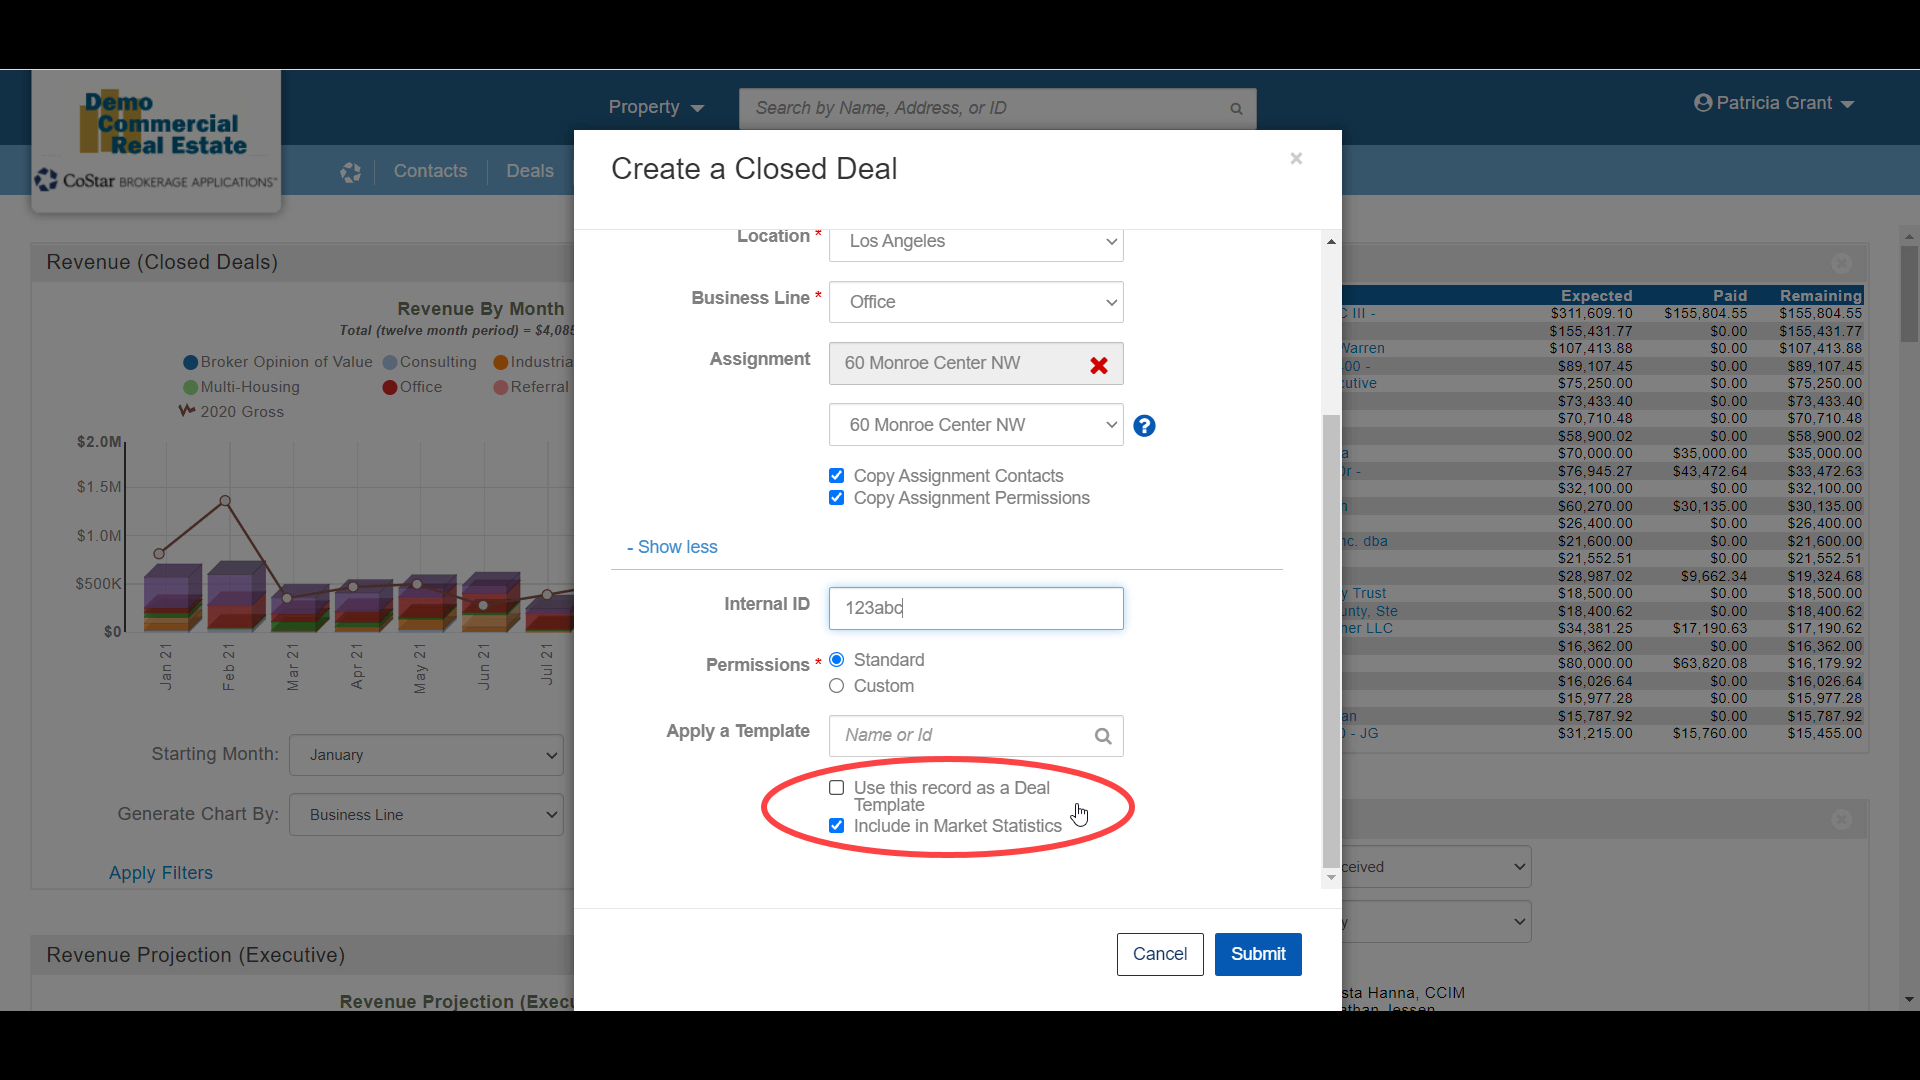
Click Submit to save your information and create the record. That’s it – the first step in creating a new Closed Deal. The system will take you to the next step, which we will cover in the next tutorial.

Click here to go to the next tutorial.
Related articles
- How to create a new Closed Deal: Part 2 - New Closed Deal Modal
- How to create a new Closed Deal: Part 3 - Workflow Navigation
- How to create a new Closed Deal: Part 4 - Property
- How to create a new Closed Deal: Part 5 - Space
- How to create a new Closed Deal: Part 6 - Contacts
- How to create a new Closed Deal: Part 7 - Lease Details
- How to create a new Closed Deal: Part 8 - Deal Information
- How to create a new Closed Deal: Part 9 - Fee Calculation
- How to create a new Closed Deal: Part 10 - Fee Splits
- How to create a new Closed Deal: Part 11 - Invoicing
- How to create a new Closed Deal: Part 12 - Payments
- How to create a new Closed Deal: Part 13 - Notes/Files
- How to create a new Closed Deal: Part 14 - Link Project
- How to create a new Closed Deal: Part 15 - Deal Share
- How to create a new Closed Deal: Part 16 - Billing Schedule
- How to create a new Closed Deal: Part 17 - Net Adjustments
- How to create a new Closed Deal: Part 18 - Annuity Schedule
- How to create a new Closed Deal: Part 19 - Sale Details
- How to create a new Closed Deal: Part 20 - Other Starting Points
© 2023 CoStar Group
Attachments:
 CBA - Entering a Closed Deal - 02 New Closed Deal Modal all (Time 0_00_31;29).png (image/png)
CBA - Entering a Closed Deal - 02 New Closed Deal Modal all (Time 0_01_09;13).png (image/png)
CBA - Entering a Closed Deal - 02 New Closed Deal Modal all (Time 0_01_27;23).png (image/png)
CBA - Entering a Closed Deal - 02 New Closed Deal Modal all (Time 0_00_31;29).png (image/png)
CBA - Entering a Closed Deal - 02 New Closed Deal Modal all (Time 0_01_09;13).png (image/png)
CBA - Entering a Closed Deal - 02 New Closed Deal Modal all (Time 0_01_27;23).png (image/png)
 CBA - Entering a Closed Deal - 02 New Closed Deal Modal all (Time 0_01_44;04).png (image/png)
 CBA - Entering a Closed Deal - 02 New Closed Deal Modal all (Time 0_01_54;08).png (image/png)
CBA - Entering a Closed Deal - 02 New Closed Deal Modal all (Time 0_02_02;26).png (image/png)
CBA - Entering a Closed Deal - 02 New Closed Deal Modal all (Time 0_02_30;26).png (image/png)
CBA - Entering a Closed Deal - 02 New Closed Deal Modal all (Time 0_01_54;08).png (image/png)
CBA - Entering a Closed Deal - 02 New Closed Deal Modal all (Time 0_02_02;26).png (image/png)
CBA - Entering a Closed Deal - 02 New Closed Deal Modal all (Time 0_02_30;26).png (image/png)
 CBA - Entering a Closed Deal - 02 New Closed Deal Modal all (Time 0_02_30;26).png (image/png)
 CBA - Entering a Closed Deal - 02 New Closed Deal Modal all (Time 0_02_35;01).png (image/png)
CBA - Entering a Closed Deal - 02 New Closed Deal Modal all (Time 0_02_43;16).png (image/png)
CBA - Entering a Closed Deal - 02 New Closed Deal Modal all (Time 0_02_47;26).png (image/png)
CBA - Entering a Closed Deal - 02 New Closed Deal Modal all (Time 0_02_35;01).png (image/png)
CBA - Entering a Closed Deal - 02 New Closed Deal Modal all (Time 0_02_43;16).png (image/png)
CBA - Entering a Closed Deal - 02 New Closed Deal Modal all (Time 0_02_47;26).png (image/png)
 CBA - Entering a Closed Deal - 02 New Closed Deal Modal all (Time 0_02_47;26).png (image/png)
CBA - Entering a Closed Deal - 02 New Closed Deal Modal all (Time 0_02_30;26).png (image/png)
CBA - Entering a Closed Deal - 02 New Closed Deal Modal all (Time 0_01_27;23).png (image/png)
CBA - Entering a Closed Deal - 02 New Closed Deal Modal all (Time 0_02_59;26).png (image/png)
CBA - Entering a Closed Deal - 02 New Closed Deal Modal all (Time 0_03_25;09).png (image/png)
CBA - Entering a Closed Deal - 02 New Closed Deal Modal all (Time 0_03_28;13).png (image/png)
CBA - Entering a Closed Deal - 02 New Closed Deal Modal all (Time 0_03_50;03).png (image/png)
CBA - Entering a Closed Deal - 02 New Closed Deal Modal all (Time 0_04_18;08).png (image/png)
CBA - Entering a Closed Deal - 02 New Closed Deal Modal all (Time 0_04_23;06).png (image/png)
CBA - Entering a Closed Deal - 02 New Closed Deal Modal all (Time 0_02_47;26).png (image/png)
CBA - Entering a Closed Deal - 02 New Closed Deal Modal all (Time 0_02_30;26).png (image/png)
CBA - Entering a Closed Deal - 02 New Closed Deal Modal all (Time 0_01_27;23).png (image/png)
CBA - Entering a Closed Deal - 02 New Closed Deal Modal all (Time 0_02_59;26).png (image/png)
CBA - Entering a Closed Deal - 02 New Closed Deal Modal all (Time 0_03_25;09).png (image/png)
CBA - Entering a Closed Deal - 02 New Closed Deal Modal all (Time 0_03_28;13).png (image/png)
CBA - Entering a Closed Deal - 02 New Closed Deal Modal all (Time 0_03_50;03).png (image/png)
CBA - Entering a Closed Deal - 02 New Closed Deal Modal all (Time 0_04_18;08).png (image/png)
CBA - Entering a Closed Deal - 02 New Closed Deal Modal all (Time 0_04_23;06).png (image/png)