This tutorial will show you how to set up a billing schedule for your commissions and other fees, and how to bill an invoice. We’re going to use the more common fee scenario as our example for this tutorial, the one without taxes and expenses.
Instructions
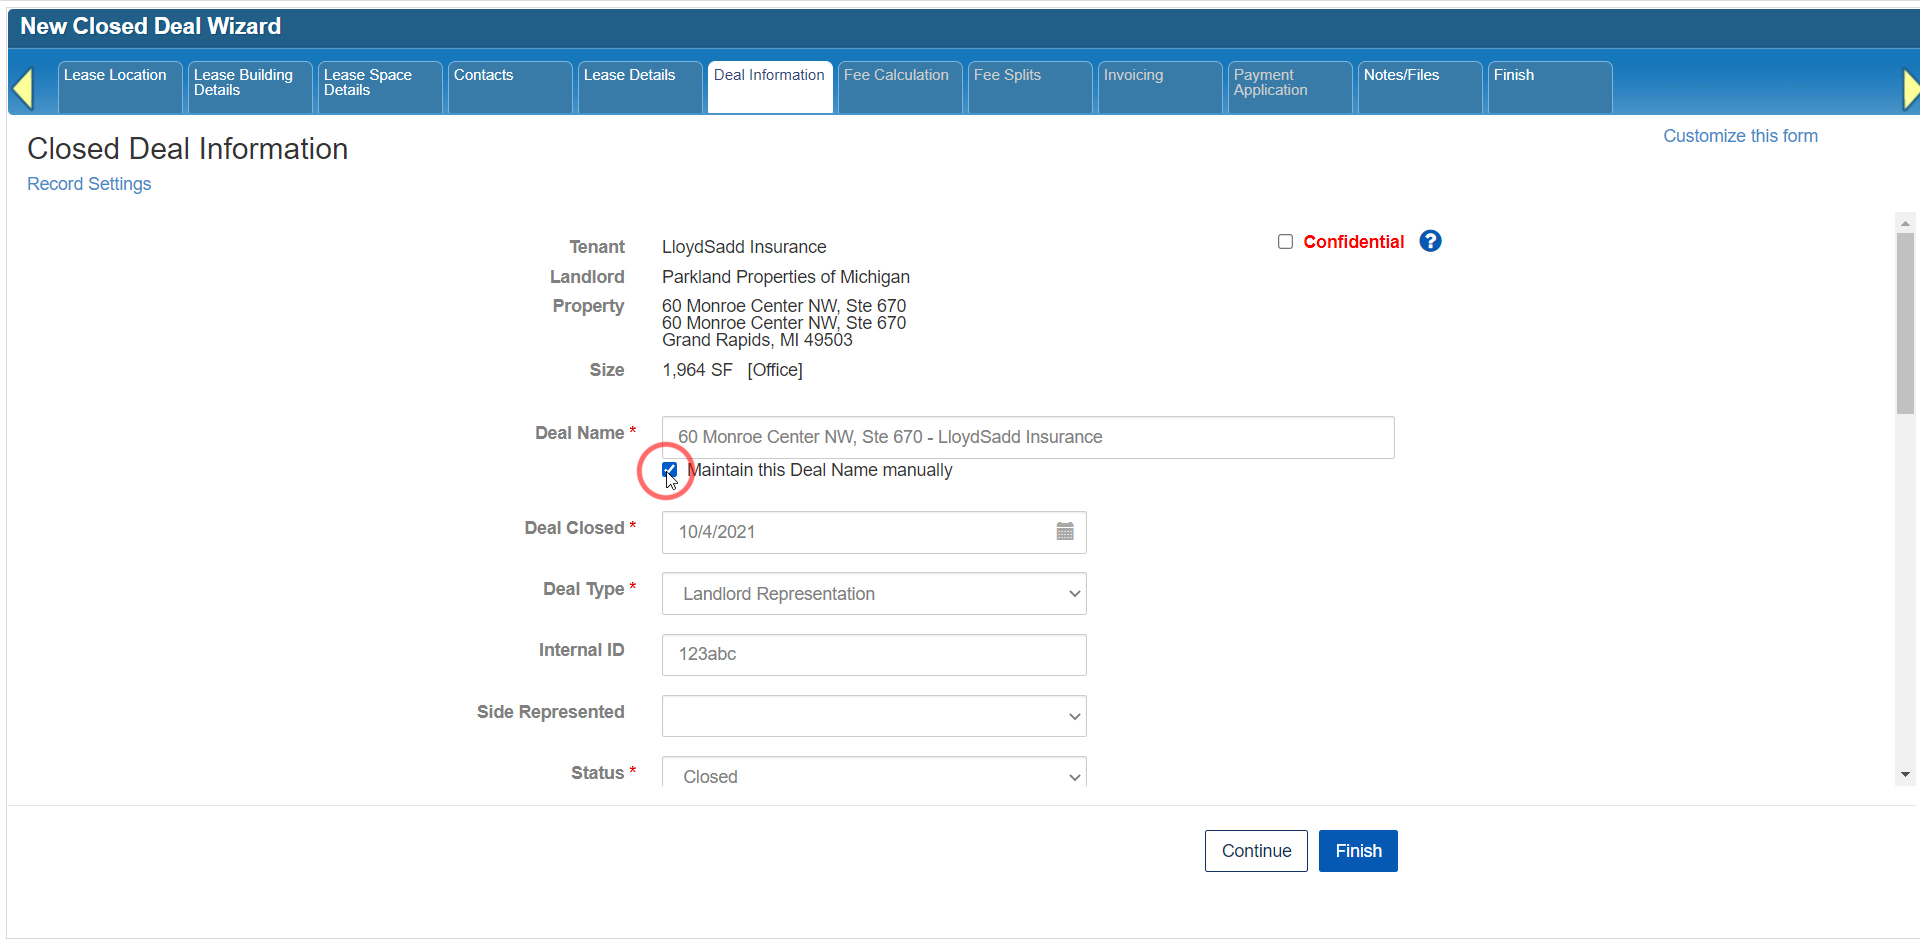
At the top of the Invoicing page, you’ll see a summary section with totals for the deal fees, amount scheduled for billing, amount invoiced (or billed), paid amount and outstanding balance.

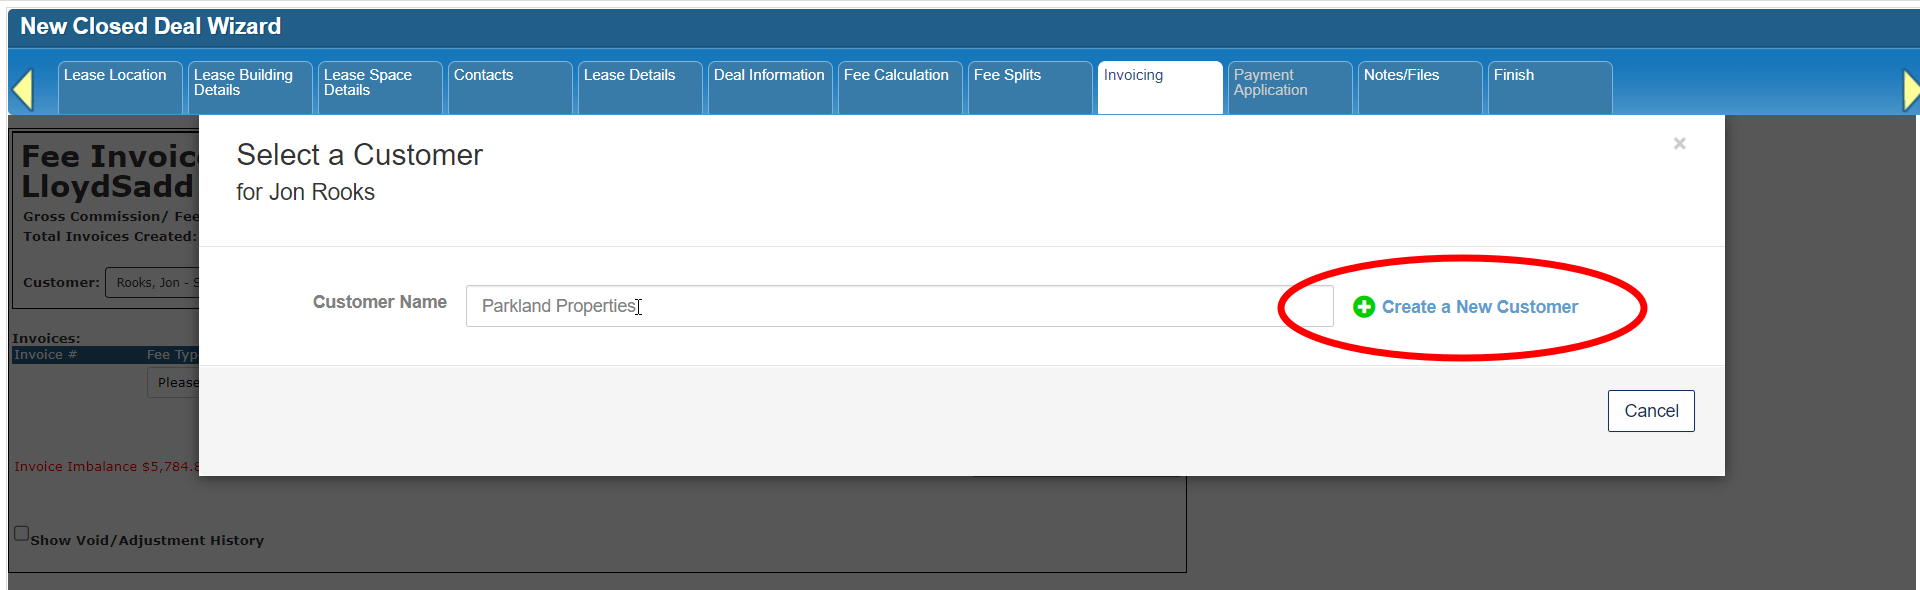
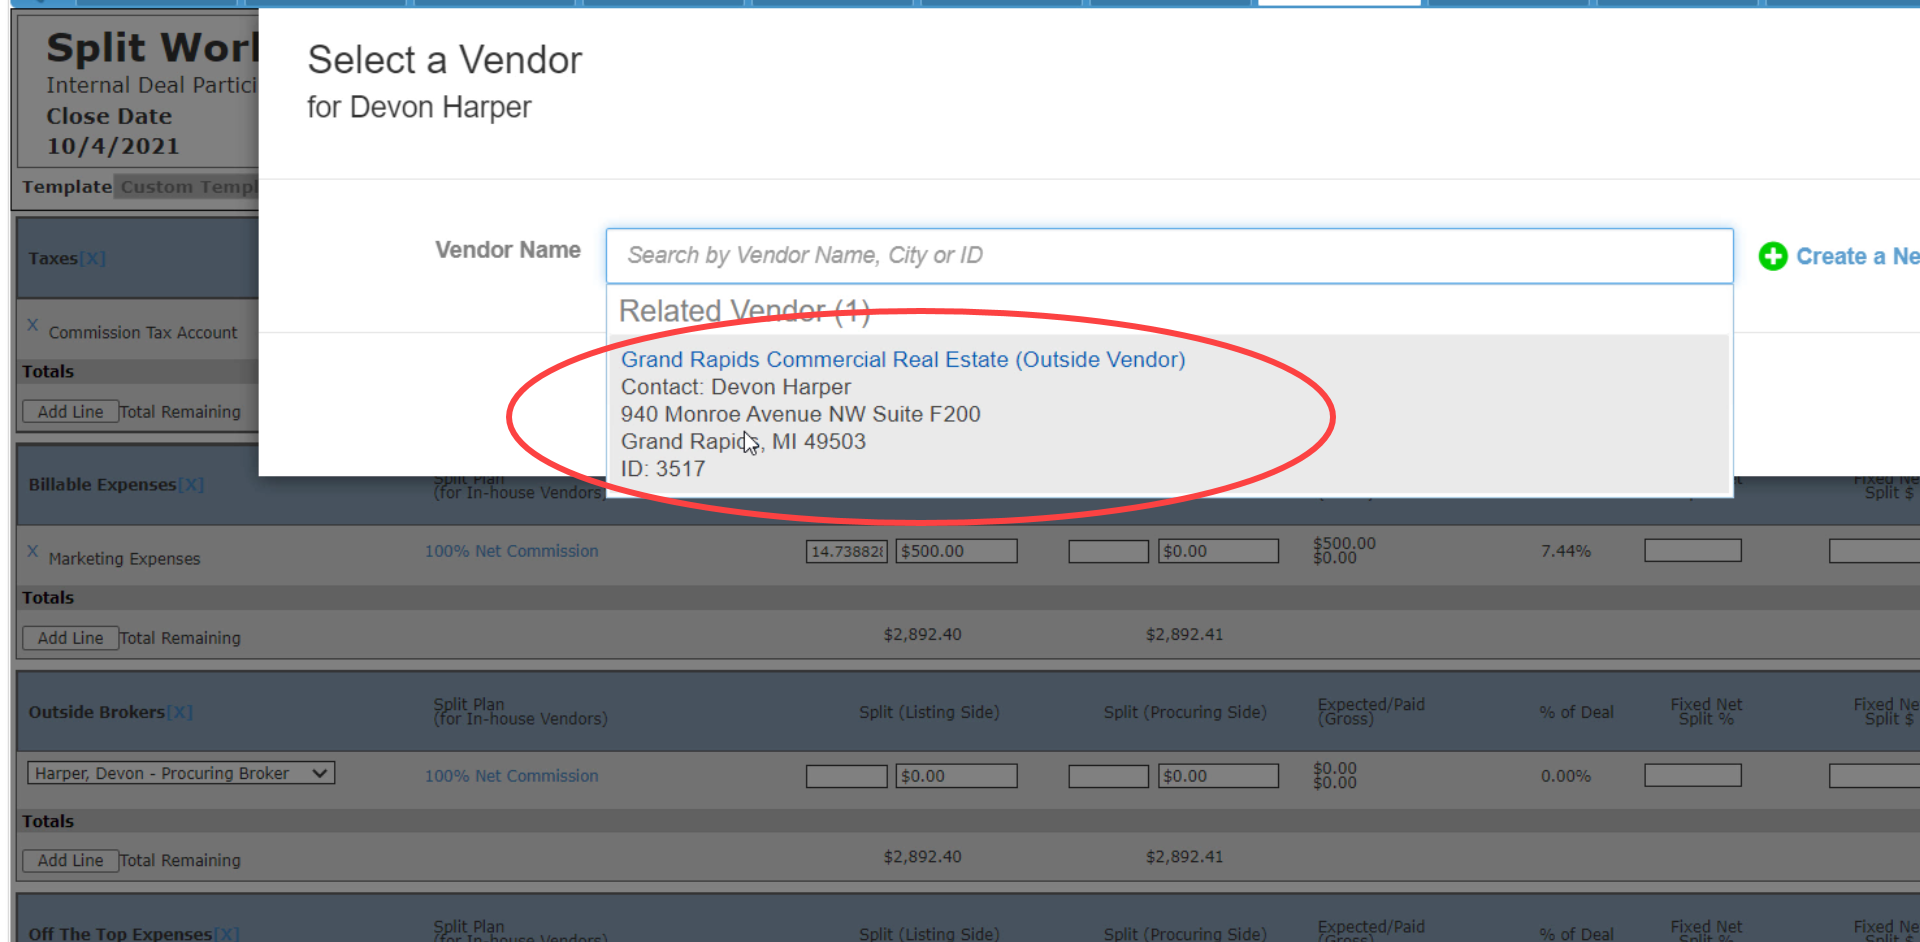
Similar to the process of selecting a Vendor for a deal contact on the Fee Splits tab, you need to select or create the Customer account for your billing contact. The billing contact in this case is the Landlord.

If there is already a Customer account linked to the contact, it will automatically show up so you don’t have to run a search.

Otherwise, run a search first, just in case the Customer account is currently linked to a different contact or is not linked to any contact.

You also have the option to create a new Customer if you can’t find the record you’re looking for.
The Create a Customer form is a lot like the Create a Vendor form. Required fields are indicated with an asterisk, and you can click on the “Import data” option to populate the address and other contact information.
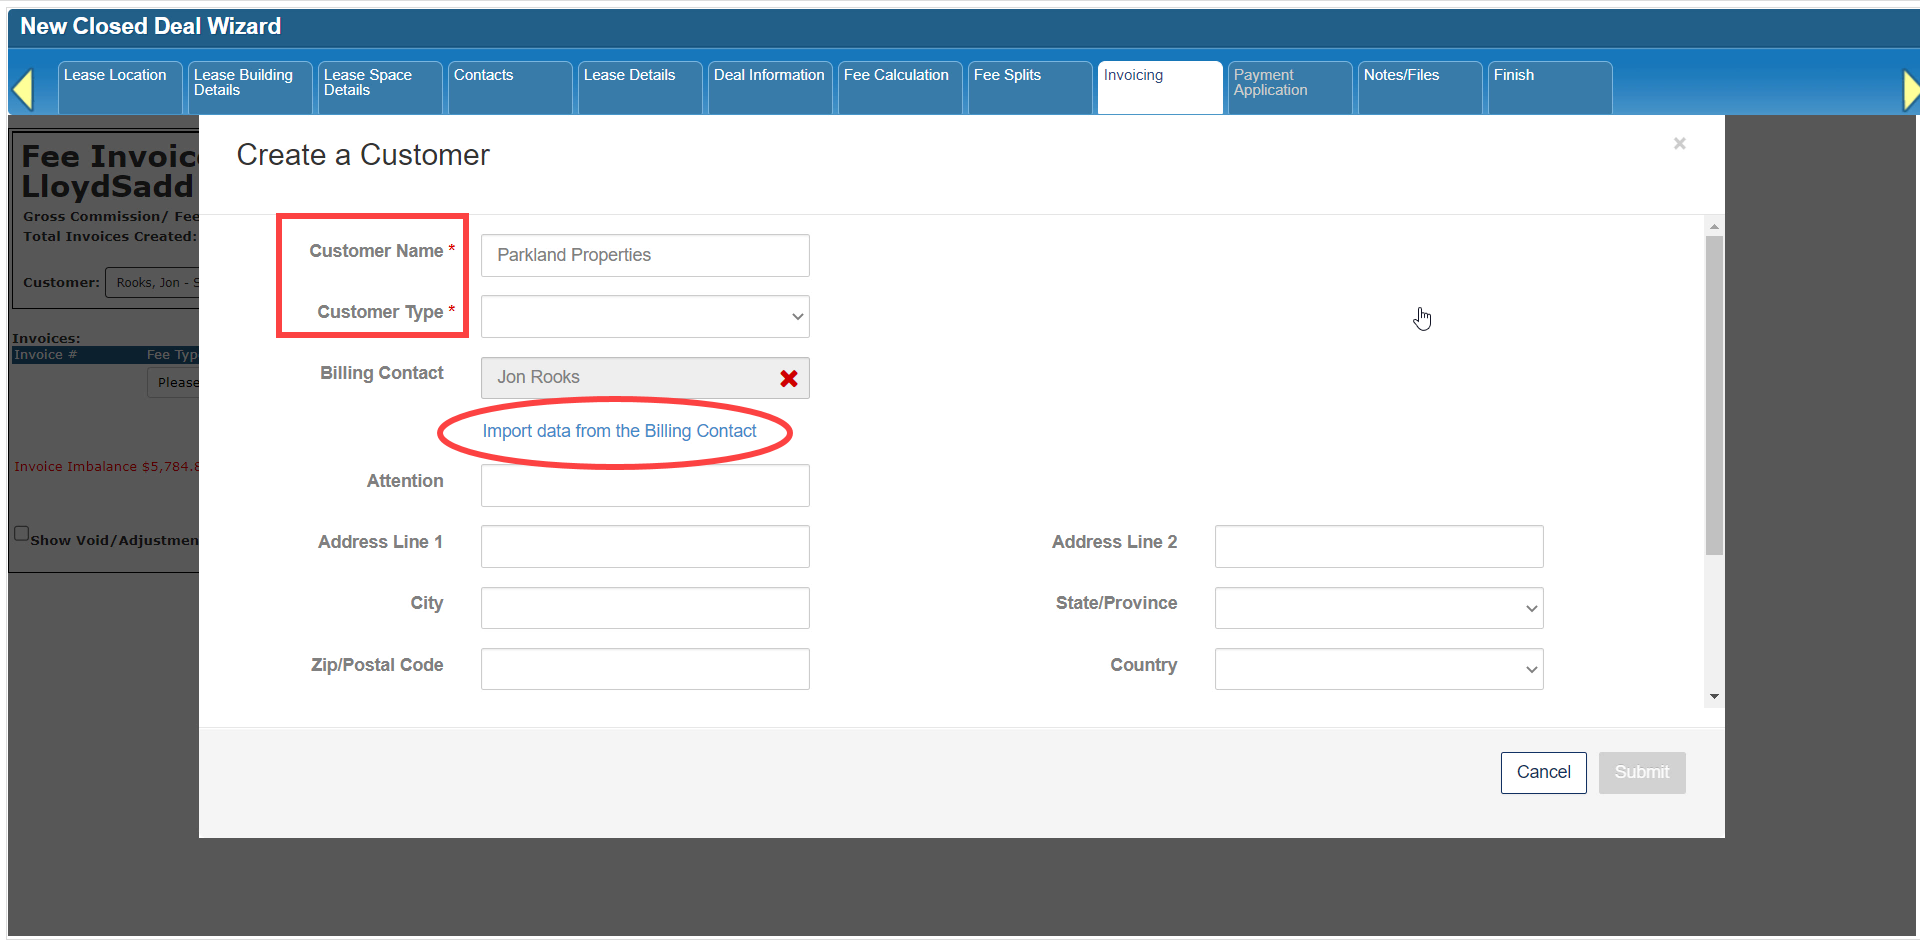
Click Submit to save the new record.

If you need to change the selected Customer, click the [x] next to that field to unlock it.

Below the summary section is a form for the invoice or list of invoices for this deal. Start by filling out the first row.

Your System Administrator maintains the options available in the Fee Type pulldown, so those options may look different in your system than in this tutorial.

Add the invoice Amount and Due Date.

The Fee Details field displays on the actual invoice that you can print or email to your customer. The Status Details field is an internal memo that shows up on some invoice reports.

If there is more than one invoice to bill for this deal, click the button to “Add Additional Invoice Lines”.

Below the invoice list, the Invoice Imbalance will indicate how much of the total fees hasn’t been scheduled or billed yet.

Once you’ve set up your billing schedule, click Save Invoices at the top.

This does not bill the invoices (or create Receivables) just yet. Notice that the Status of each invoice is still “Unbilled”, and the Total Invoices Generated in the summary section is still $0.00.

However, the Total Invoices Created now reflects the amount you’ve just set up for billing.

To bill an invoice, click on the “Create Invoice” button next to that invoice. Please note that this option only becomes available after you click on Save Invoices.

A form will come up with the additional fields required to complete the billing process. All of the entries on this form should be pre-populated, so you only have to confirm or correct them as needed.

The Invoiced Date will default to today’s date.

The Invoice # uses the system’s record ID as the default entry, but you can use numbers and letters here if you want to.

The Billable Status distinguishes between current Receivables and invoices that are actually due after a specific contingency has been met. The alternative to using this entry is to leave the invoice as Unbilled until you are ready to treat it as a true Receivable.

Click Save to bill this invoice.

Notice that the Status has now changed to “Open”. Or, if the Due Date is in the past, the Status will be “Past Due”.

To view and print or send the billed invoice, click the Print button next to the invoice.

The invoice will come up on screen with several options for customization at the top. If you make any changes to those options, click “View Report” to refresh the screen.

You can then download the invoice in a variety of formats and either send it to your printer or attach it to an email.

Apply the first Payment by either clicking on the “Apply Payment” button at the top of this form, or by clicking on the “Payment Application” tab.

Both options will only be available if there is a billed invoice with an unpaid balance on this deal. You can see the Outstanding Balance in the summary section.

Once you apply a payment to this deal, you’ll see it listed on this page under the Invoices list.

You can also view a history of invoice voids and adjustments by clicking on the option to “Show Void/Adjustment History”.

We’ll cover payments in the next part of this tutorial series, and there will be another tutorial series that covers voids and adjustments.
Click here to go to the next tutorial.
Related articles
- How to create a new Closed Deal: Part 2 - New Closed Deal Modal
- How to create a new Closed Deal: Part 3 - Workflow Navigation
- How to create a new Closed Deal: Part 4 - Property
- How to create a new Closed Deal: Part 5 - Space
- How to create a new Closed Deal: Part 6 - Contacts
- How to create a new Closed Deal: Part 7 - Lease Details
- How to create a new Closed Deal: Part 8 - Deal Information
- How to create a new Closed Deal: Part 9 - Fee Calculation
- How to create a new Closed Deal: Part 10 - Fee Splits
- How to create a new Closed Deal: Part 11 - Invoicing
- How to create a new Closed Deal: Part 12 - Payments
- How to create a new Closed Deal: Part 13 - Notes/Files
- How to create a new Closed Deal: Part 14 - Link Project
- How to create a new Closed Deal: Part 15 - Deal Share
- How to create a new Closed Deal: Part 16 - Billing Schedule
- How to create a new Closed Deal: Part 17 - Net Adjustments
- How to create a new Closed Deal: Part 18 - Annuity Schedule
- How to create a new Closed Deal: Part 19 - Sale Details
- How to create a new Closed Deal: Part 20 - Other Starting Points
© 2023 CoStar Group