Released: February, 2018
Summary
This document provides an overview of the improved process for placing Contacts and Companies into Contact Groups. The new Group Management tool now makes it even easier to organize Contacts and Companies into Groups by seeing all the available Groups at one time. In addition, we have also simplified the modal to create new Groups.
Adding Companies/Contact to Groups: Navigation
You have the ability to add a Contact or Company to a Group in one of three ways:
From a Contact (or Company) Masterview. Click on the “Groups” tab (1) and then on the green “New” (2) button at the top of the list:
2. From the Contact (or Company) Masterview “Groups” widget...simply click “Add to Group”.
3. From the Contact (or Company) main search list, select the “I want to...Add the Selected records to a Group” will work the same as when adding Groups to a single Contact (or Company Record).
Add Records to Group(s) Modal: Selected Contact or Company
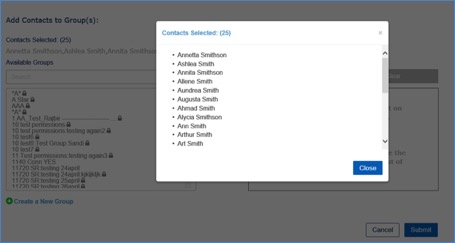
Once you launch the new Add Records to Group(s) modal, you can see the selected Contacts or Companies at the top of the form. If you are adding multiple Contacts or Companies, you may not see all of the selected records. To see the full list of Contacts or Companies, click on the blue ellipse “...”.

A ‘read only’ list of the selected records will be displayed.
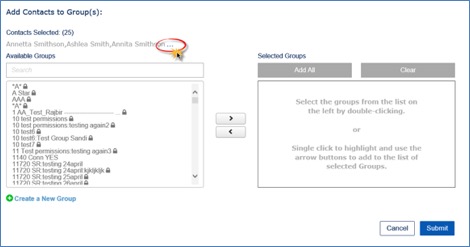
Add Records to Group(s) Modal: Selecting Groups
Start typing the desired “Group Name” to filter, and a list of matching Group names will appear in the list:
Select the Group(s) from the “Available Groups” list on the left by double-clicking on the Group name, or single click to highlight and use the arrow buttons to add to the “Selected Groups” list.
The Group will be removed from the Available Group list and moved to the Selected Groups list.
Additional Group names can be added by repeating the process until all desired Group names are added to the Selected Groups list (on the right). Note: You can also select multiple groups by using the Shift, Ctrl (Windows), or Command (Macintosh) keys.
To remove a Group name, or names, from the Selected Groups list, select the Group name(s) you wish to remove and click the Left Arrow. To remove all of the list, click on the “Clear” button. The Group name(s) will be removed from the Selected Groups list and added back to the Available Groups List.
Once the list is complete, you can click on the blue “Submit” button and the Contact (or Company) record(s) will be added to all the Groups on the selected list.
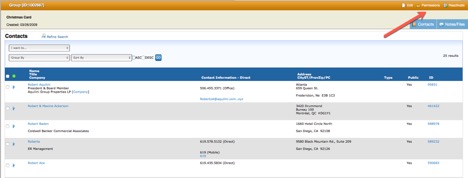
You will see all the Groups have been added to the Contact (or Company) Masterview Groups List:
Creating a New Group: Navigation
In addition to the existing ways to create a new Group (i.e. Contacts menu on main navigation), you can now create one directly on the new form. Once you create a new Group, you will automatically be redirected to this form and the new Group will already be in the “Selected Groups” list.

Create a New Group: Modal Review
The new modal to create a new Group works the same as our previous one, it simply has a cleaner look.

Enter the New Group information:
Group Name (required) – Name of the new group.
Parent Group (optional) - To associate any Group with a Parent Group, select the Parent Group name from the pulldown. This will add the Parent Group name to the beginning of the new Group name. For example, if "New Year" is the value entered into the Group Name field, and "Holiday Cards" is selected as the Parent Group, the new Group's name will be "Holiday Cards:New Year".
This will also allow searches on the Parent Group to include Contacts/Companies associated with any of its Sub-Groups. For example, a Contact search on the Group Name "Holiday Cards" will include Contacts in the "Holiday Cards" Group, as well as Contacts in the "Holiday Cards:New Year" Group.
Sort Order (optional) – This will determine the sort order in the Groups List. If left blank, the order will be alphabetical.
Permissions (required) – Set the desired Group Permissions. The default is ‘Everyone can view’. Other options include: ‘Me Only’ or ‘Teams I’ve Selected’.
Once you have created a Group, you are able to edit permissions for that Group on the Group Masterview, the same as you do today.
If you have any questions or would like to schedule a detailed training on this feature, please contact [email protected].
© 2023 CoStar Group