This article will demonstrate how to complete a ‘Account Entity Deduplication’ using the Data Cleanup Widget.
Instructions:
STEP 1: Generate an Account Entity Dedup Worksheet
The Data Cleanup widget requires the user's login to have ‘Data Tool Cleanup’ Admin permissions.
From the ‘Data Cleanup' widget, use the ‘Choose a worksheet:’ pulldown and select 'Account Entity Dedup’
Once selected click on ‘Generate’
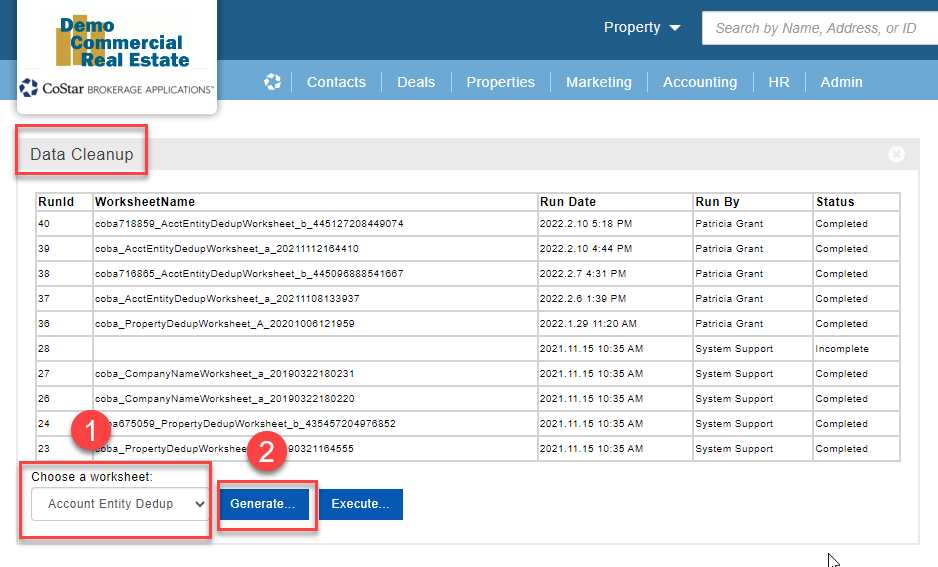
From the ‘Account Entity Dedup Worksheet’ information page select ‘Generate’

The ‘Account Entity Dedup Worksheet’ will be available in your download folder.
STEP 2: Organize the ‘Property Dedup Worksheet’
Open the ‘Property Dedup Worksheet’ in Excel.
Recommended settings/options in Excel:
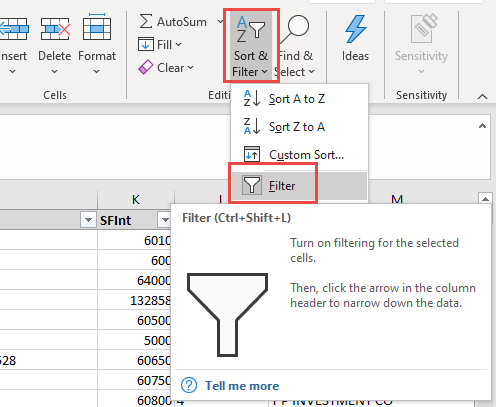
Turn on ‘Sort & Filter’ option
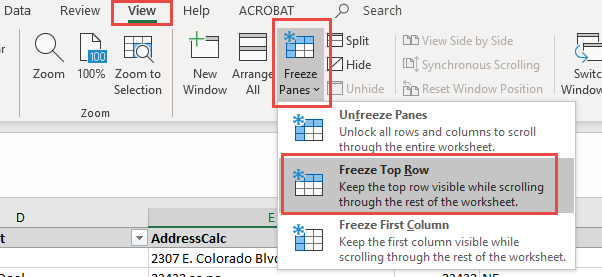
Under the ‘View’ menu, select ‘Freeze Panes’ and choose ‘Freeze top Row’
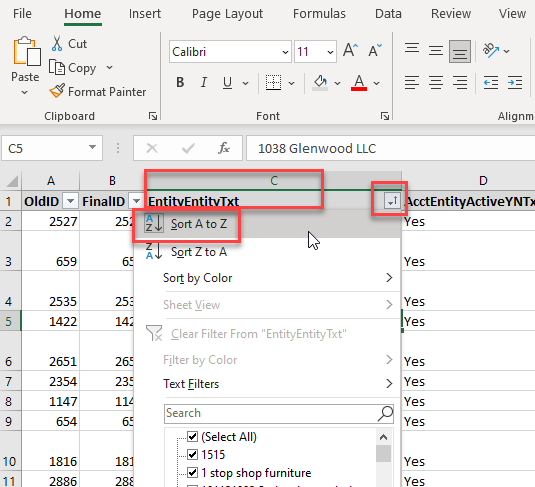
Recommended sort options (this will organize possible duplicates next to each other):
Sort ‘EntityEntityTxt’ A to Z
Filter by 'AcctEntityTypeTxt' (it is recommended to only dedupe one AcctEntithyTypeTxt at a time)

STEP 3: Complete the ‘Account Entity Dedup Worksheet’
Review the worksheet for duplicate records.
Once you have identified duplicate records:
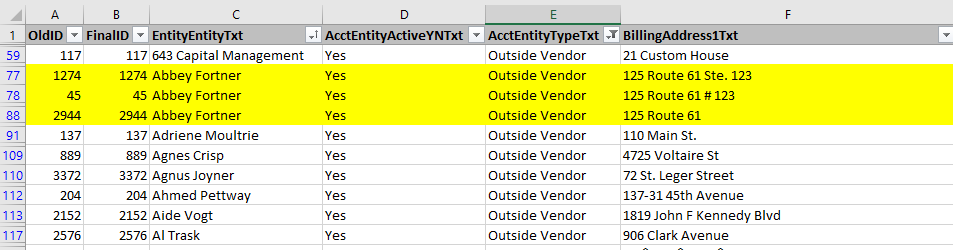
Copy the ‘OldID’ of the Entity Record you want to keep
Paste that ID into the ‘FinalID' column of the Entity you want to deduplicate

Repeat for all duplicate Account Entities.
Save your Excel Worksheet.
IMPORTANT: When sorting the Excel worksheet, it is critically important that you sort across all rows so that the IDs stay in alignment with the property information. If they become mixed up, this will cause serious issues with your database.
NOTE: It is important that you do not modify the column header names in the worksheet, they must remain the same as they were when exported.
When the worksheet is executed, the process will relink any of the information from the duplicate Account Entity (OldId) records to the remaining Account Entity (FinalID) record. This includes Transactions and Closed Deals. The Account Entity attributes will not change on the remaining Account Entity record (FinalID).
STEP 4: Upload the ‘Account Entity Dedup Worksheet’
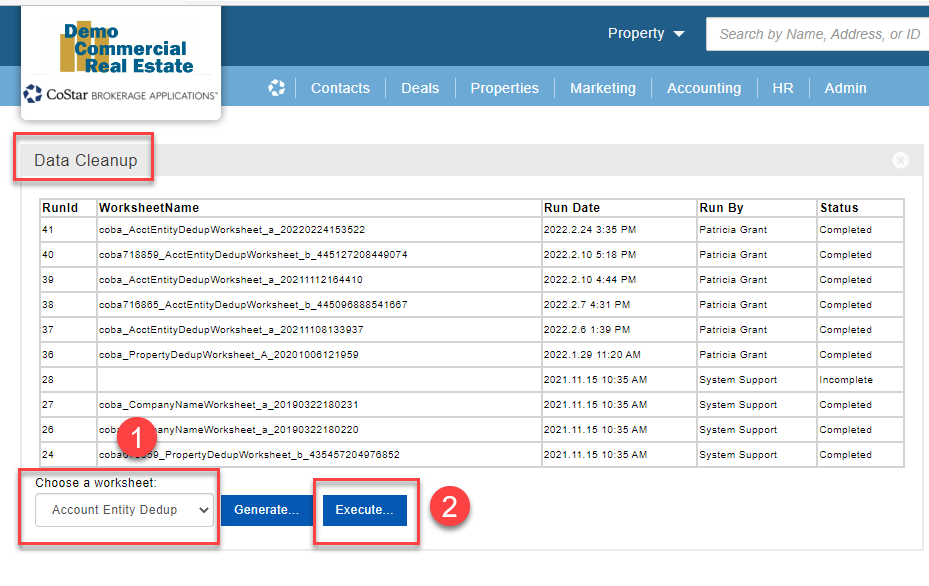
From the ‘Data Cleanup’ widget, use the ‘Choose a worksheet’ pulldown to select ‘Account Entity Dedup’ and click ‘Execute’.
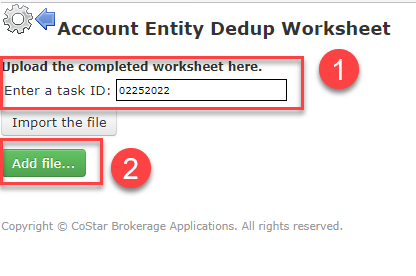
Enter a task ID - this is only for reference, you can use the current date without formatting: mmddyyyy
Click on ‘Add file’ and find the saved worksheet on your computer and select
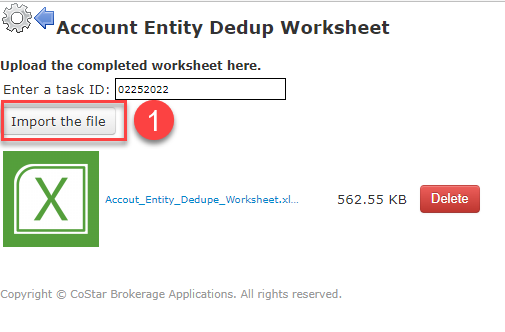
Click on ‘Import the file’ and the wizard will walk you through the rest of the process.
If you experience any issues please contact the help desk at: [email protected]
© 2023 CoStar Group
Attachments:
 image-20201006-203256.png (image/png)
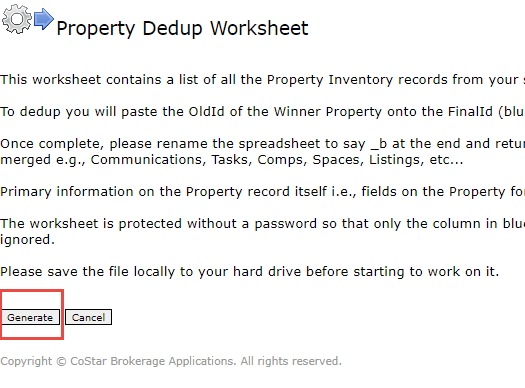 image-20201006-203245.png (image/png)
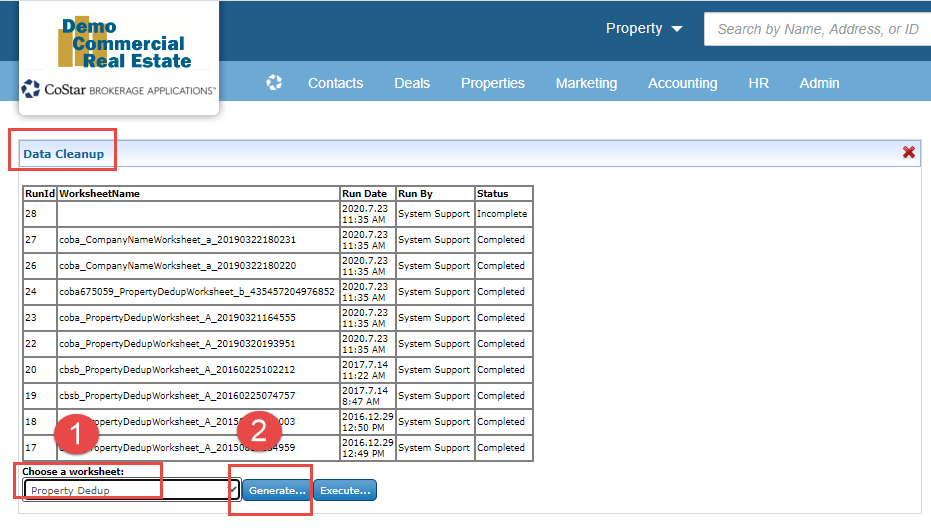 image-20201006-202446.png (image/png)
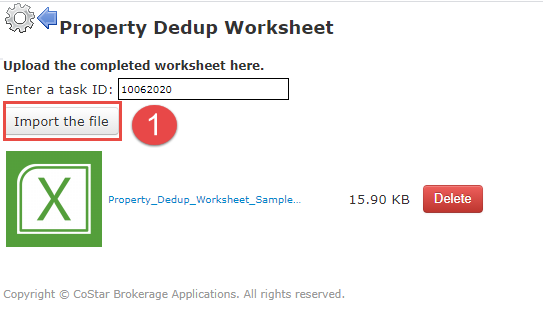 image-20201006-202431.png (image/png)
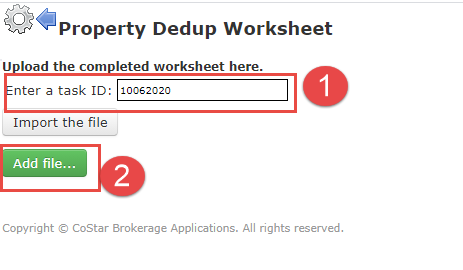 image-20201006-202408.png (image/png)
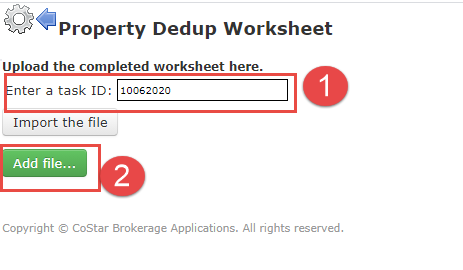 image-20201006-202355.png (image/png)
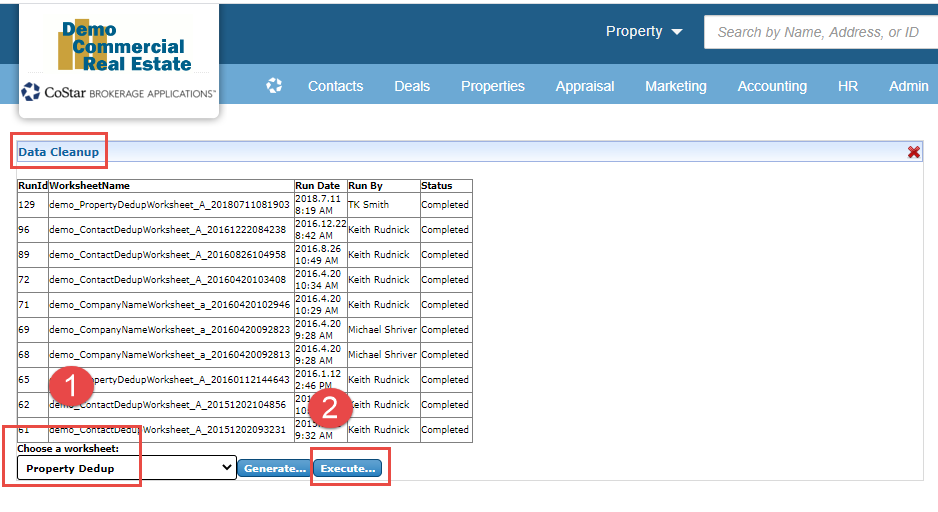 image-20201006-200509.png (image/png)
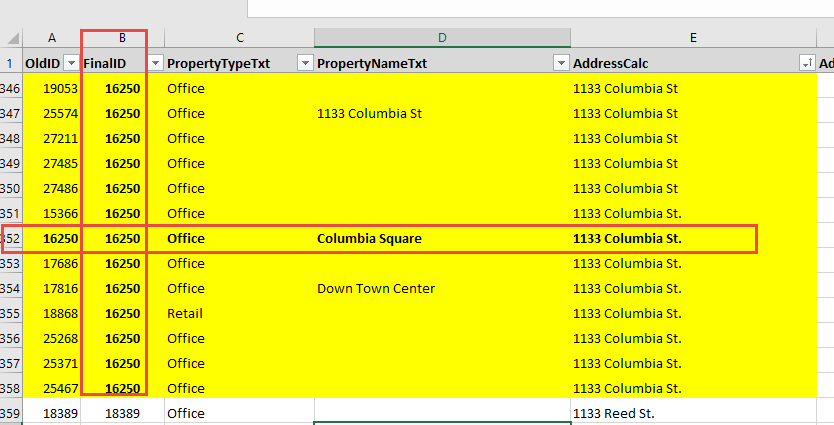 image-20201006-200453.png (image/png)
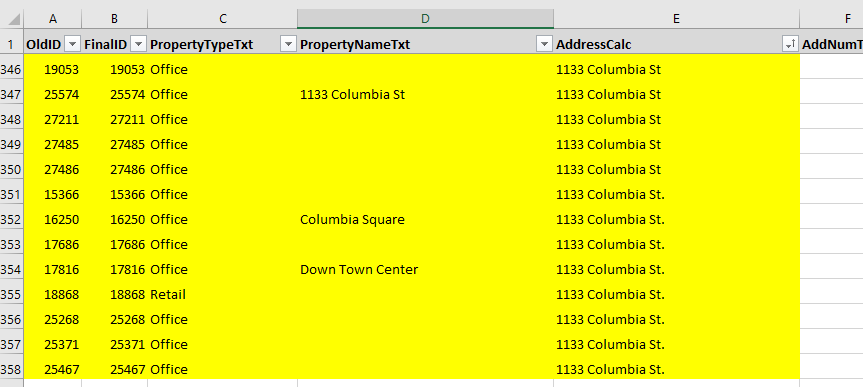 image-20201006-195247.png (image/png)
 image-20201006-195208.png (image/png)
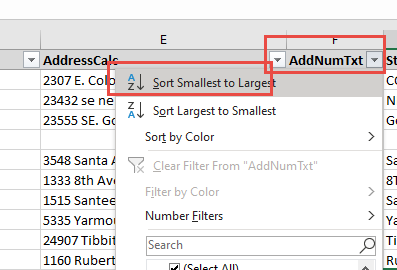 image-20201006-195049.png (image/png)
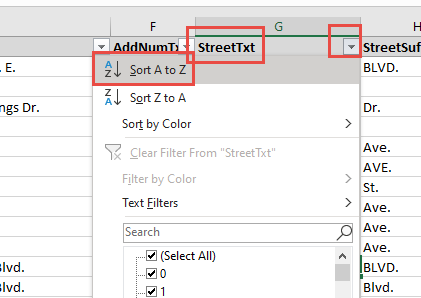 image-20201006-194955.png (image/png)
image-20201006-194925.png (image/png)
image-20201006-191920.png (image/png)
image-20201006-194955.png (image/png)
image-20201006-194925.png (image/png)
image-20201006-191920.png (image/png)
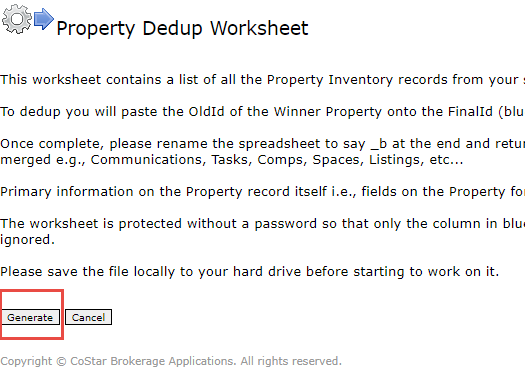 image-20201006-191838.png (image/png)
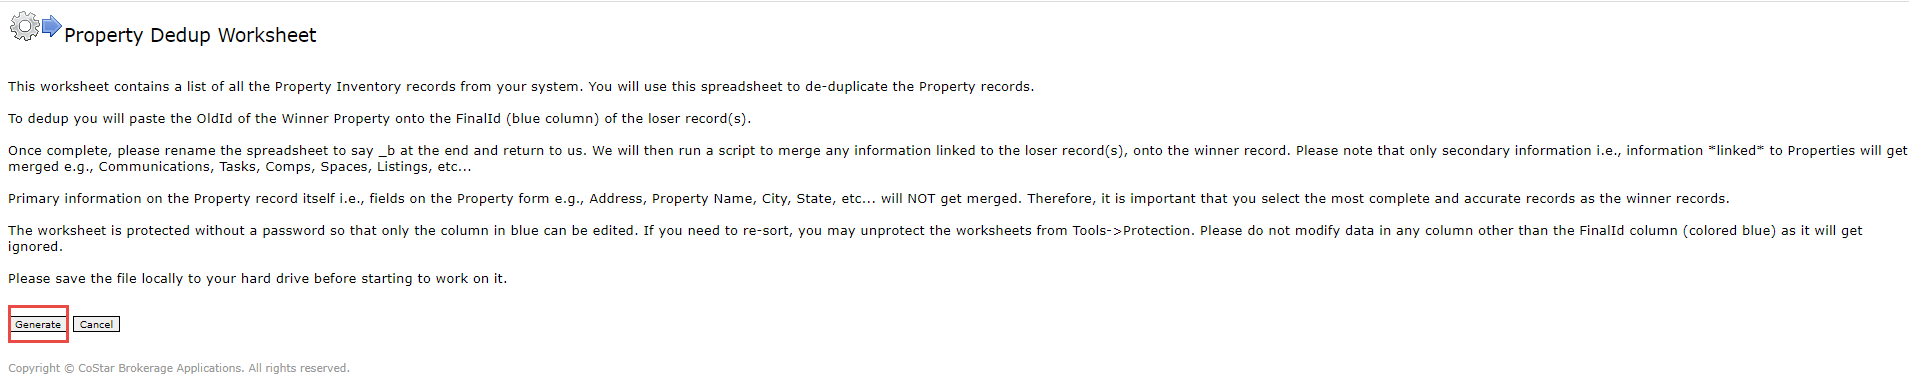 image-20201006-191620.png (image/png)
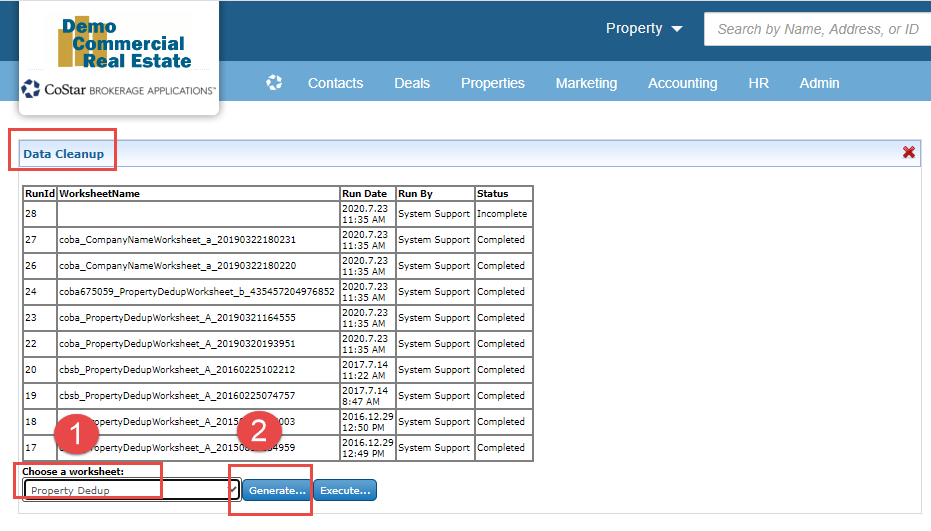 image-20201006-191338.png (image/png)
 image-20220224-233351.png (image/png)
image-20220224-233451.png (image/png)
image-20220224-233841.png (image/png)
image-20220224-234322.png (image/png)
image-20220225-162938.png (image/png)
image-20220224-233351.png (image/png)
image-20220224-233451.png (image/png)
image-20220224-233841.png (image/png)
image-20220224-234322.png (image/png)
image-20220225-162938.png (image/png)
 image-20220225-163001.png (image/png)
image-20220225-163212.png (image/png)
image-20220225-163909.png (image/png)
image-20220225-164108.png (image/png)
image-20220225-163001.png (image/png)
image-20220225-163212.png (image/png)
image-20220225-163909.png (image/png)
image-20220225-164108.png (image/png)
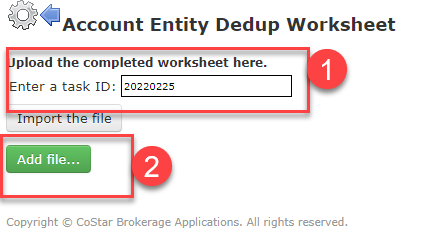 image-20220225-164217.png (image/png)
image-20220225-164321.png (image/png)
image-20220225-164217.png (image/png)
image-20220225-164321.png (image/png)