If an entire floor in a building is available, you don’t have to create a separate Space for each suite on that floor. Instead, you can make a Space record represent the entire floor of the building. There are also some steps you can take to avoid redundant data entry if you need to make multiple floors available in the same building.
The following instructions will show you how to save some time by:
Creating a Space for each floor instead of each suite
Copying a Space
Using Assignments and/or template Projects
Instructions
Use the “Copy” feature to create multiple floors
If you need to set up Availabilities for multiple floors in a building, you can save some time by setting up the floors first. This can also apply to a building that has multiple non-contiguous Suites which need to be listed, or if you are just entering the current tenancies in a multi-tenant building.
Open the Property record, and go to Tenancy > Tenants, then click on the [+] icon.
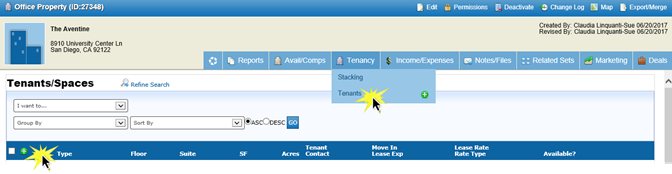
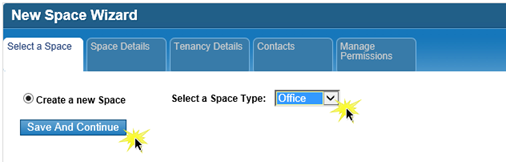
Create a new Space for the first floor in your building.
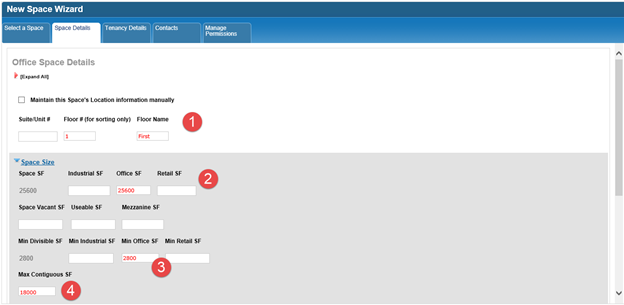
On the Space Details tab, enter:
Floor # and Floor Name
Total Available Floor SF (divided by Industrial, Office, Retail SF if appropriate)
The minimum divisible SF by Space Type
The maximum contiguous SF on the entire floor
Enter any other features which apply to the entire floor and save your new floor Space.
Note: We recommend adding Tenancy Details (e.g. Lease Rate) to your Space to save you some time later when you make each Space available.
On the Tenants/Spaces list, open the QuickLinks menu to the left of the Space you just created, and select the option to “Copy this Space”.
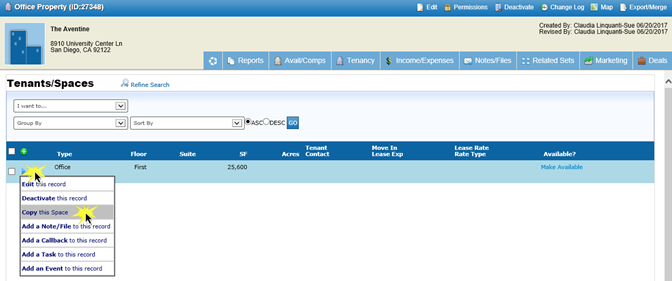
Modify the details for this new Space to represent the next floor, change the Tenancy and Contact details if needed, and save your changes.
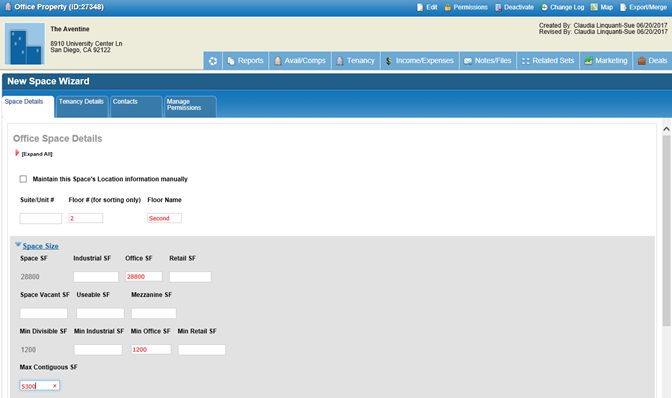
Repeat the process as often as needed until you have all of the floors you need to list for this Property.
Set up an Assignment or Template Project
To save time when you create the Availabilities for the floors in this building, we recommend either setting up a new Assignment for this listing, or a template Project.
Either option will allow you to add the Listing Contacts to the Assignment or template Project once, and then copy those Contacts to each new Availability.
From an Assignment, you can copy the following to each new Availability:
Contacts
Deal Settings
Permissions
From a template Project, you can copy the following to each new Availability:
Contacts
Milestones
Tasks
You can set up both an Assignment and a template Project if applicable.
Create an Availability for each floor
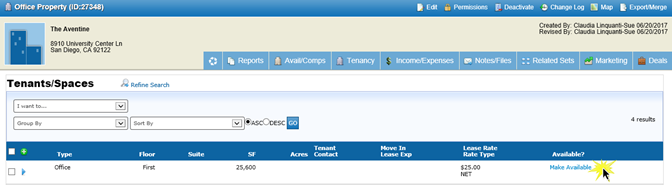
From the Tenants/Spaces list, click on the “Make Available” link.
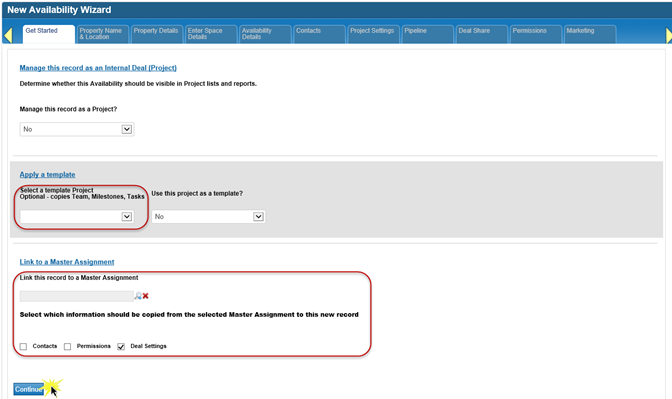
Select all applicable options on the Get Started tab, then click Continue.
This is where you have the option to select a template Project and/or an Assignment, so that certain settings can be copied to your new Availability to save you some time.
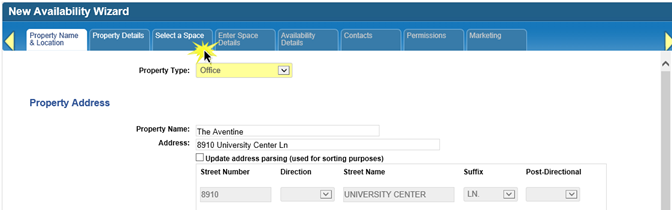
Click on the “Select a Space” tab to skip the Property Name & Location and Property Details tabs if you do not need to modify the building details.
Your Space should already be selected, so you can click on “Save and Continue”.
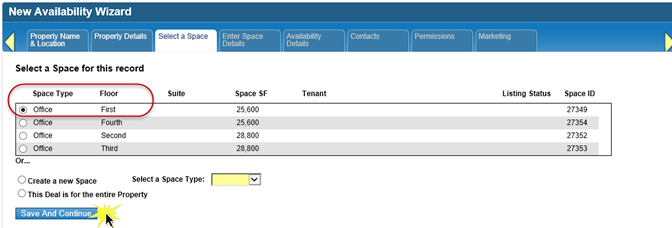
You can skip the Enter Space Details form if needed and go to Availability Details by clicking on that tab.
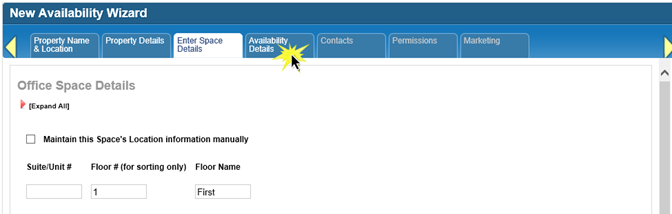
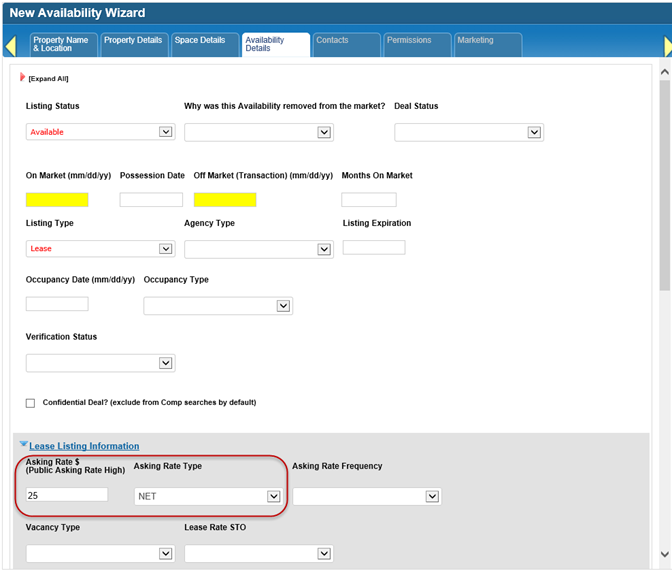
Populate the Availability Details tab as appropriate. Some of the data from the Tenancy Details on the Space record will have copied over to this form already.
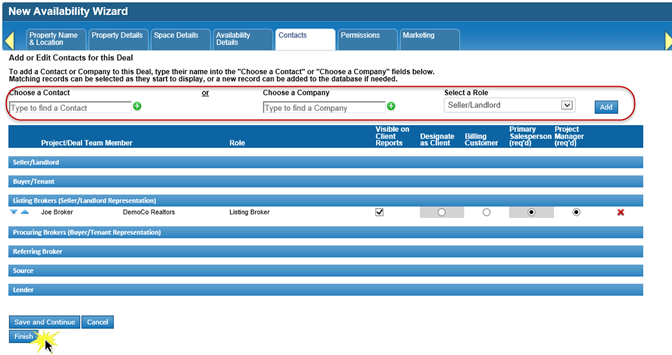
Click Continue at the bottom of the Availability Details tab to add or modify your Deal Contacts, then click Finish when you’re done.
The completed Available Space record for this floor will come up in your browser.
To continue with the next floor, go back to the Property record, Tenants/Spaces list. Click the Make Available option next to another Space, and repeat the process.
Related articles
© 2023 CoStar Group
Attachments:
 image-20191218-231510.png (image/png)
image-20191218-231530.png (image/png)
image-20191218-231608.png (image/png)
image-20191218-231714.png (image/png)
image-20191218-231739.png (image/png)
image-20191218-231911.png (image/png)
image-20191218-232247.png (image/png)
image-20191218-231510.png (image/png)
image-20191218-231530.png (image/png)
image-20191218-231608.png (image/png)
image-20191218-231714.png (image/png)
image-20191218-231739.png (image/png)
image-20191218-231911.png (image/png)
image-20191218-232247.png (image/png)
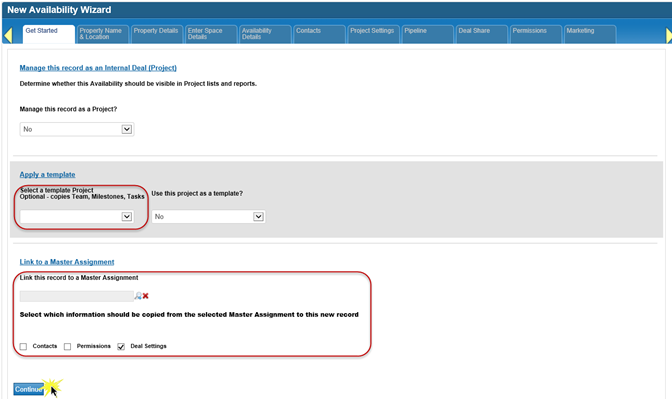 image-20191218-232255.png (image/png)
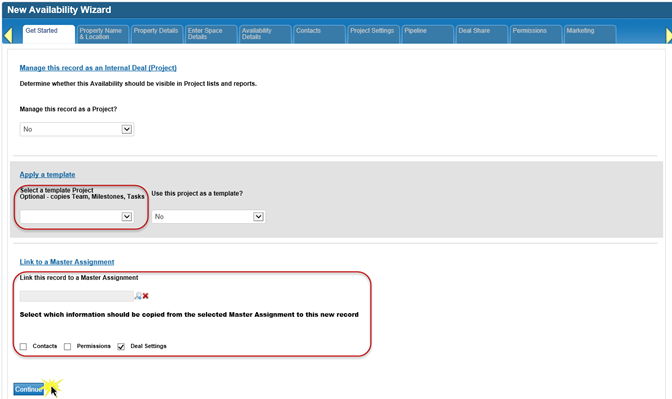 image-20191218-232323.png (image/png)
image-20191218-232358.png (image/png)
image-20191218-232459.png (image/png)
image-20191218-232515.png (image/png)
image-20191218-232533.png (image/png)
image-20191218-232616.png (image/png)
image-20191218-232323.png (image/png)
image-20191218-232358.png (image/png)
image-20191218-232459.png (image/png)
image-20191218-232515.png (image/png)
image-20191218-232533.png (image/png)
image-20191218-232616.png (image/png)