This tutorial will go over the Annuity Schedule tab. The Annuity Schedule allows you to set up a monthly or quarterly commission billing schedule over the course of a lease, without having to create each individual invoice manually. This setup then works together with a batch invoicing feature to bill those annuity invoices.
This is an optional step and may not be relevant for your firm’s internal process. If that’s the case, you can ask your System Administrator to hide this tab from the workflow in your user settings.
Instructions
Set up the Annuity Schedule
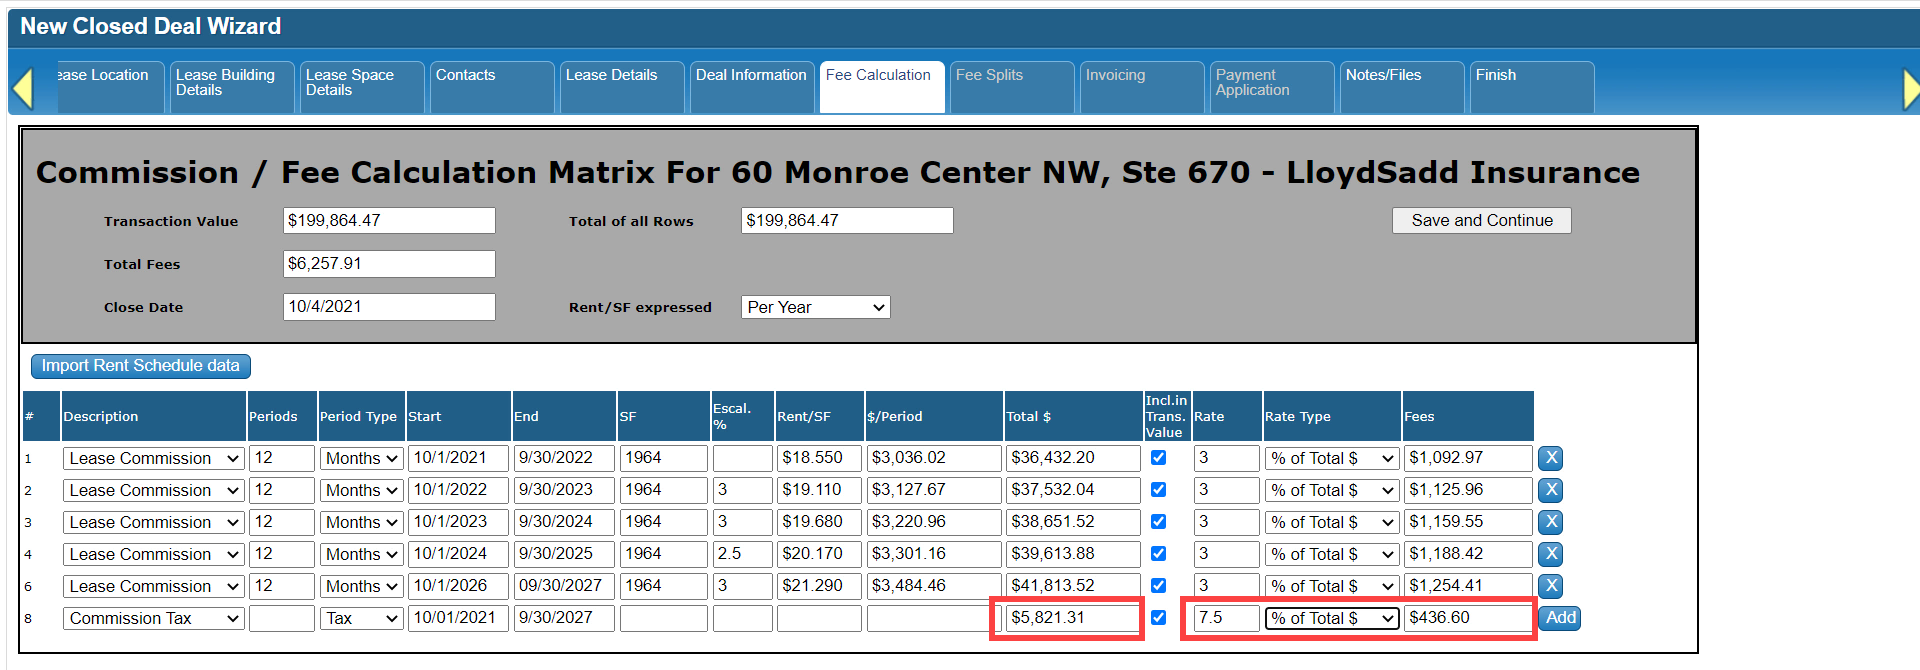
At the top of the Annuity Schedule tab is the Total Fee or Gross Commission amount that was calculated on the Fee Calculation tab.
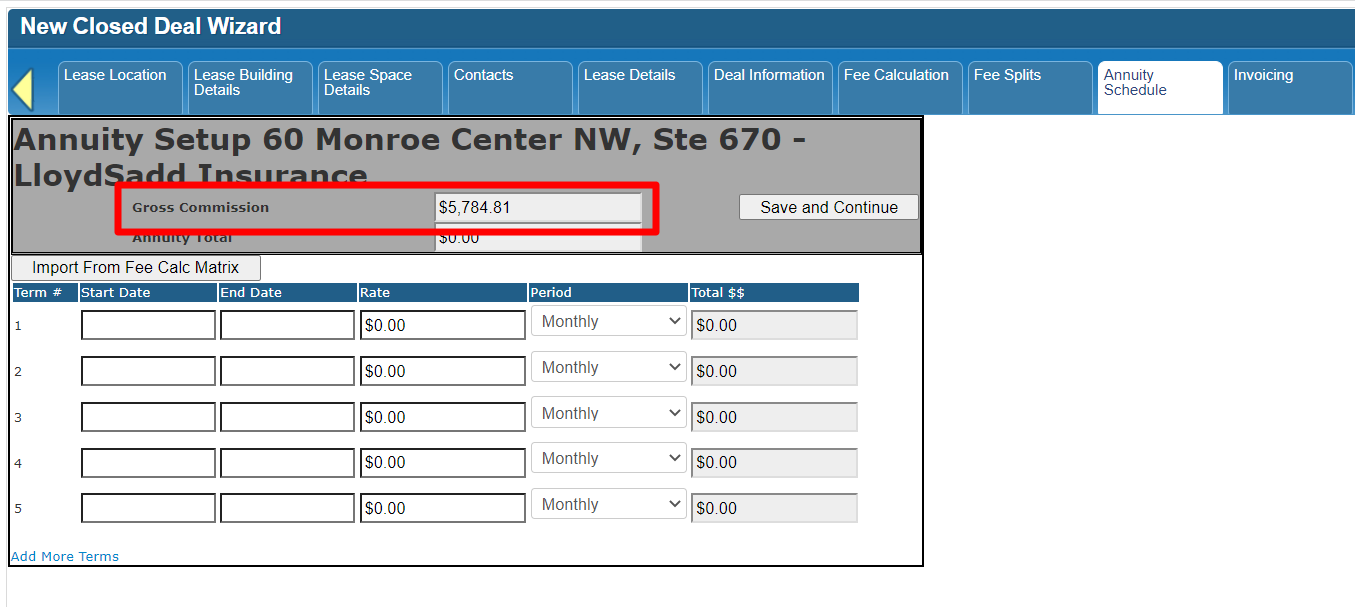
Below that is a summary of the total amount scheduled for monthly or quarterly billing on this deal.

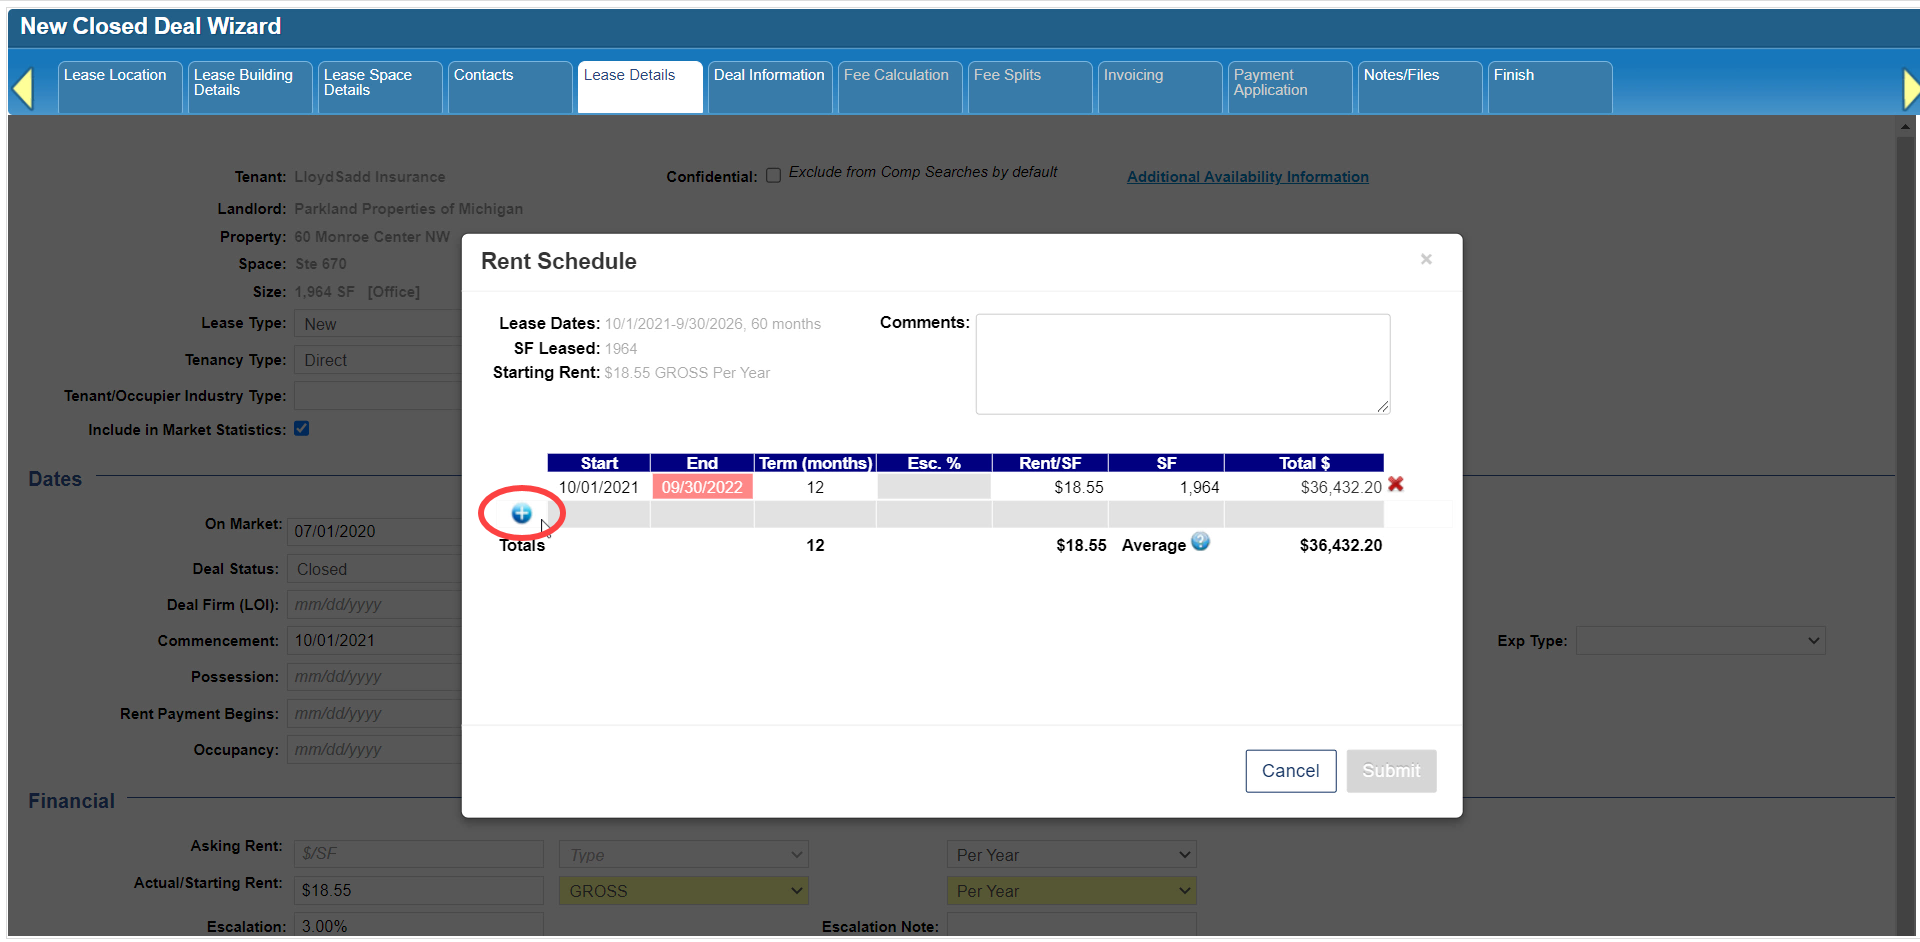
To save yourself some time, you can click on the option to import the fee schedule from the Fee Calculation tab.

You will be asked to set a Start Date, which is when the annuity billing is supposed to begin.

Below the calendar is a pulldown menu for the billing frequency or Period. Select either monthly or quarterly, then click Submit.

This will populate the bottom of the form with a row for each term that was defined on the Fee Calculation tab, with a Start and End Date, the Rate or invoice amount for each invoice, the Period you just selected, and the total amount scheduled for each Term.

If you are entering the Annuity Schedule manually, simply enter the first billing date as the Start Date, the day before the billing rate or invoice amount changes or escalates as the End Date, the Rate or invoice amount, and the Period or billing frequency.

In the next row, enter the Start Date for the new billing rate, the End Date for that Term, the new billing rate, and the Period.

Continue until you have entered the billing schedule for the entire lease.
If needed, click on the Add More Terms option to increase the number of Terms.

Check the Annuity Total to make sure it’s correct.

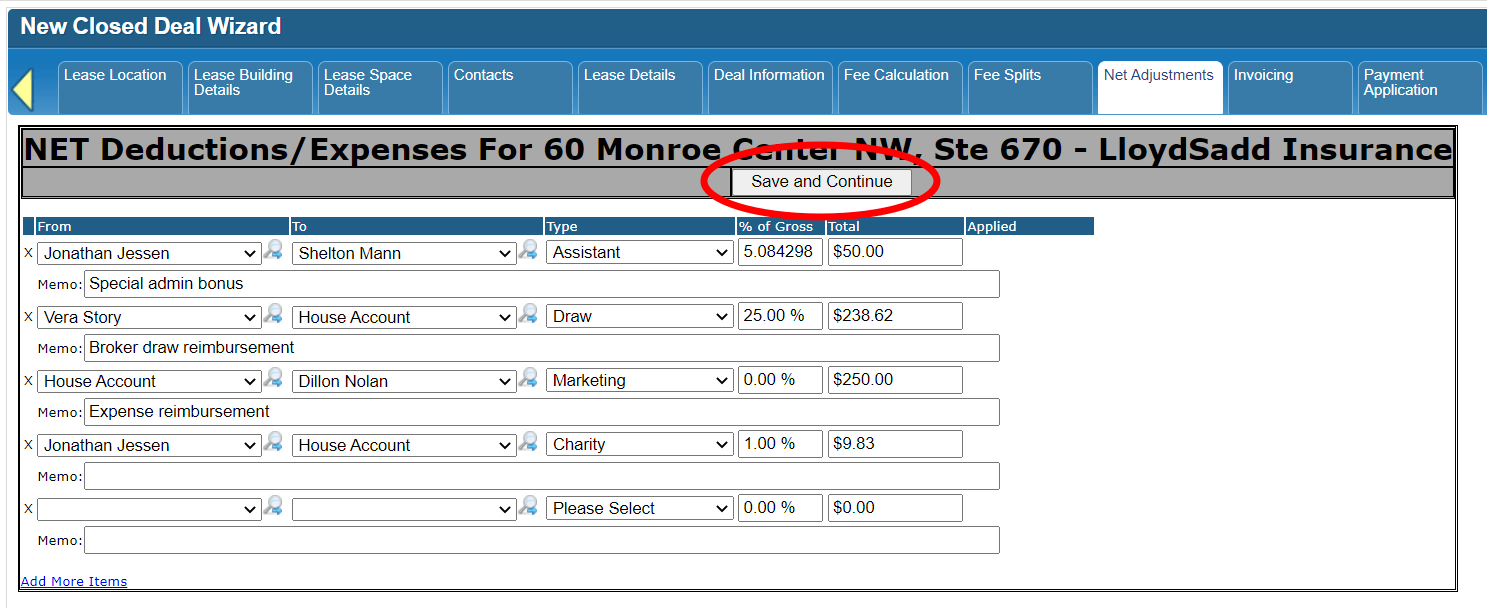
Whether you imported or manually entered this information, make any necessary adjustments, then click Save and Continue.

Select or create a Customer
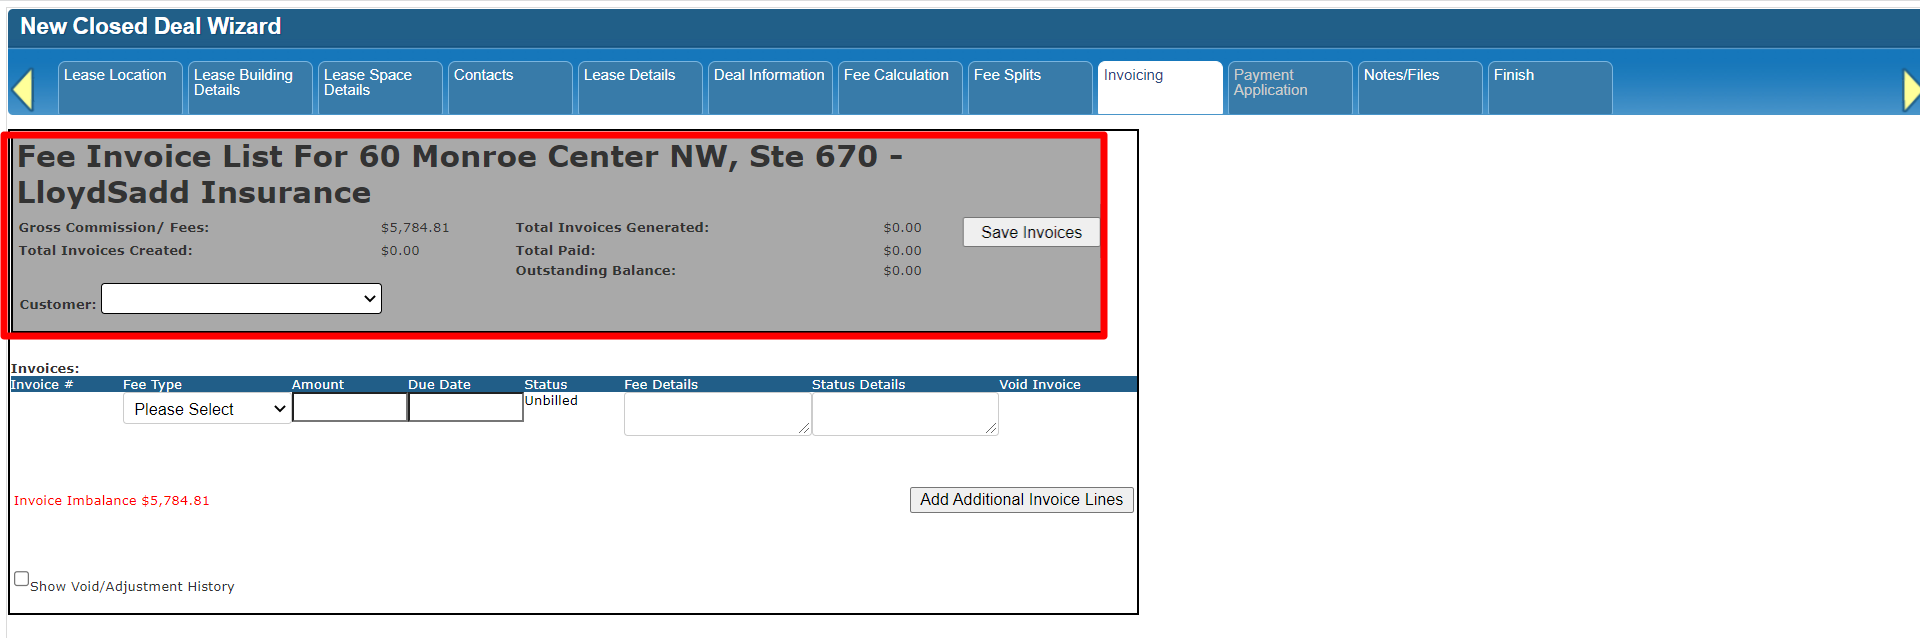
The system will take you to the Invoicing tab (if you have permission to access that tab). There won’t be any invoices listed here yet, unless they were added manually. It is possible to bill invoices outside of the Annuity Schedule - for example, for billable expenses. You can learn more about creating manual invoices in our Invoicing tutorial. The annuity invoices won’t show up here until they have been created using the batch invoicing feature, which we will get to later in this tutorial.

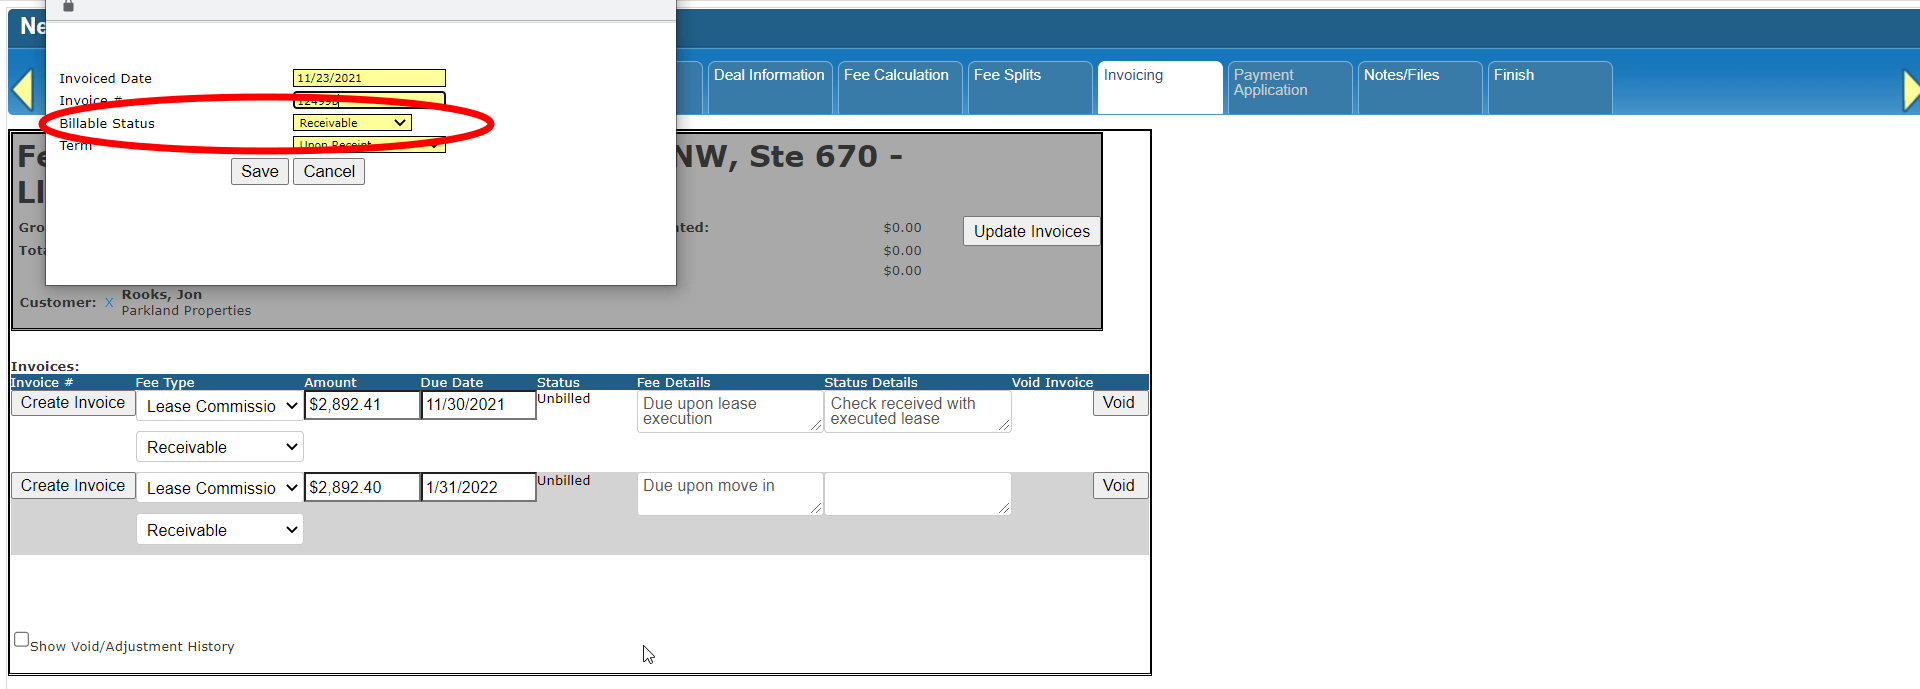
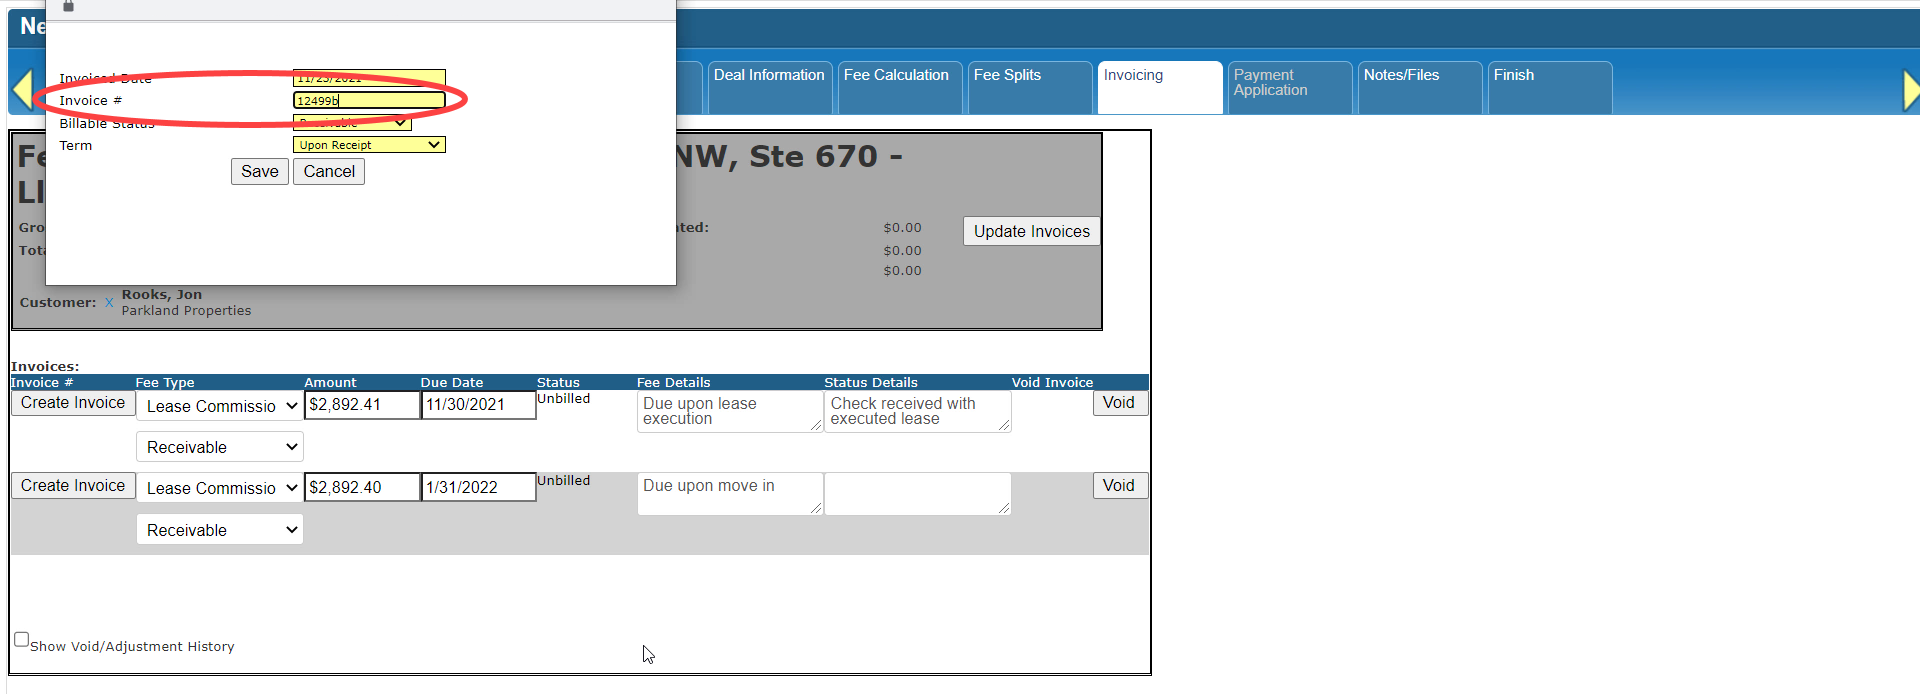
You need to select the Billing Contact or Company towards the top of the Invoicing tab.

If there is already a Customer account linked to the contact, it will automatically show up so you don’t have to run a search.

Otherwise, run a search first, just in case the Customer account is currently linked to a different contact or is not linked to any contact.

You also have the option to create a new Customer if you can’t find the record you’re looking for.

The Create a Customer form is a lot like the Create a Vendor form. Required fields are indicated with an asterisk, and you can click on the “Import data” option to populate the address and other contact information.


Click Submit to save the new record.

If you need to change the selected Customer, click the [x] next to that field to unlock it.

Click Update Invoices at the top of the tab to save your Customer selection. This is all you need to do on the Invoicing tab if all of the billing for this deal will be handled via the Annuity Schedule.

Add the Batch Invoices widget to your dashboard
To generate or bill a batch of monthly or quarterly invoices, go to the Home page. Look for a Batch Invoices widget on your dashboard.

If it isn’t there, scroll to the bottom of the dashboard and click on the option to Add Widgets. This will open the widget library.

Go to the Accounting category. Find the Batch Invoices widget in the list on the right and click on Add it Now. Contact your System Administrator if you don’t see the widget listed, as they may need to give you permission to use it.

Use the Return to Dashboard link at the top to go back to the Home page.

The Batch Invoices widget will now be in the top left corner of your dashboard.
Generate an Invoice batch
In the widget, give this batch a name that you will remember – this batch name can be used to find all of the invoices in the batch at any time. Your firm may have a specific naming convention, such as January 2022 Monthly 1, which would be: Billing Month, Billing Year, Monthly or Quarterly, and Batch Number. Adding a Batch number may be helpful if you run more than one batch for the same invoicing criteria after adding new deals or making corrections.

Indicate which Due Date the system should assign to all of the invoices in this batch.

Select whether to generate Monthly or Quarterly invoices, then click Generate Invoices to create those invoices.


For this example (Due Date: 1/31/2022 and Monthly), the system will generate an invoice due on 1/31/2022 for all deals which meet the following criteria:
Deals which have an Annuity Template set up with Monthly invoices, and

Deals where the Due Date of 1/31/2022 falls between the Start and End Dates of an Annuity Term.

The process may take several minutes. Once complete, it will open the Invoices list with all of the newly generated invoices from this batch.

Check the box next to the invoice(s) you want to view, download or print. You can skip this step if you want to view all of the invoices in the list.

Open the I Want To menu at the top of the list and select the Report/Export All or Selected option.

Choose the appropriate Invoice report template by clicking on the name, then go to Select this Report.

Indicate which details to include on the invoices, then click View Report.

The invoices will come up on screen with the options you selected at the top.

If you make any changes to those options, click “View Report” to refresh the screen.

You can then download the invoices in a variety of formats and either send them to your printer or attach them to an email.

Search for an Invoice batch
Any batch can be pulled up again by searching all Invoices by Batch #. Start from the Home page. Open the Accounting menu and click on Invoices.

Enter your Batch Number on the search form and click Search.

The next tutorial is coming soon!
Related articles
- How to create a new Closed Deal: Part 2 - New Closed Deal Modal
- How to create a new Closed Deal: Part 3 - Workflow Navigation
- How to create a new Closed Deal: Part 4 - Property
- How to create a new Closed Deal: Part 5 - Space
- How to create a new Closed Deal: Part 6 - Contacts
- How to create a new Closed Deal: Part 7 - Lease Details
- How to create a new Closed Deal: Part 8 - Deal Information
- How to create a new Closed Deal: Part 9 - Fee Calculation
- How to create a new Closed Deal: Part 10 - Fee Splits
- How to create a new Closed Deal: Part 11 - Invoicing
- How to create a new Closed Deal: Part 12 - Payments
- How to create a new Closed Deal: Part 13 - Notes/Files
- How to create a new Closed Deal: Part 14 - Link Project
- How to create a new Closed Deal: Part 15 - Deal Share
- How to create a new Closed Deal: Part 16 - Billing Schedule
- How to create a new Closed Deal: Part 17 - Net Adjustments
- How to create a new Closed Deal: Part 18 - Annuity Schedule
- How to create a new Closed Deal: Part 19 - Sale Details
- How to create a new Closed Deal: Part 20 - Other Starting Points
© 2023 CoStar Group