This part of our New Closed Deal tutorial series will cover the Deal Share tab in the Closed Deal workflow.
This is an optional step and may not be relevant for your firm’s internal process. If that’s the case, you can ask your System Administrator to hide this tab from the workflow in your user settings.
Instructions
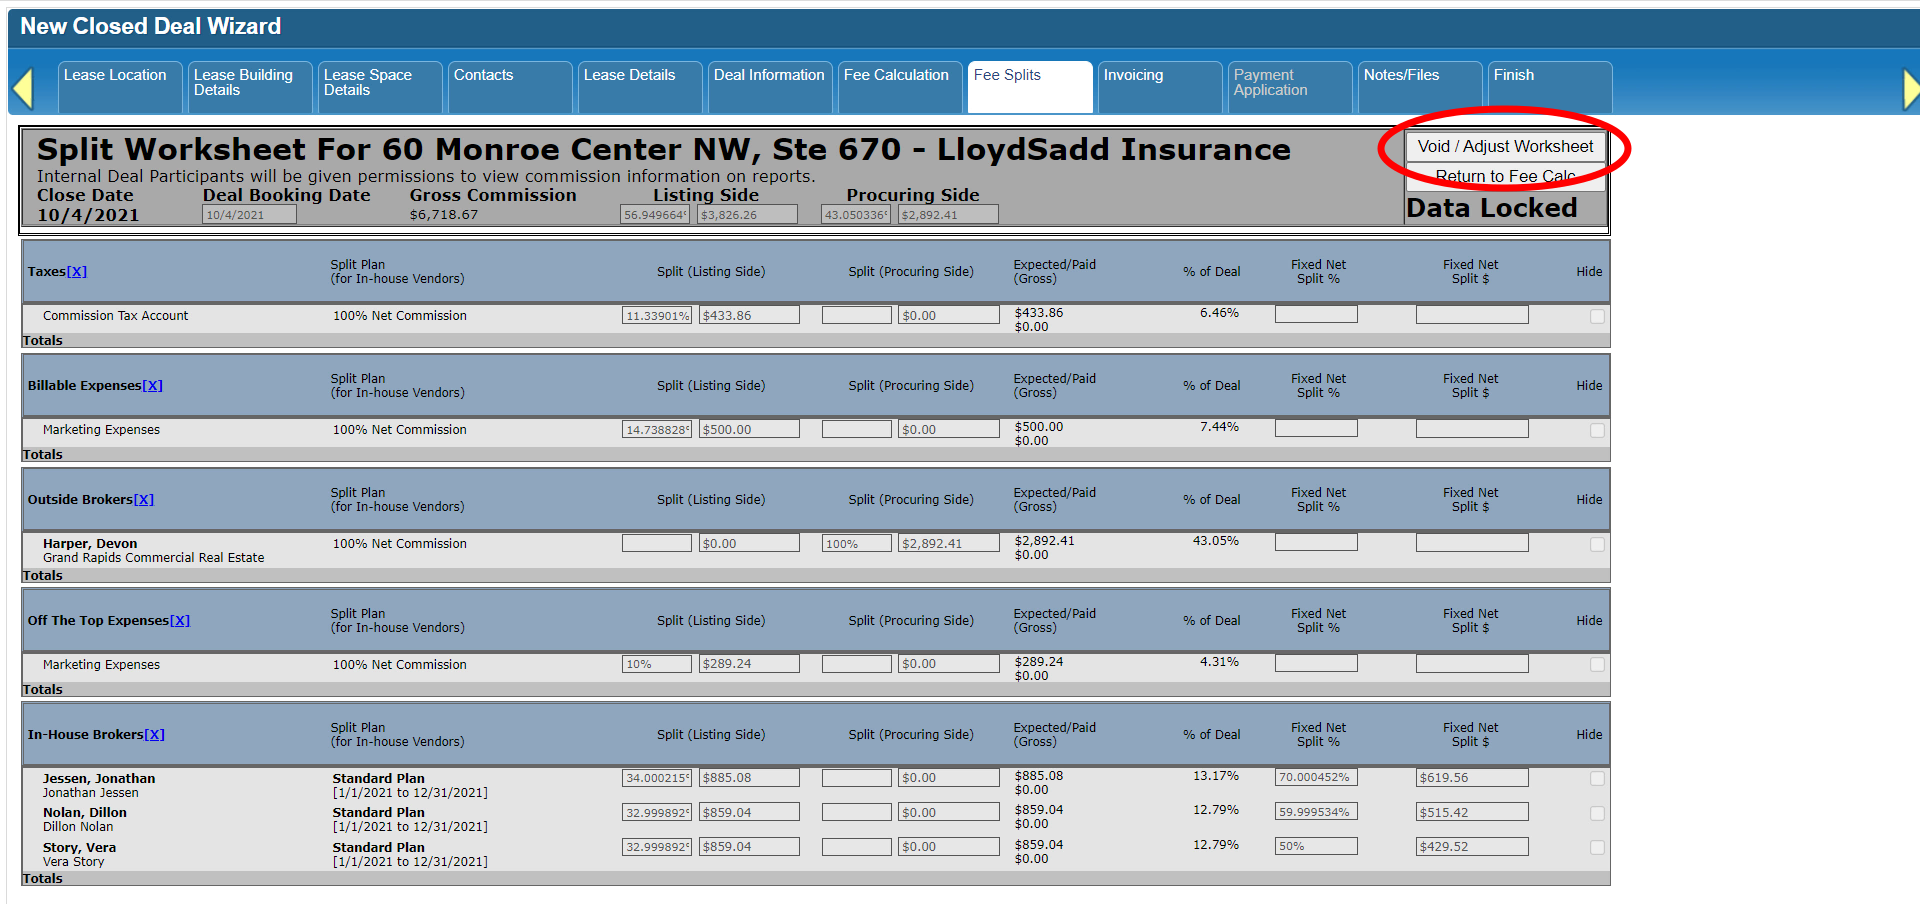
The Deal Share tab is part of a simplified Closed Deal data entry process designed for brokers or staff who are not meant to have access to or modify potentially sensitive accounting information. Specifically, this tab acts as an initial stand-in for the Fee Splits tab, which requires access to Vendor records, displays some commission split plan information, and which may affect the brokers’ YTD Production Credit or Total Gross Commission when it’s saved. You can refer to the tutorial on the Fee Splits tab for more information.
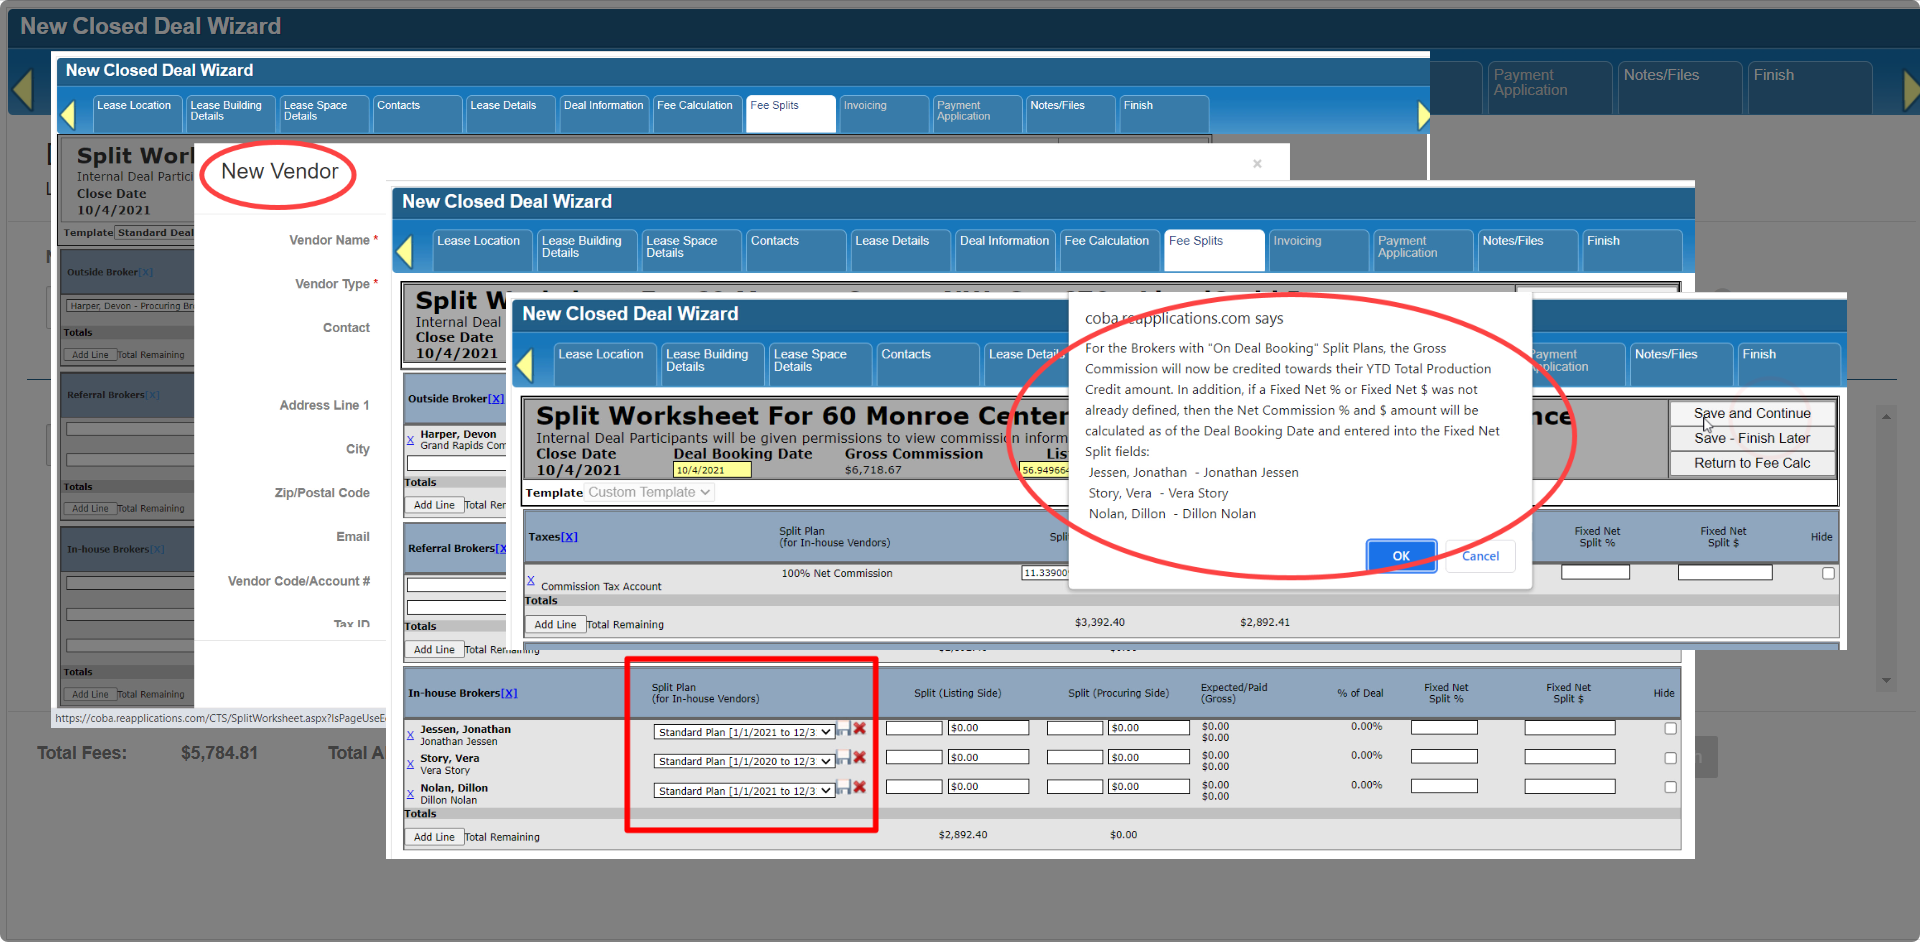
The idea behind this simplified workflow is to allow a user to provide sufficient information on the Closed Deal for the remaining accounting information to be completed by someone else. For example, a broker may create the Closed Deal and then send it to an accounting team to set up Vendors and bill Invoices.
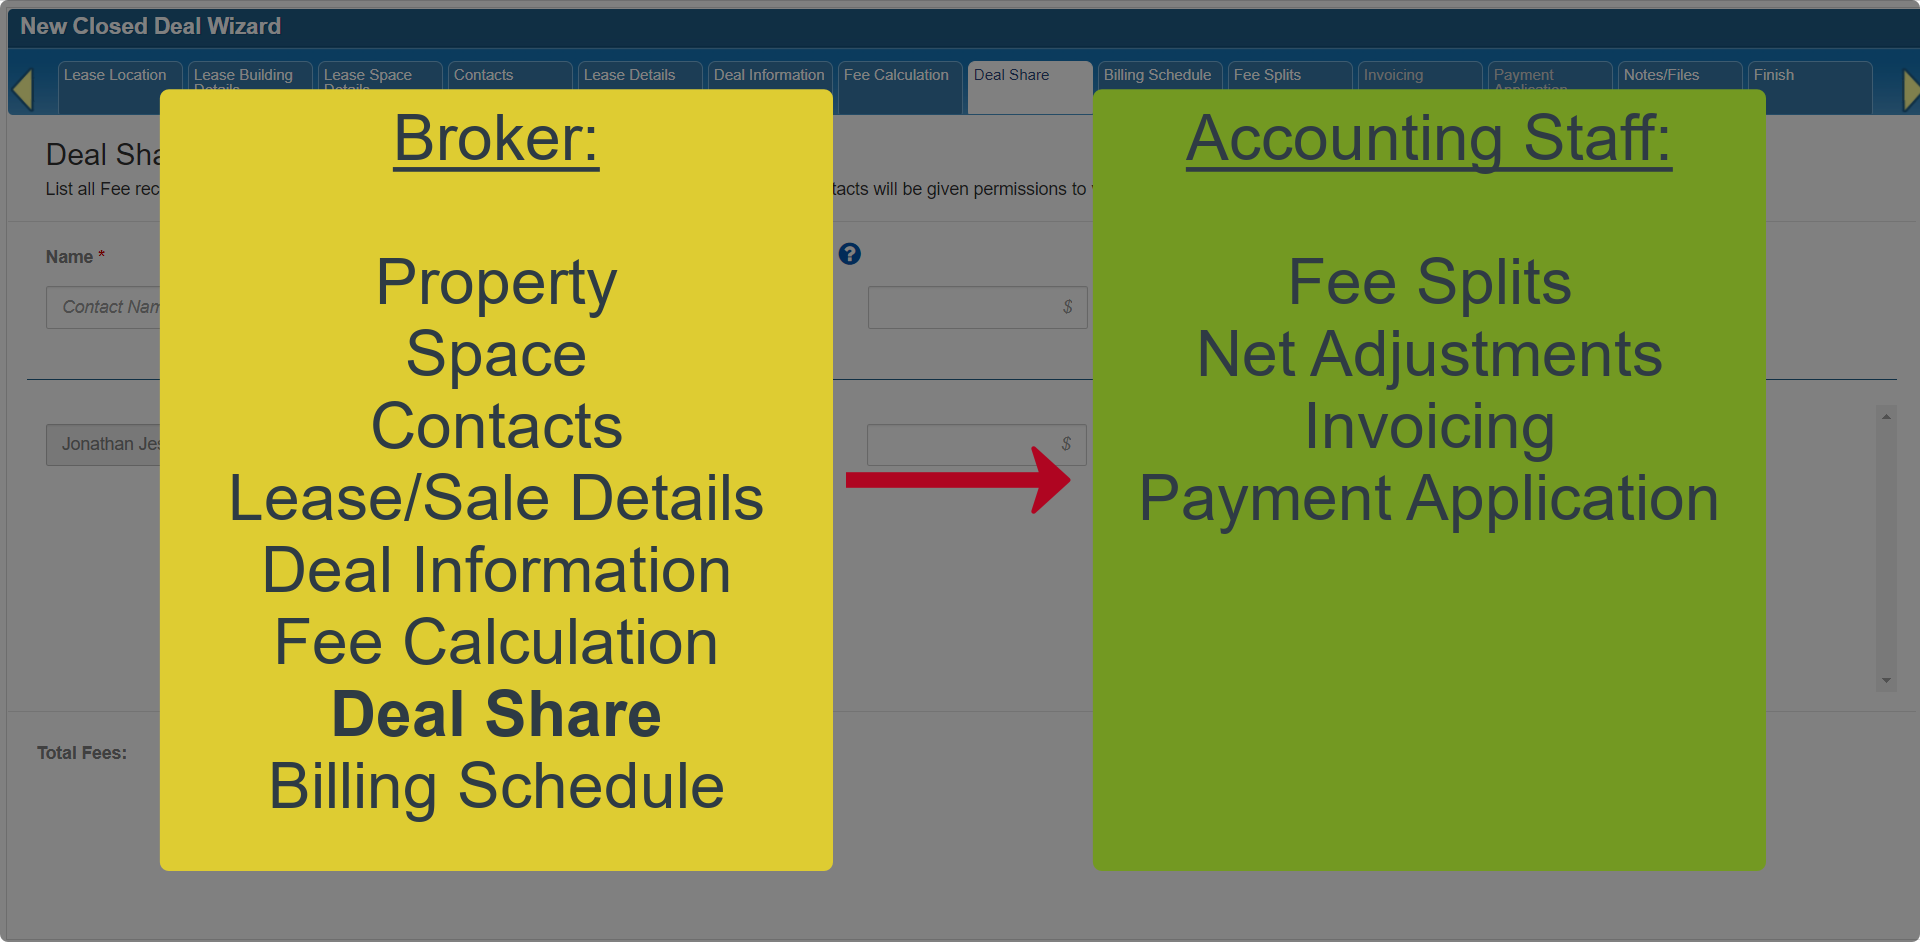
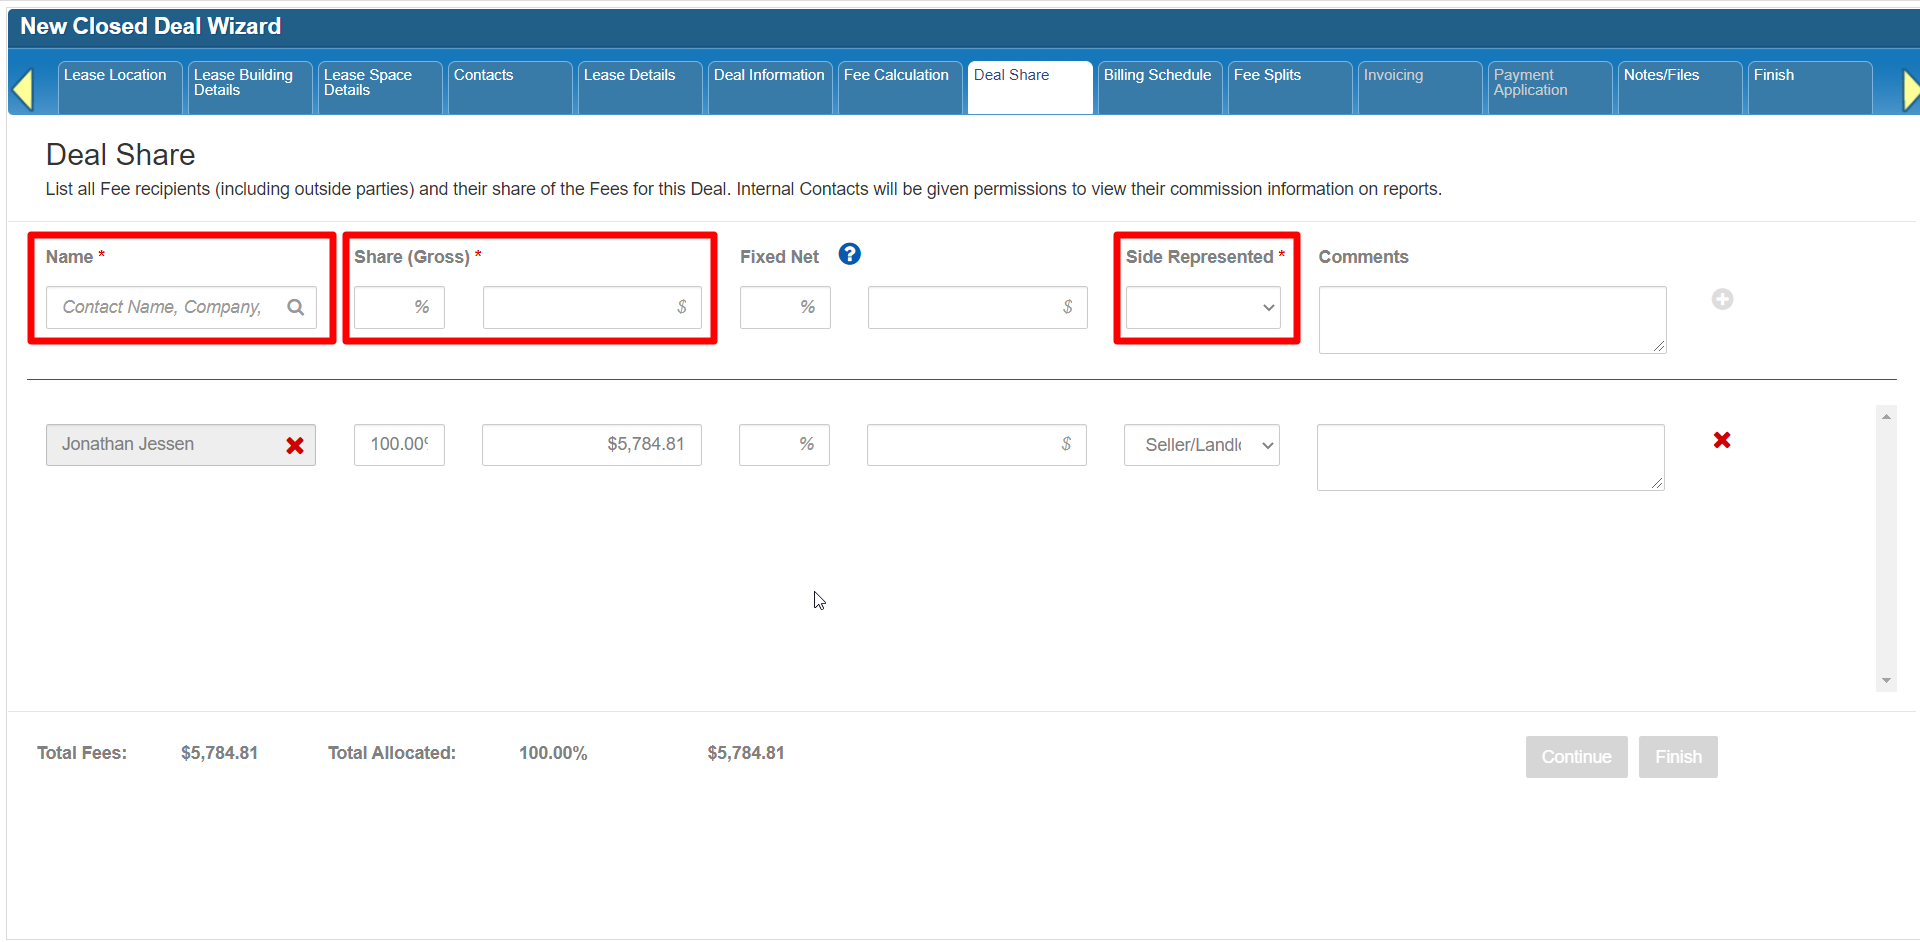
The top part of the form is where new entries are added.
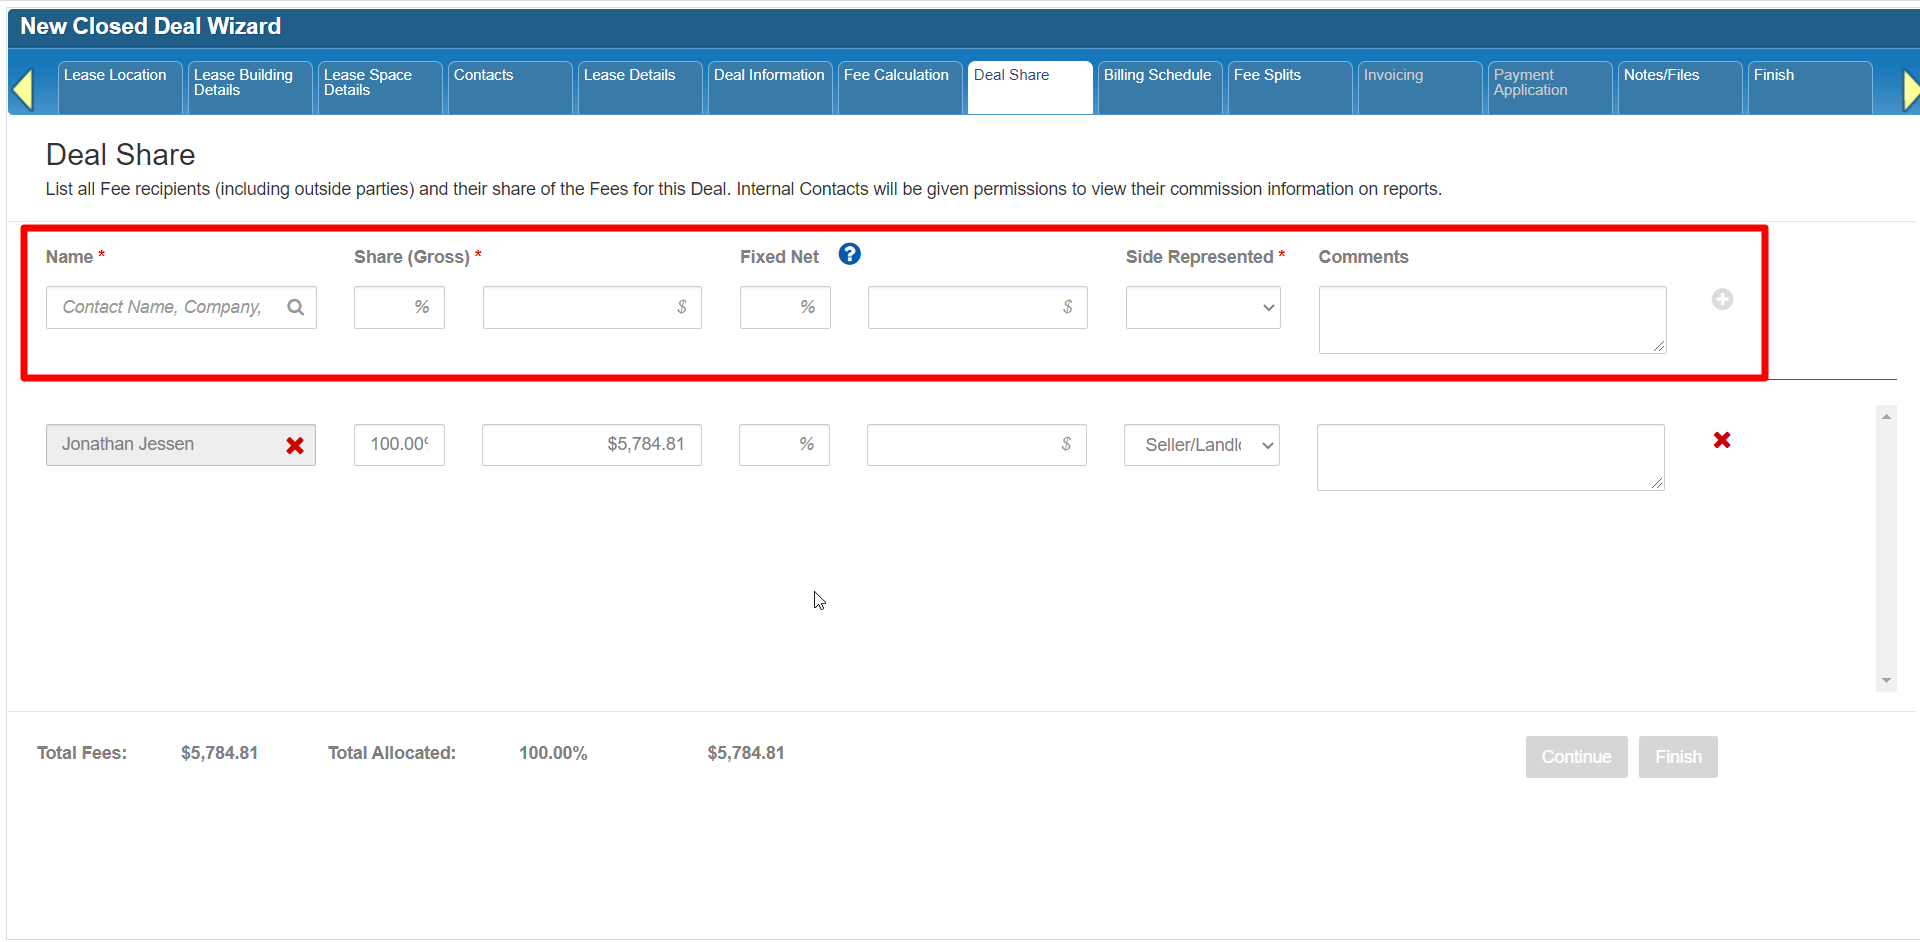
Below that is a list of existing entries which you can modify or remove as needed.
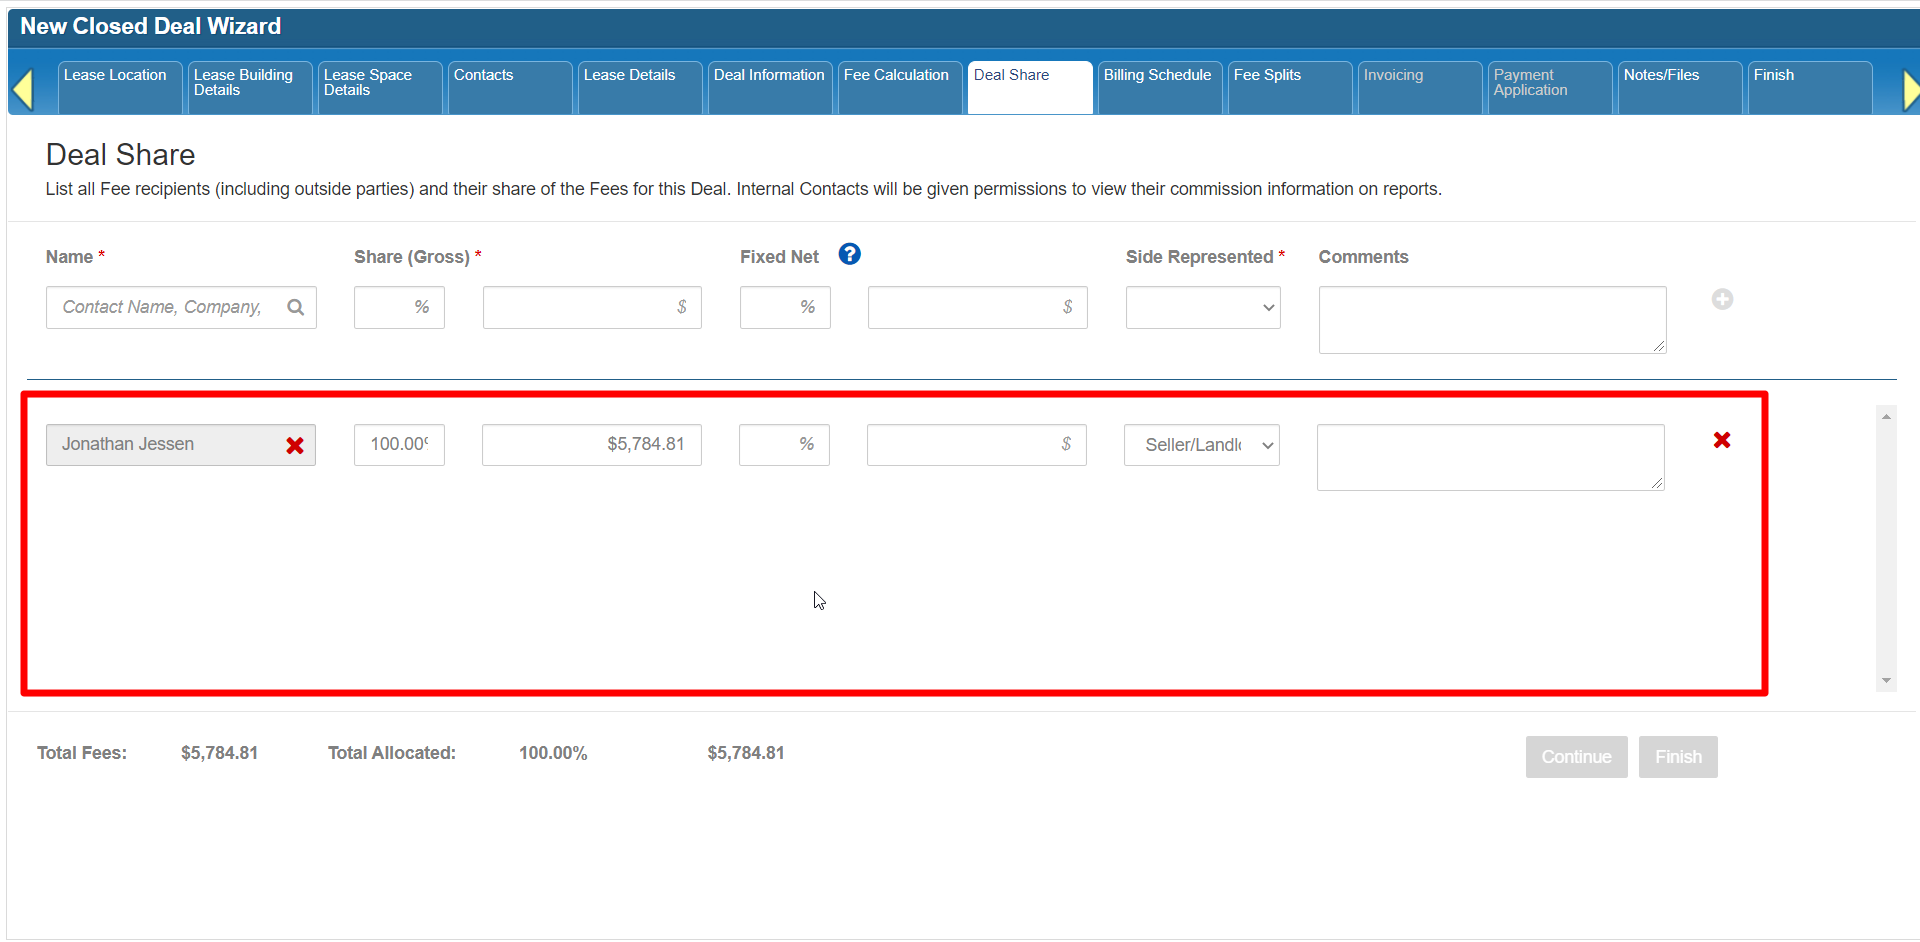
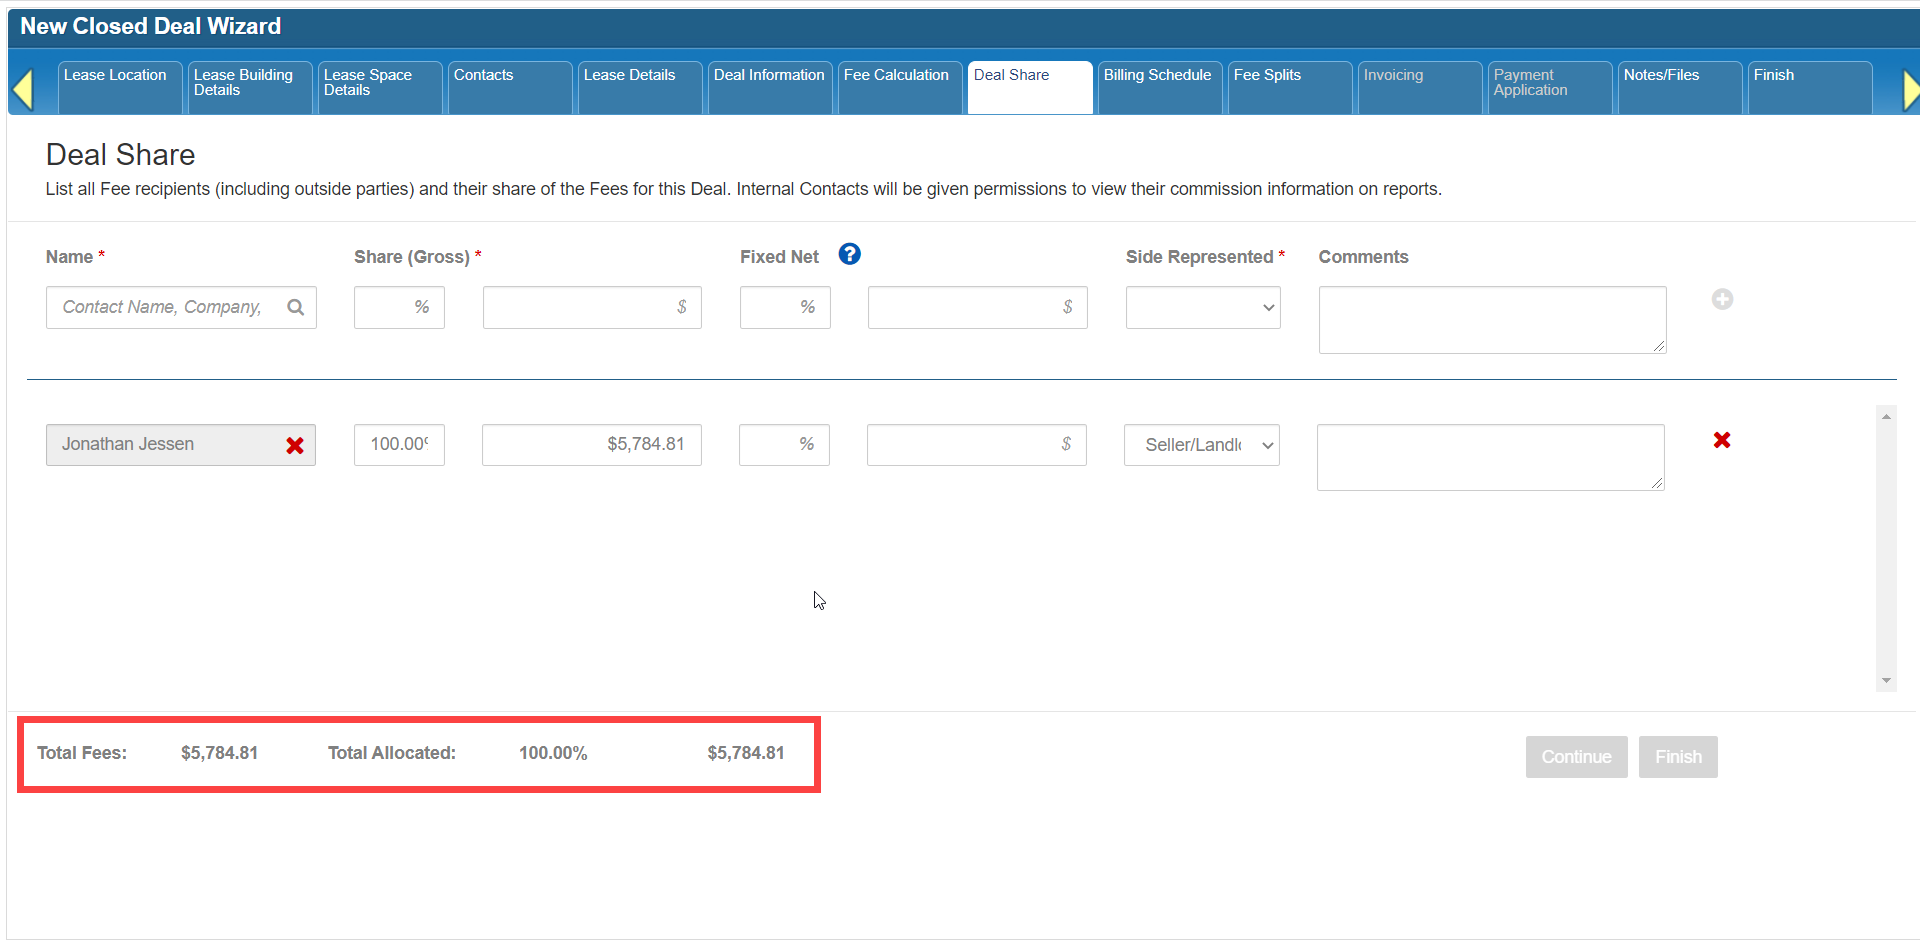
At the bottom is a summary of the total fees (from the Fee Calculation tab), how much of that amount has been allocated so far on this tab, and whether there are any discrepancies between those two amounts. We’ll demonstrate that later in this tutorial.
Required fields are indicated by an asterisk.
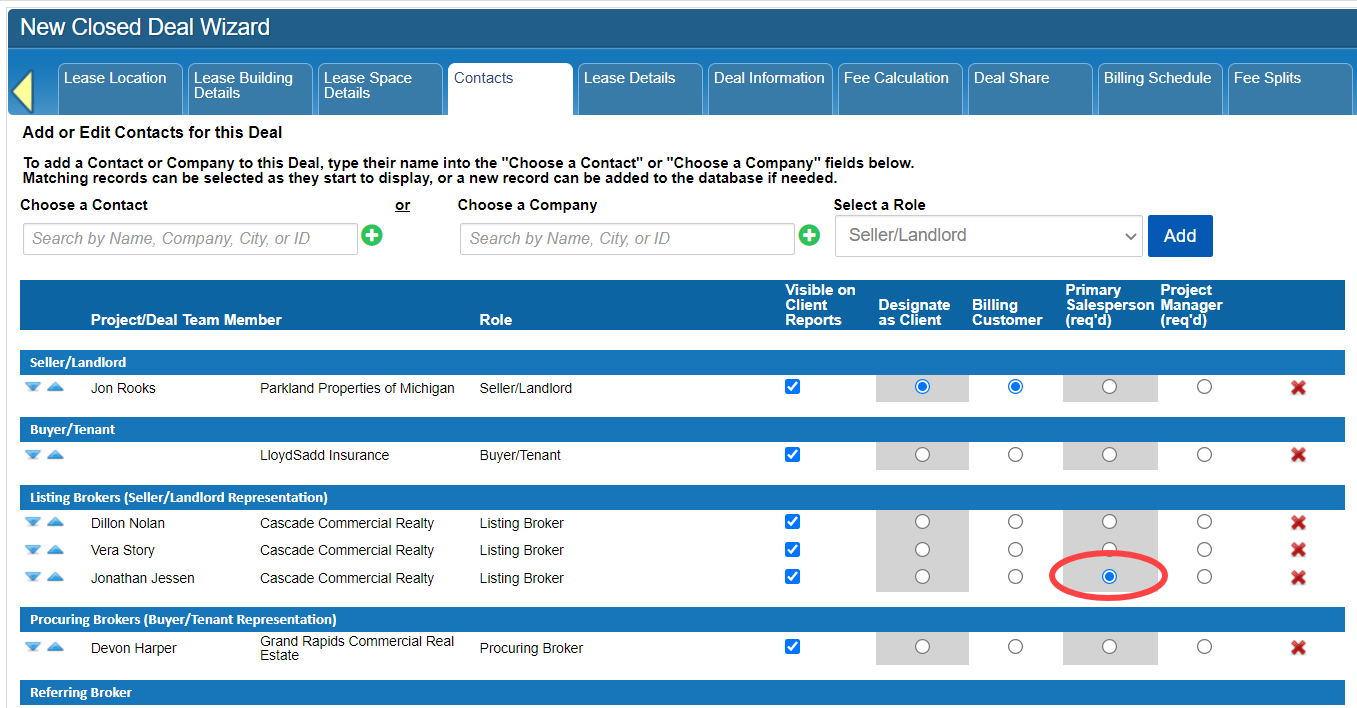
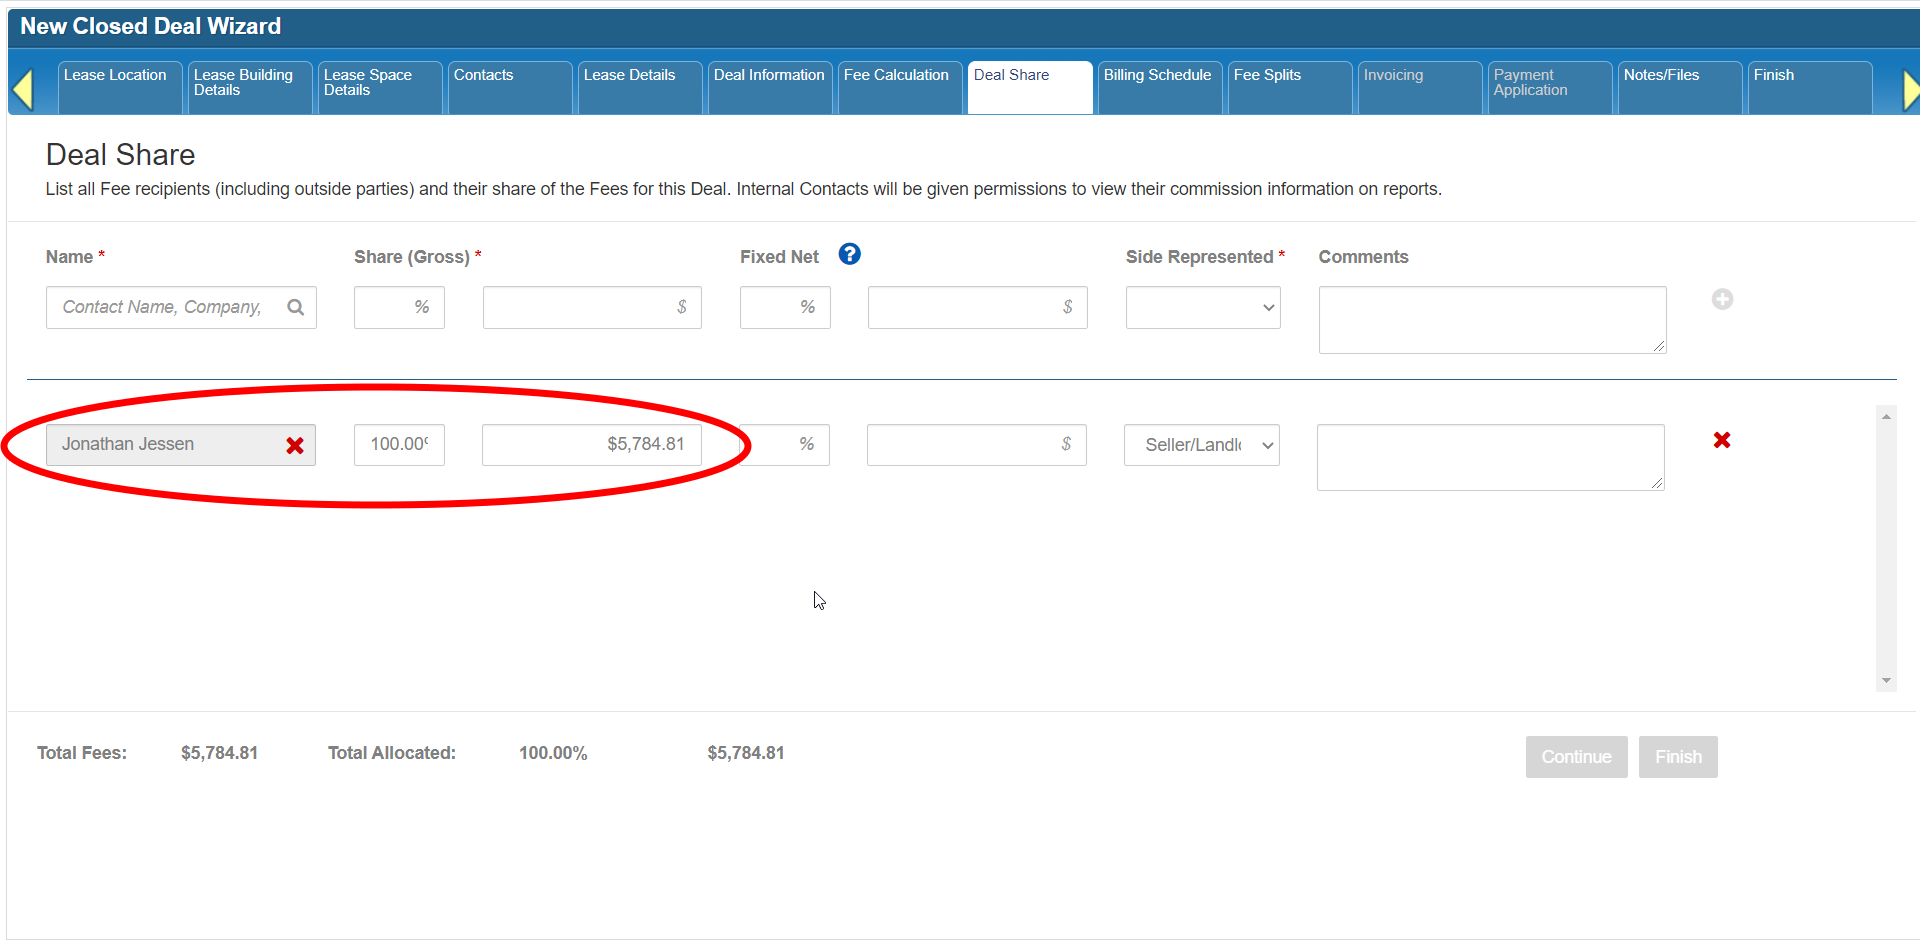
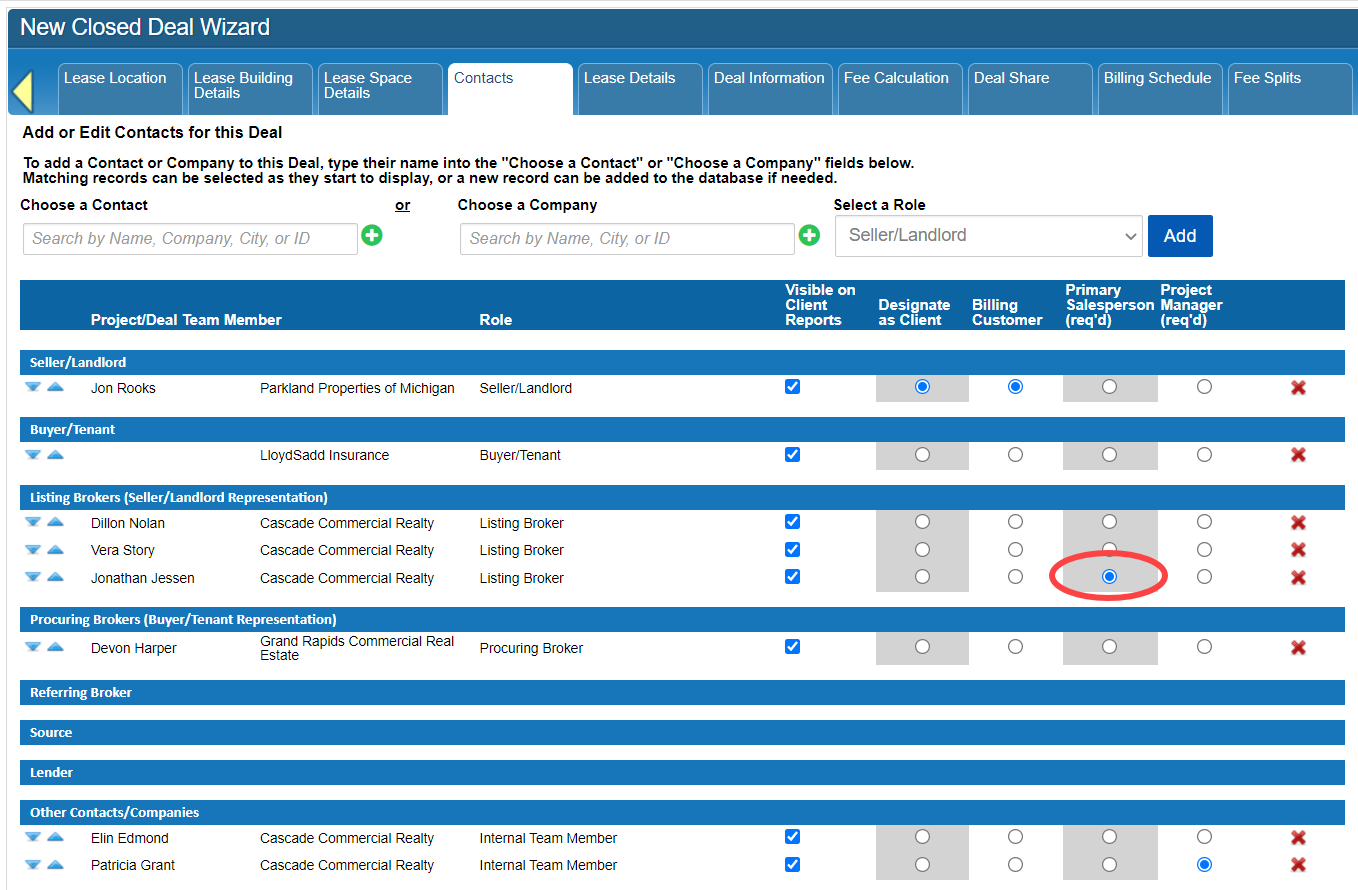
By default, the person designated as the Primary Salesperson on the Contacts tab will already have been added to this tab with a 100% share of the total fee amount.
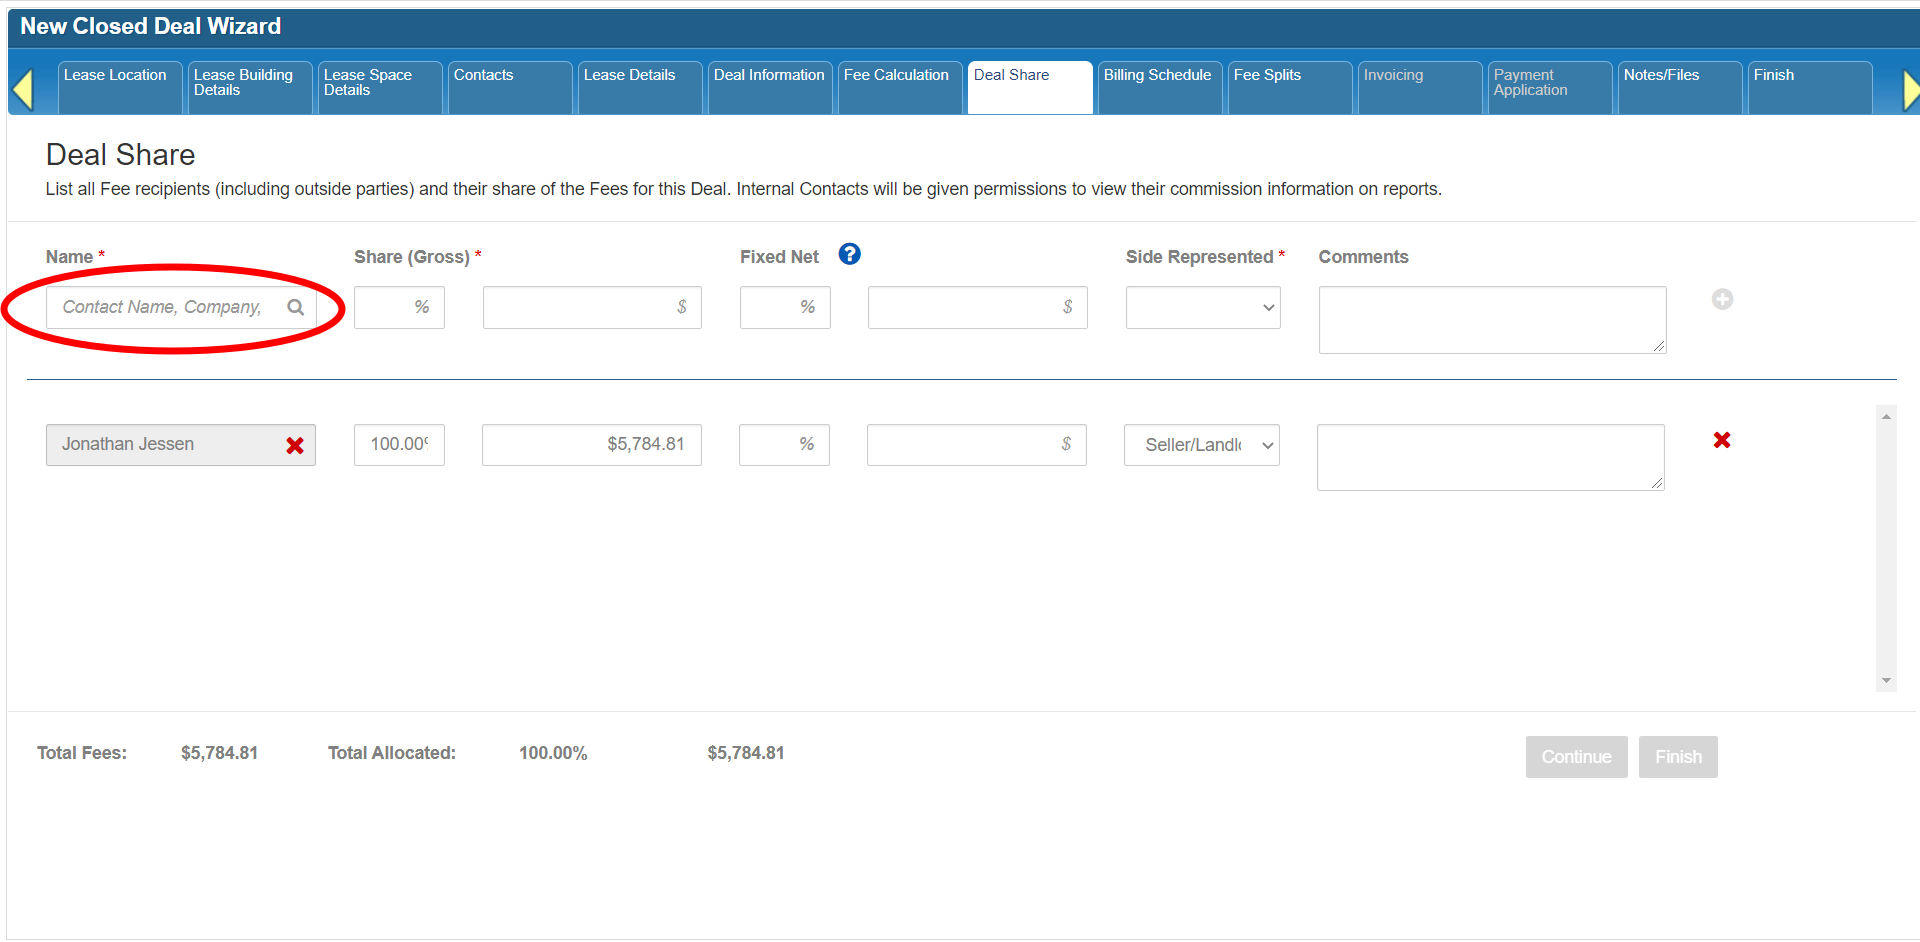
To add someone else, click into the Name field at the top of the form.
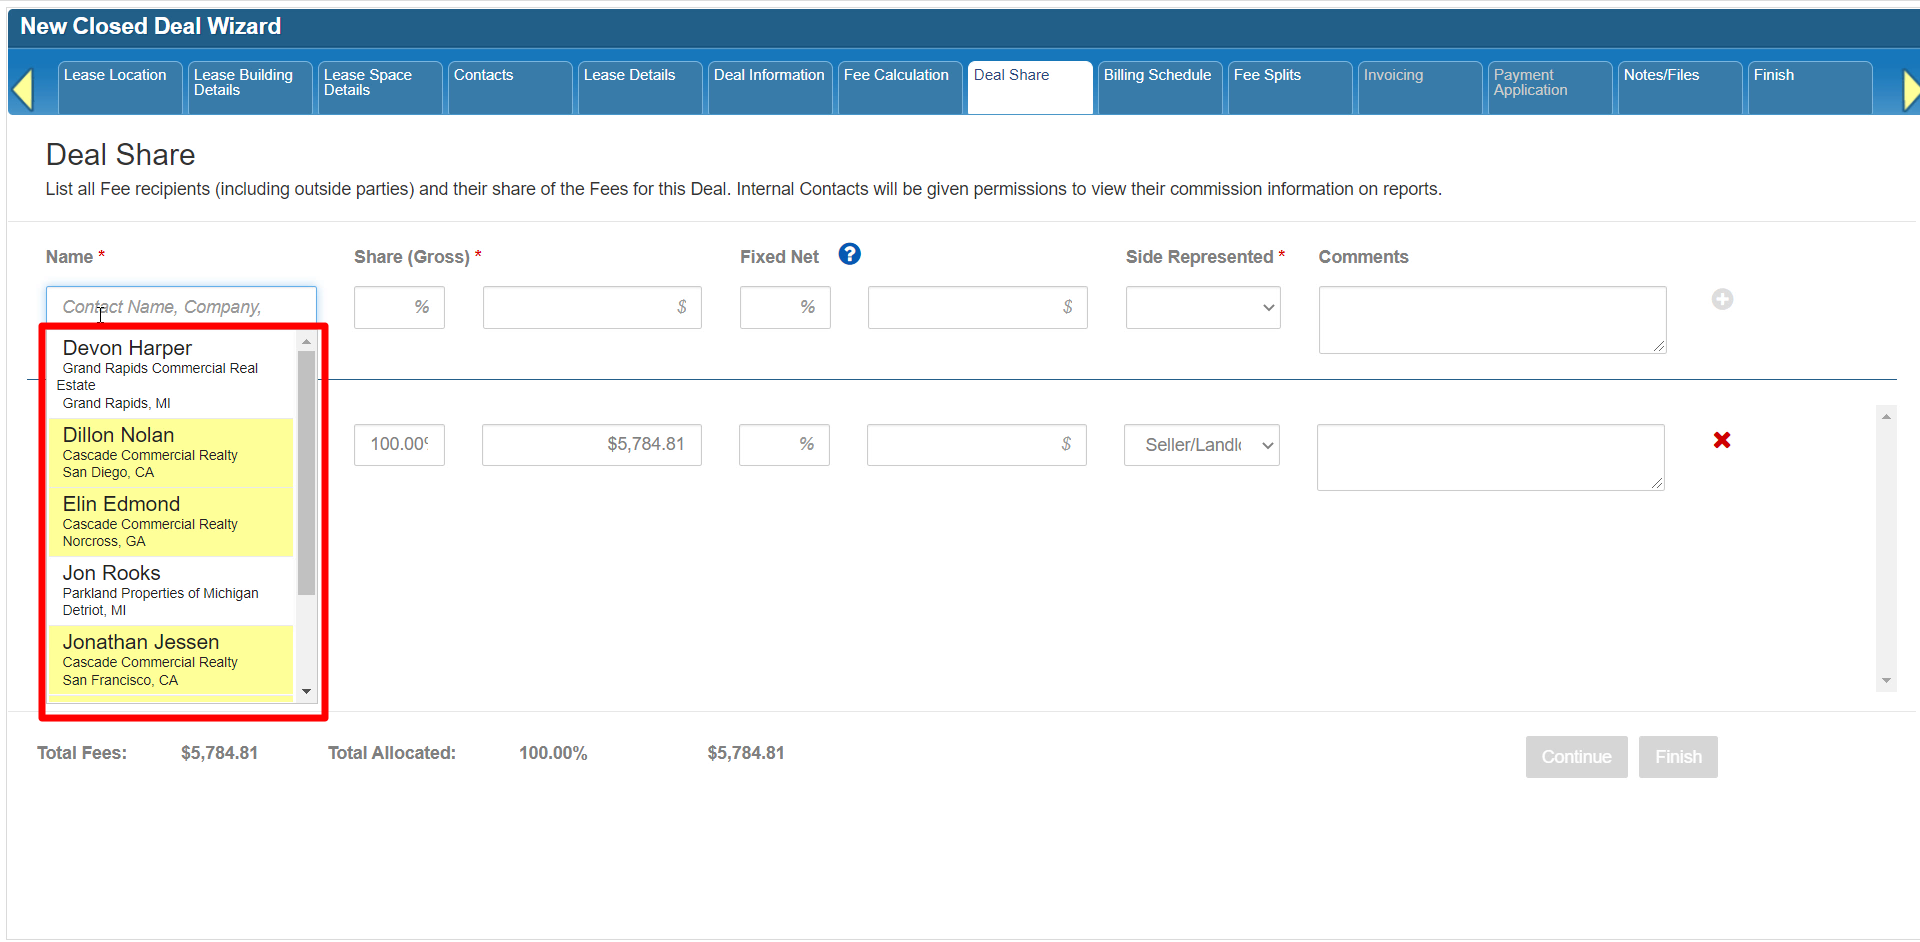
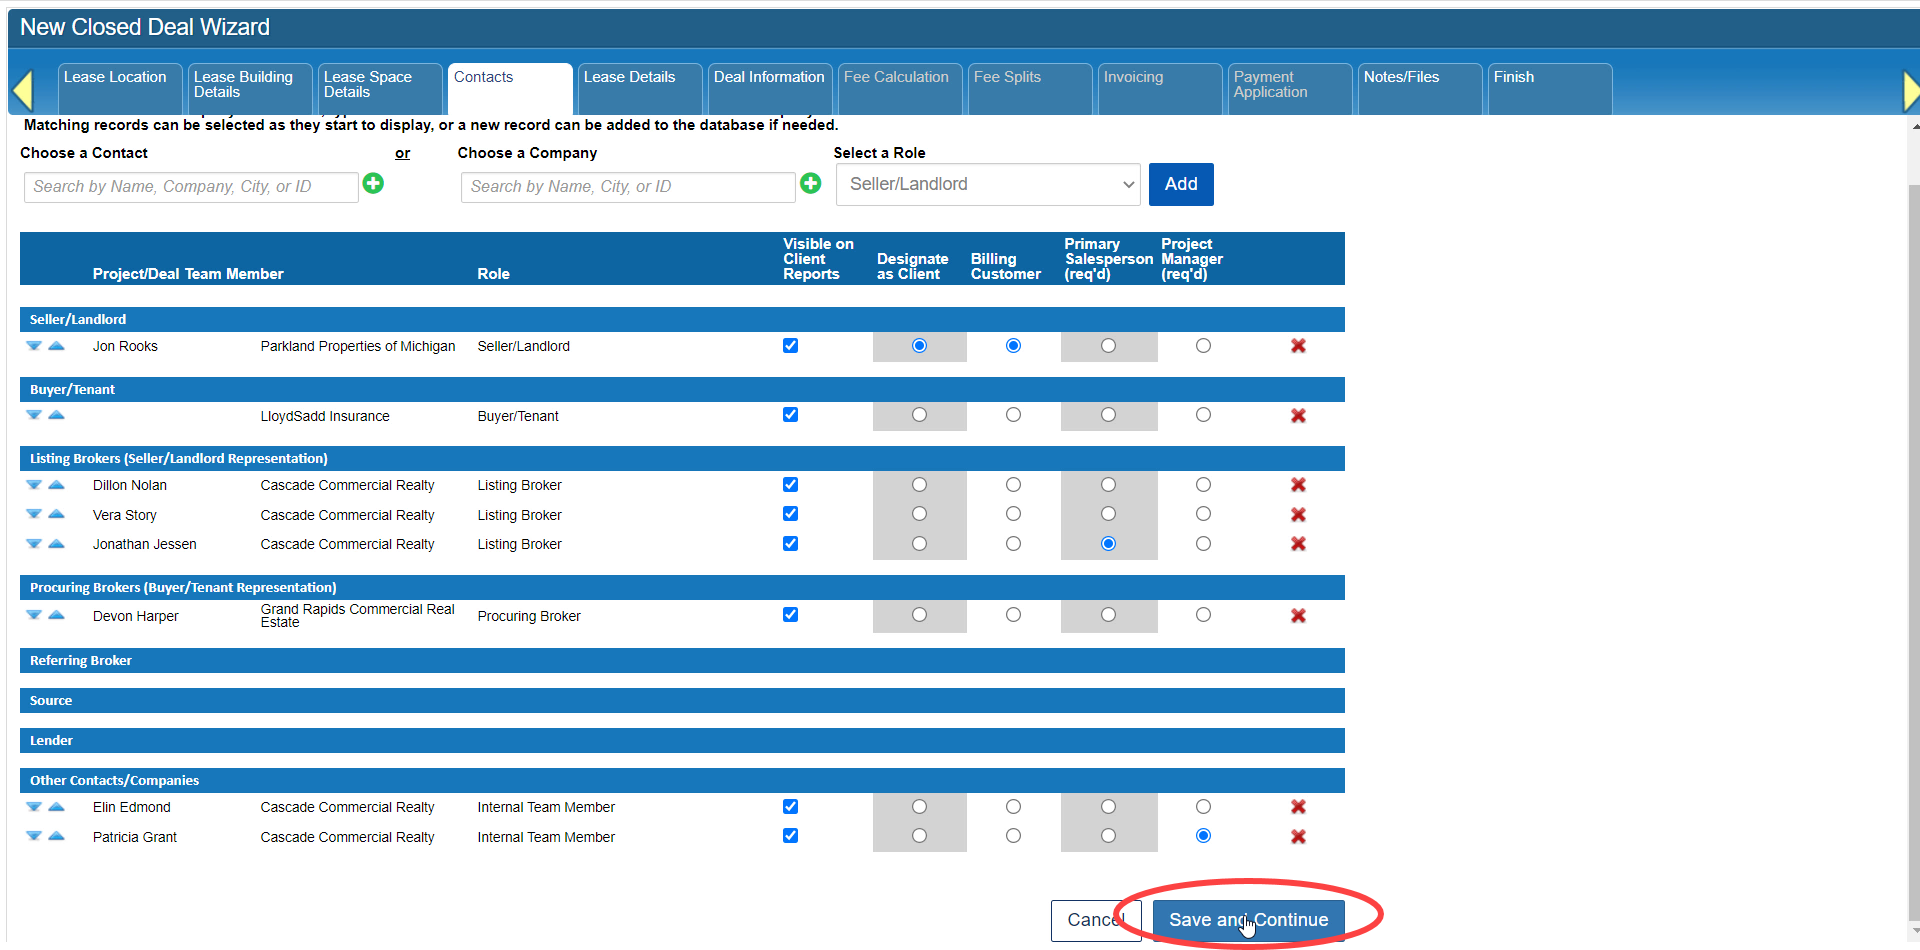
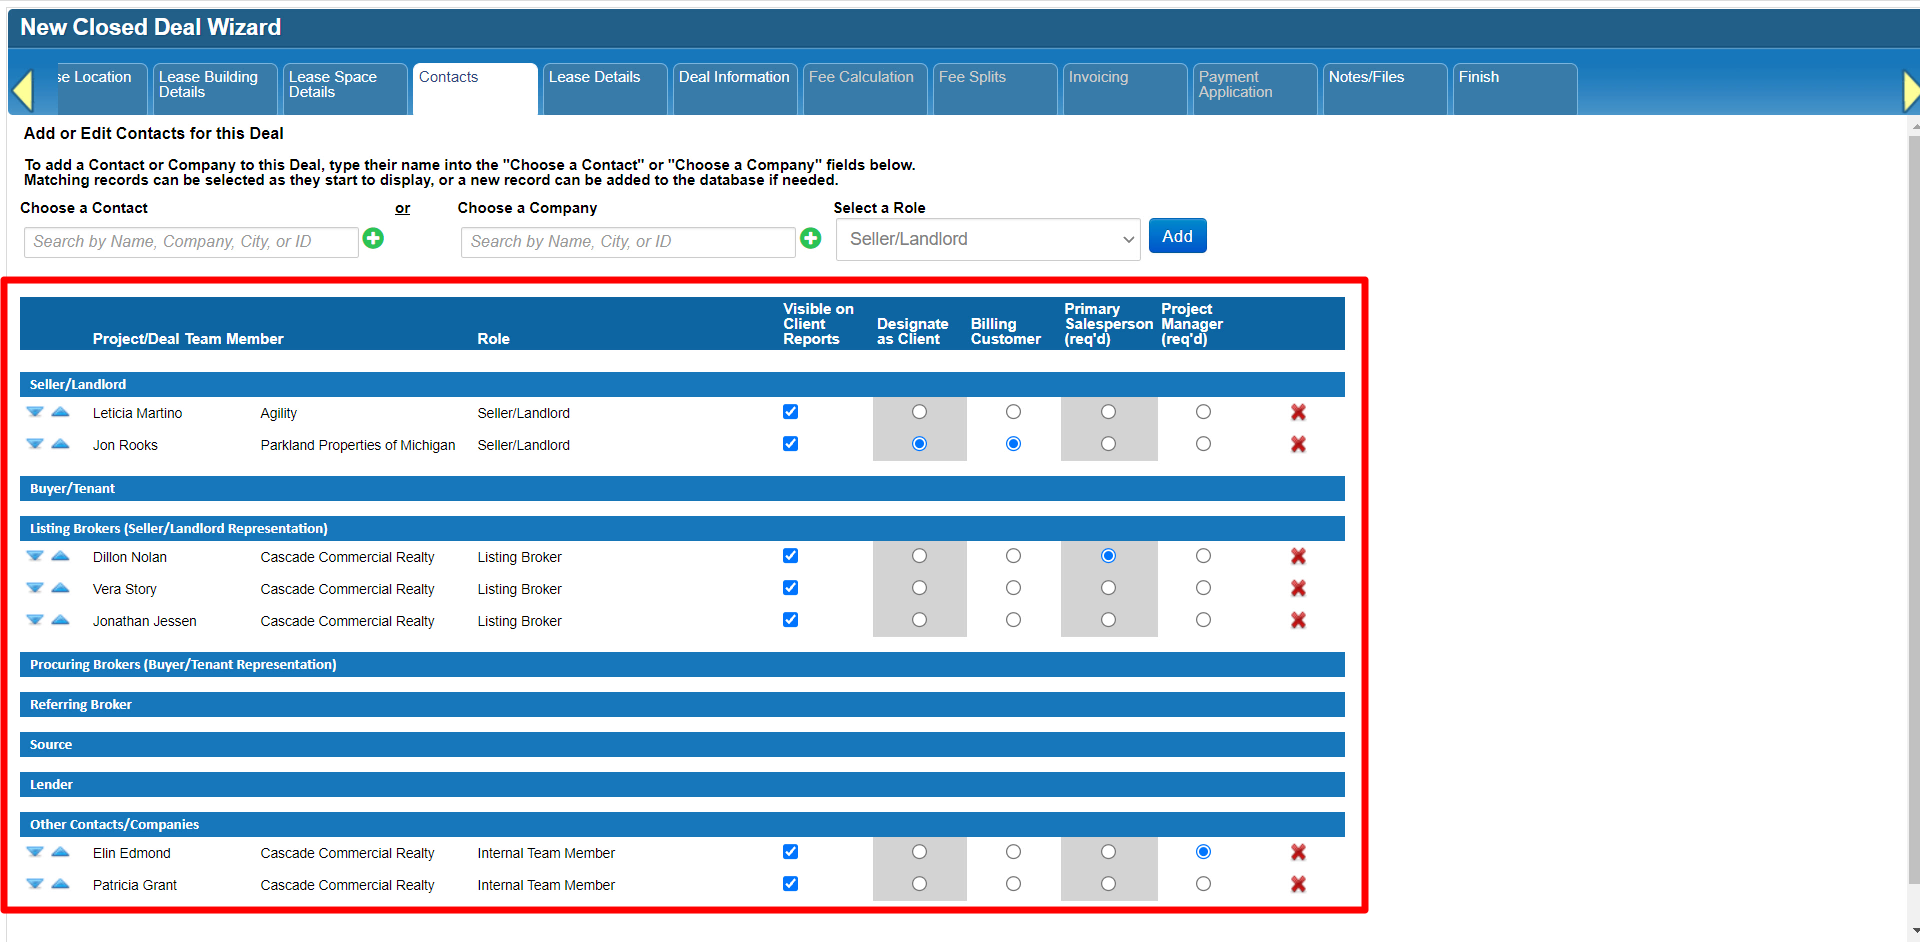
All of the Contacts who have already been added to the deal on the Contacts tab will automatically display in a list for you to choose from.
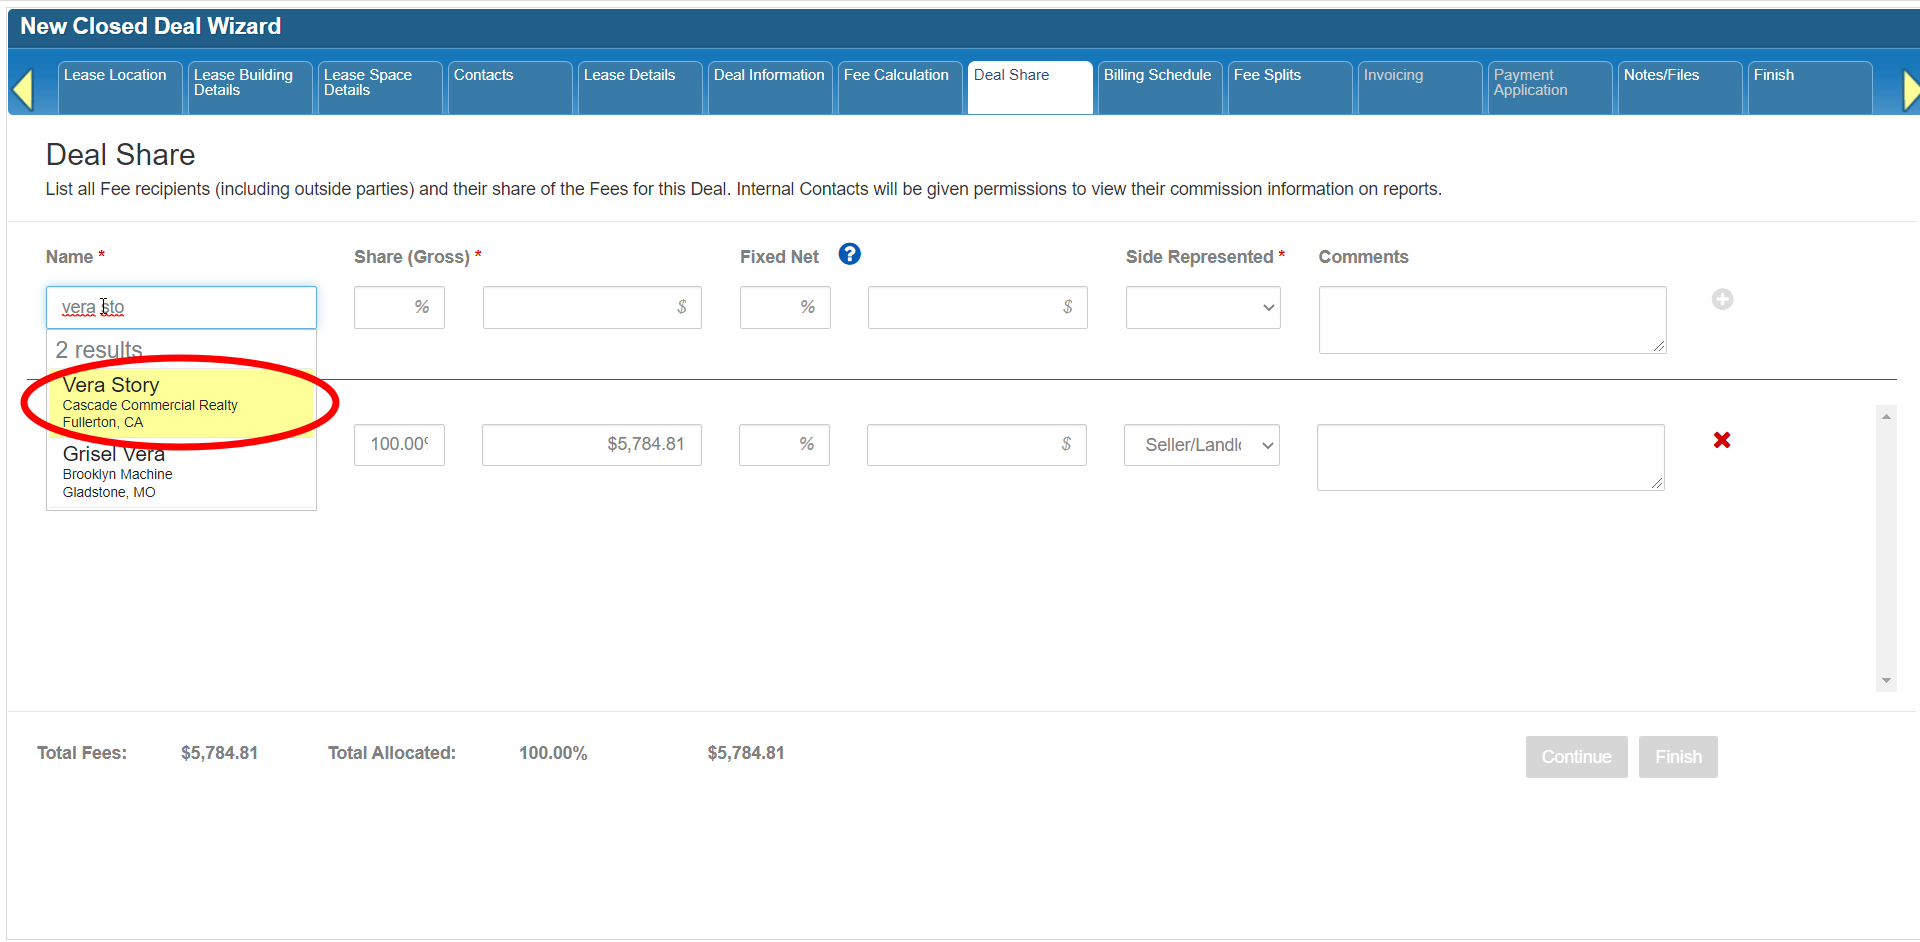
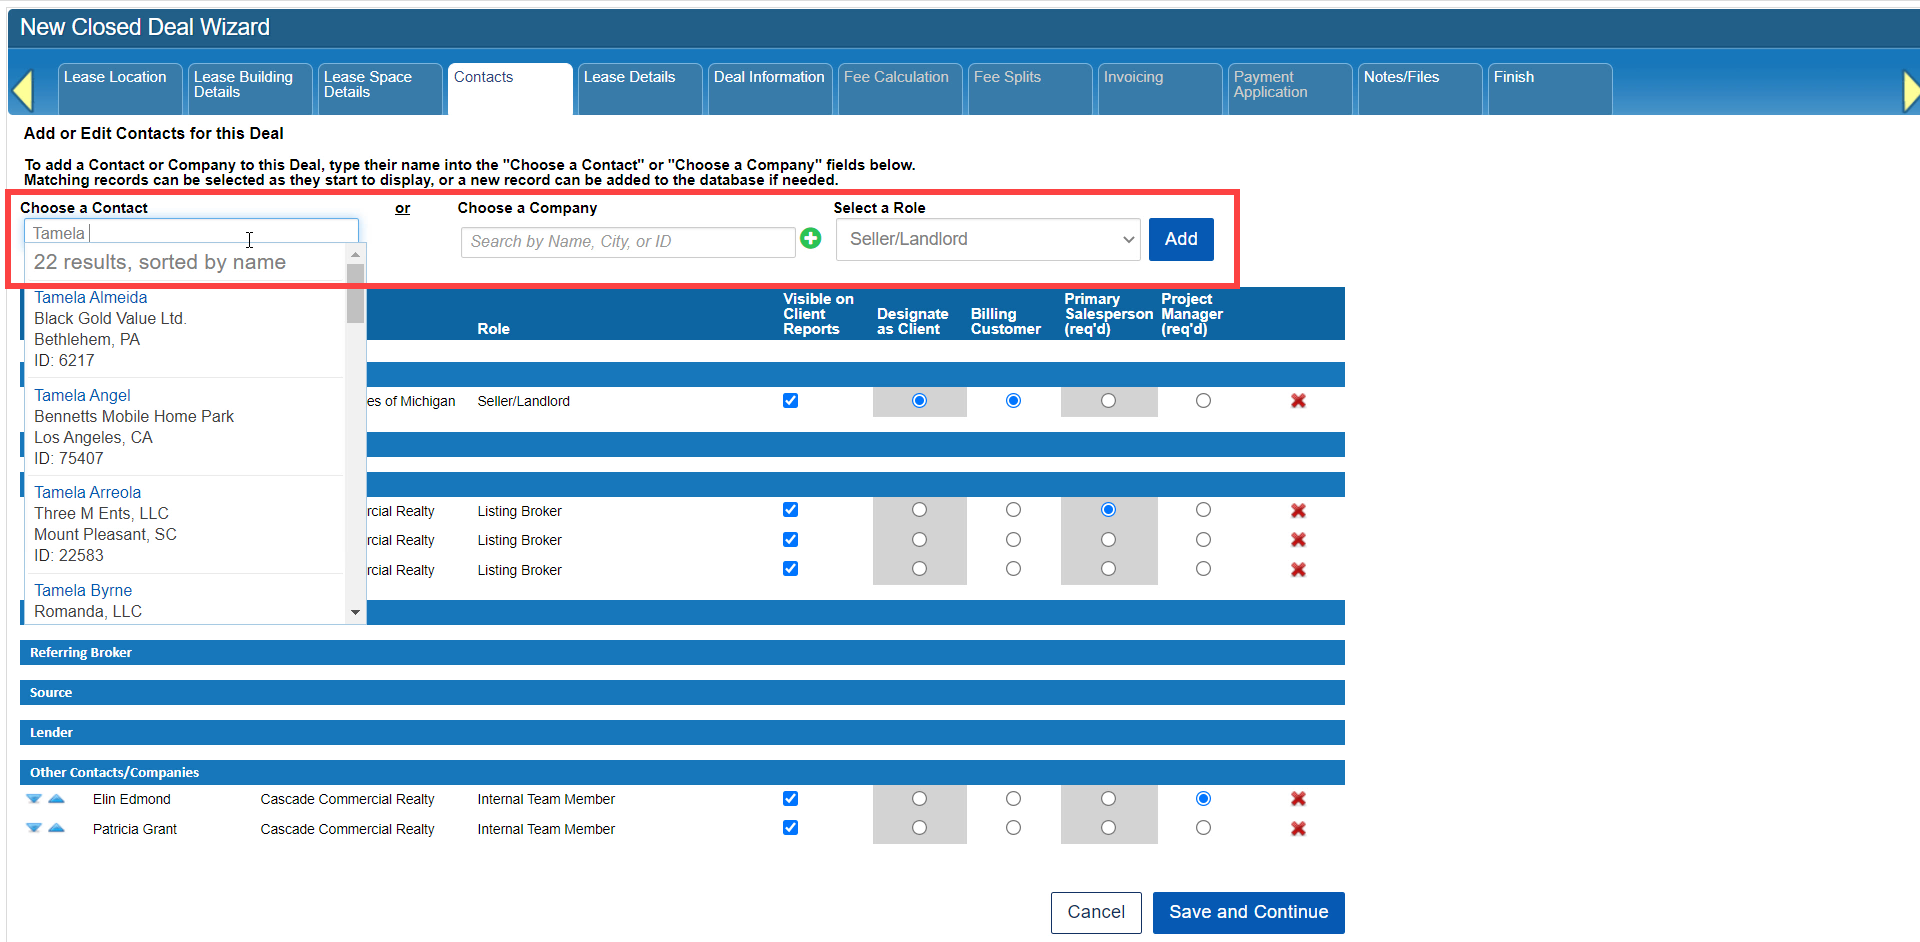
Alternatively, type in any combination of the name, city, or record ID of the person you wish to add. The system will show a list of potential matches. Internal Contacts will be highlighted in yellow. Select the correct entry from the list by clicking on it.
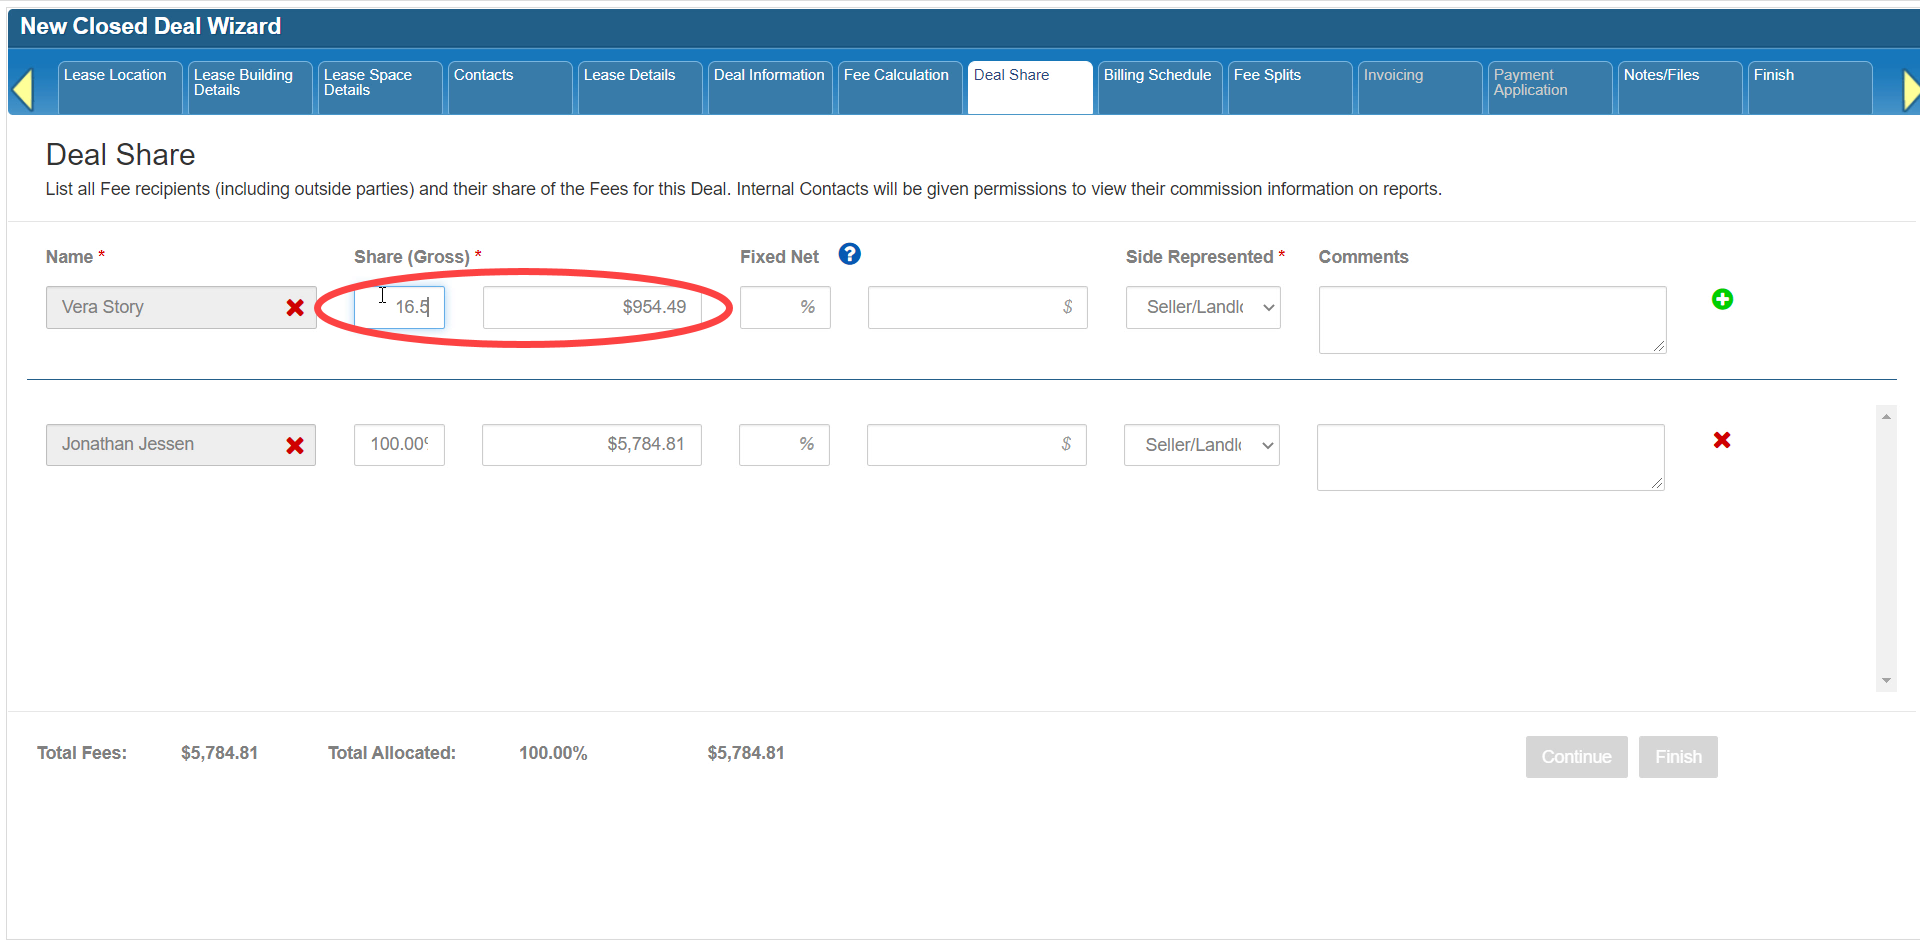
Indicate that person’s share as a percentage of the total fees, or as a specific amount. The corresponding field will be calculated automatically.
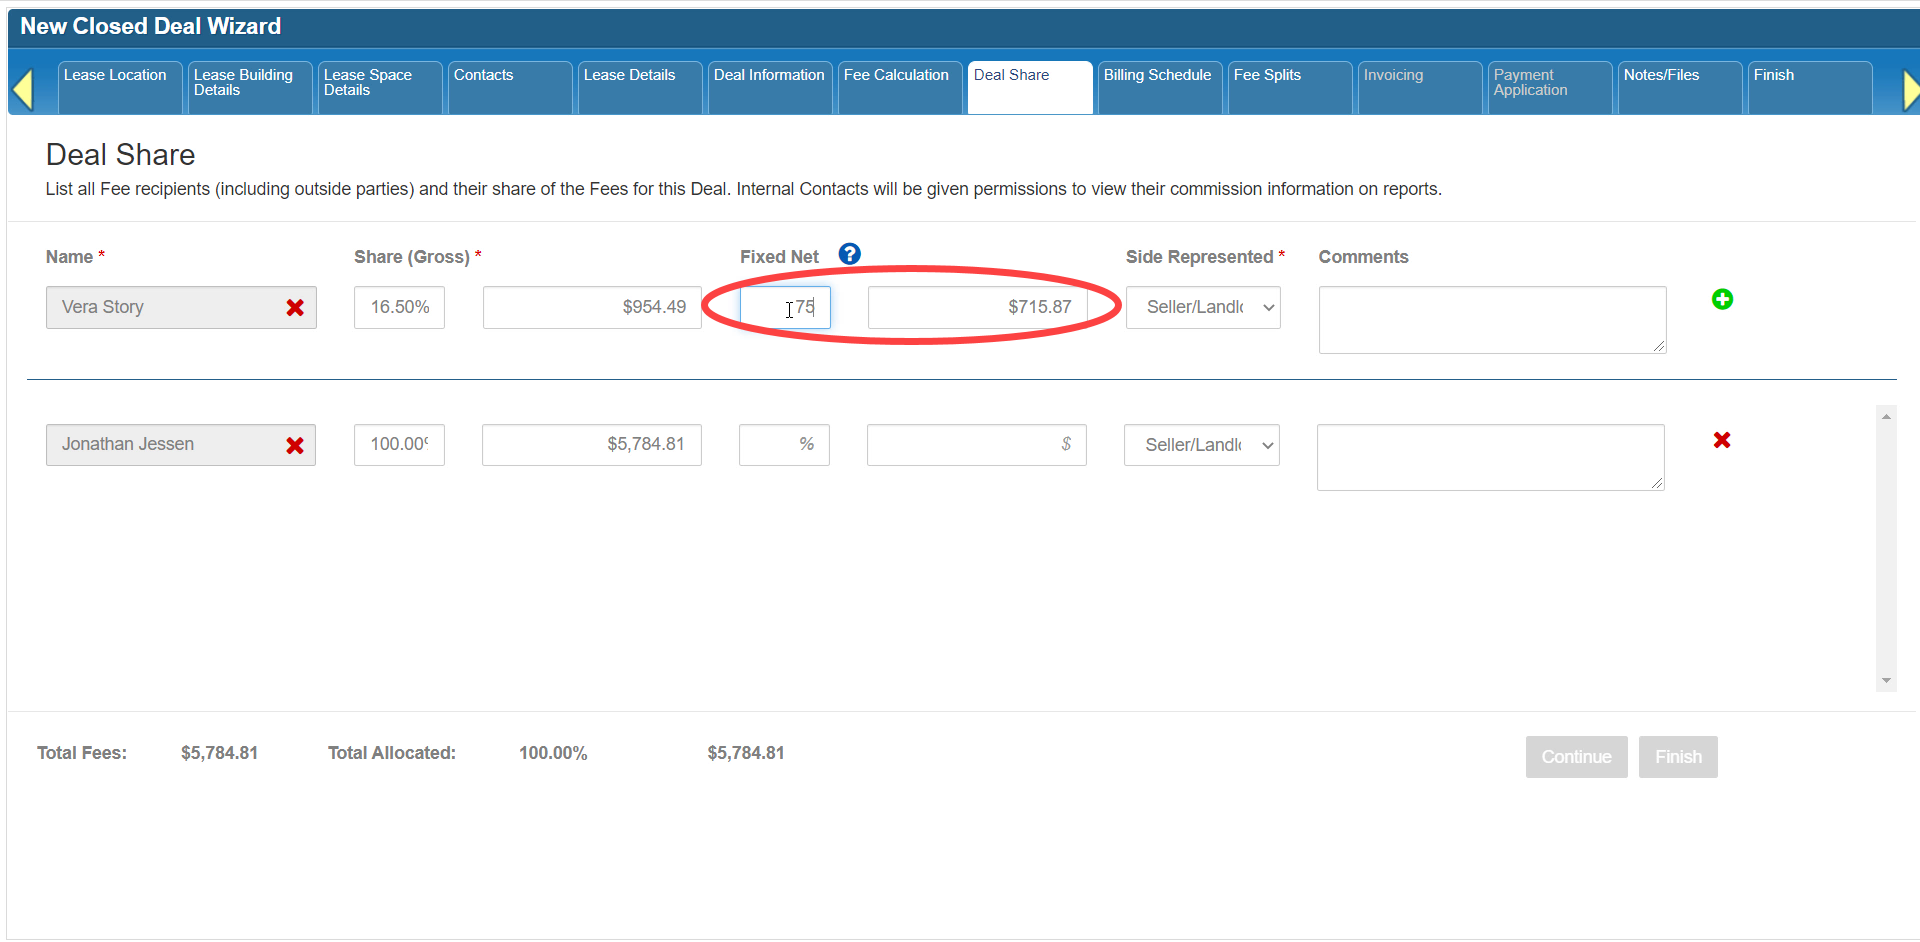
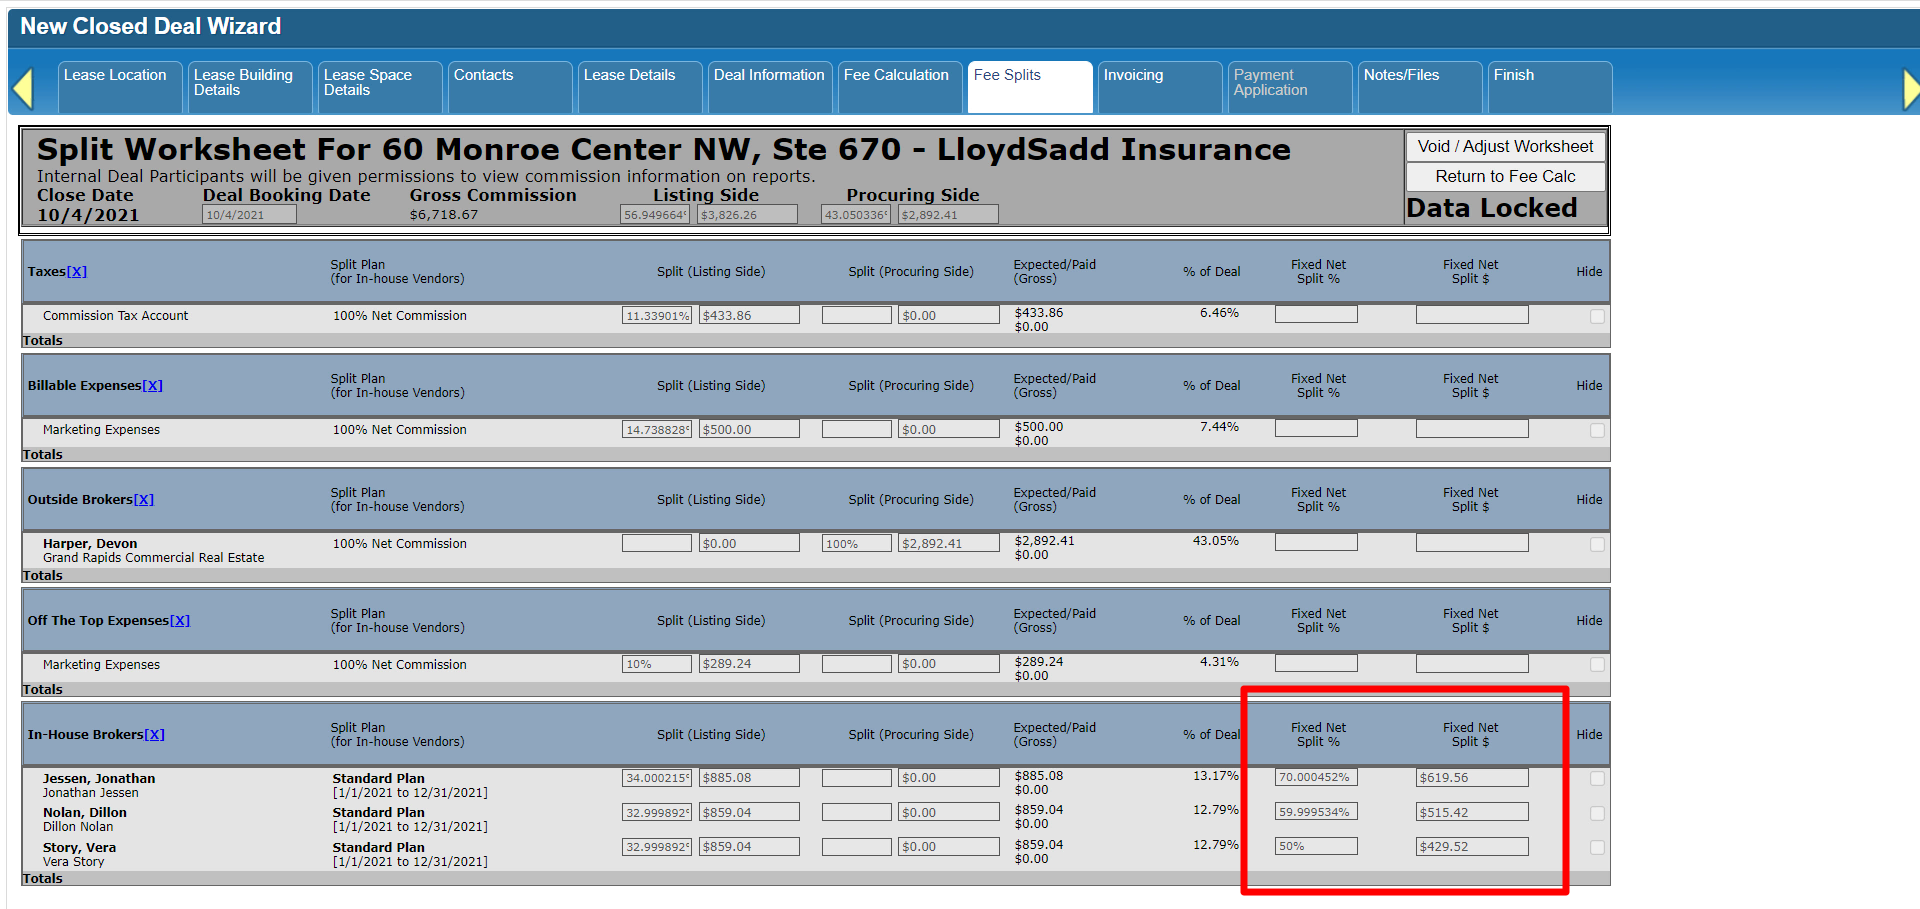
If a broker’s commission split with the firm should not follow their usual split plan but a specific percent of their gross share or a set amount, enter that information into the Fixed Net fields. This indicates that the system should use these net commission values regardless of their split plan when the time comes to distribute the fees.
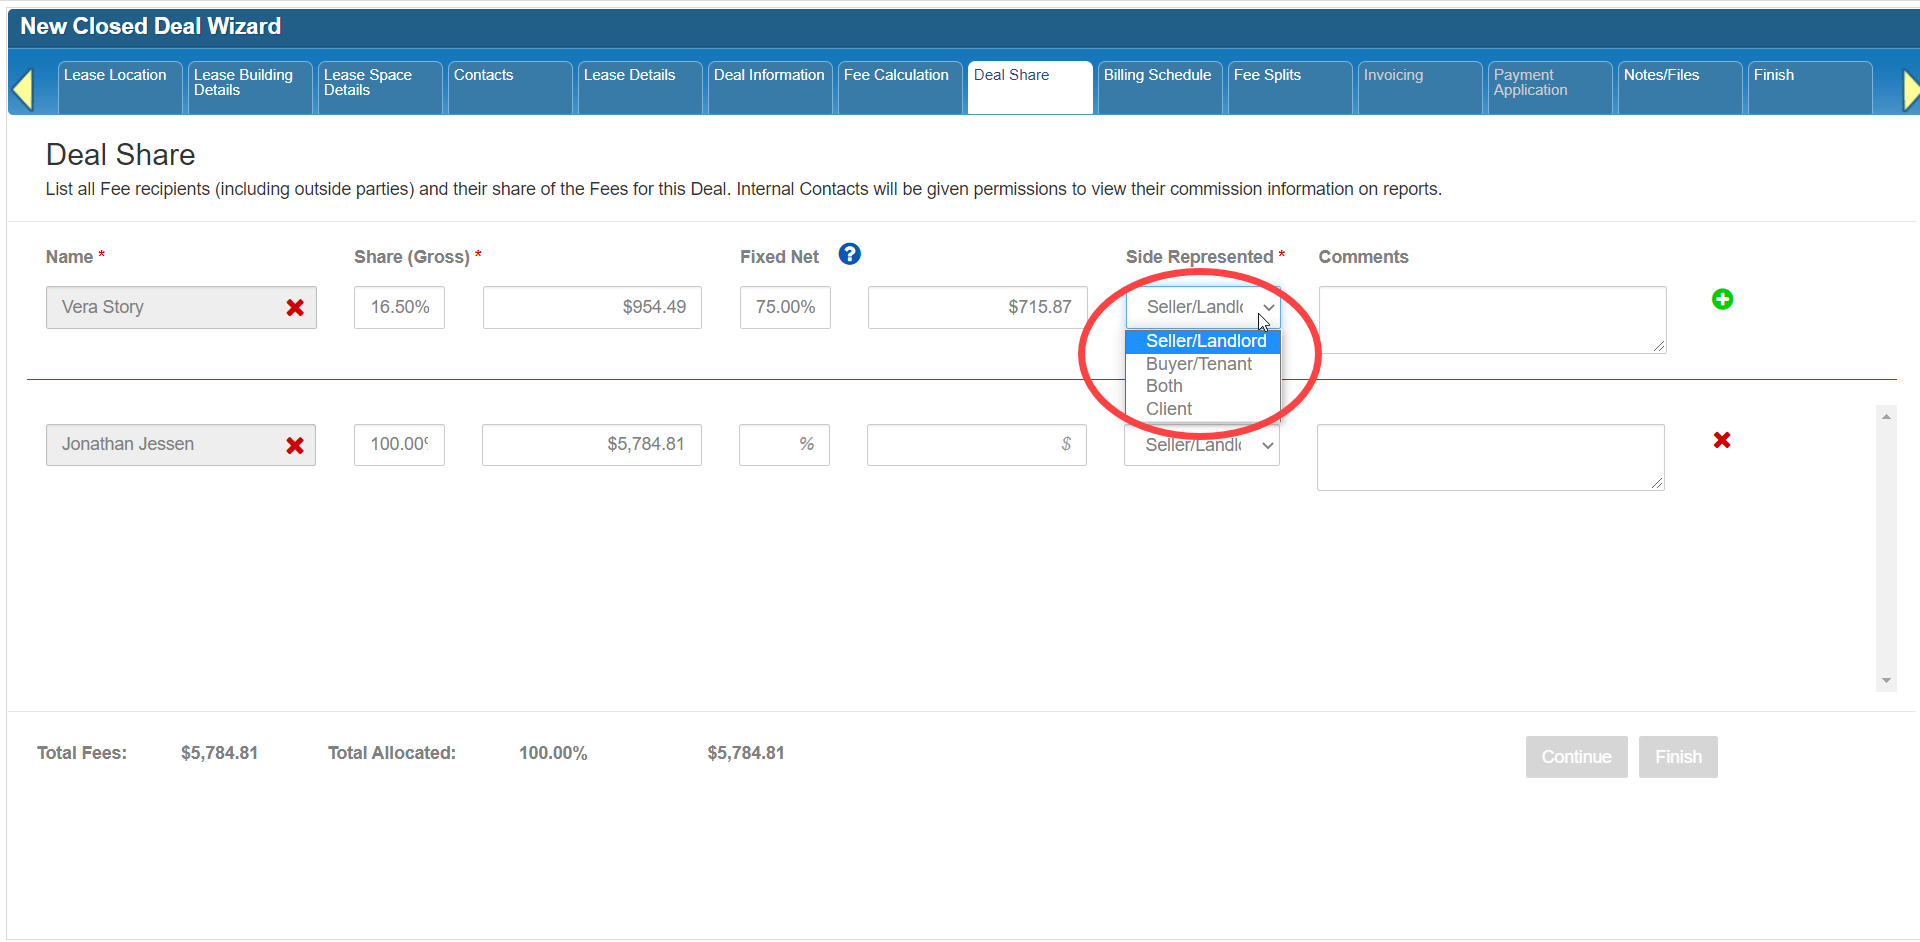
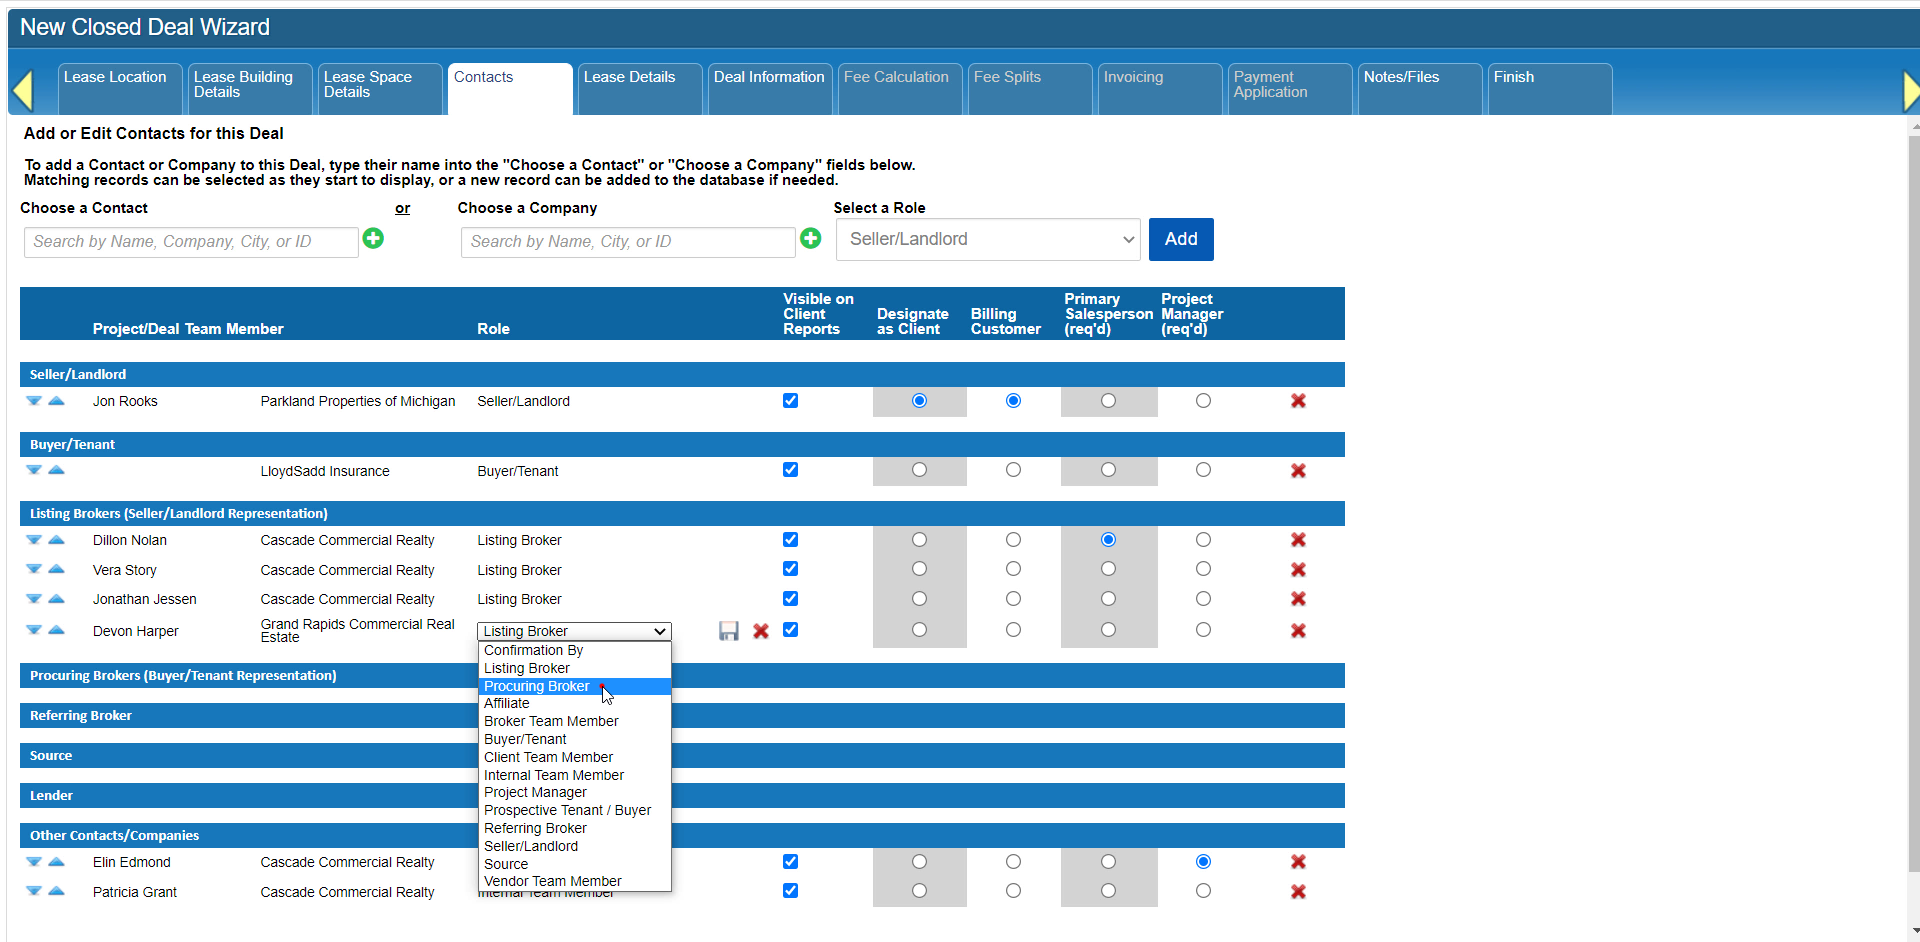
Select which side of the deal this person represented. If their role on the Contacts tab was Listing or Procuring Broker, the system will select the appropriate entry for you. For deals that aren’t a Lease or Sale, you can select Client.
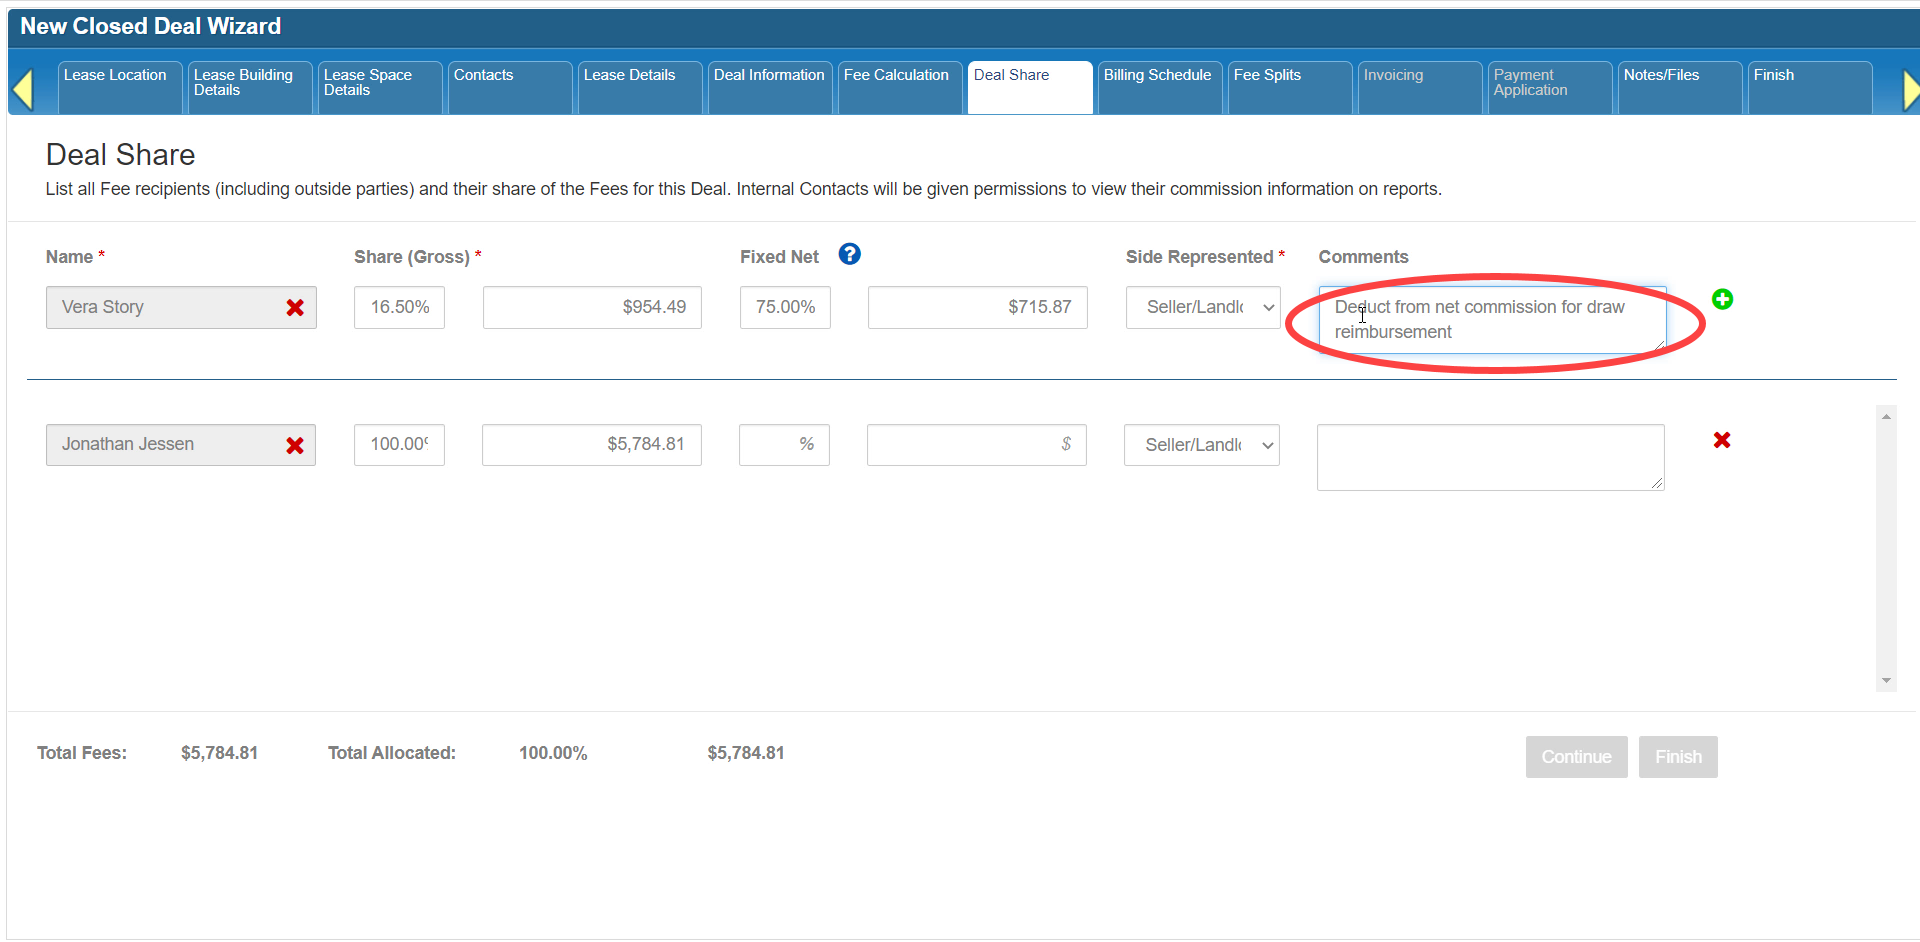
Add any other relevant instructions to the Comments, such as which Split Plan to use if that Broker has more than one plan for the year, or if there are supposed to be any additions to or deductions from their net commission.
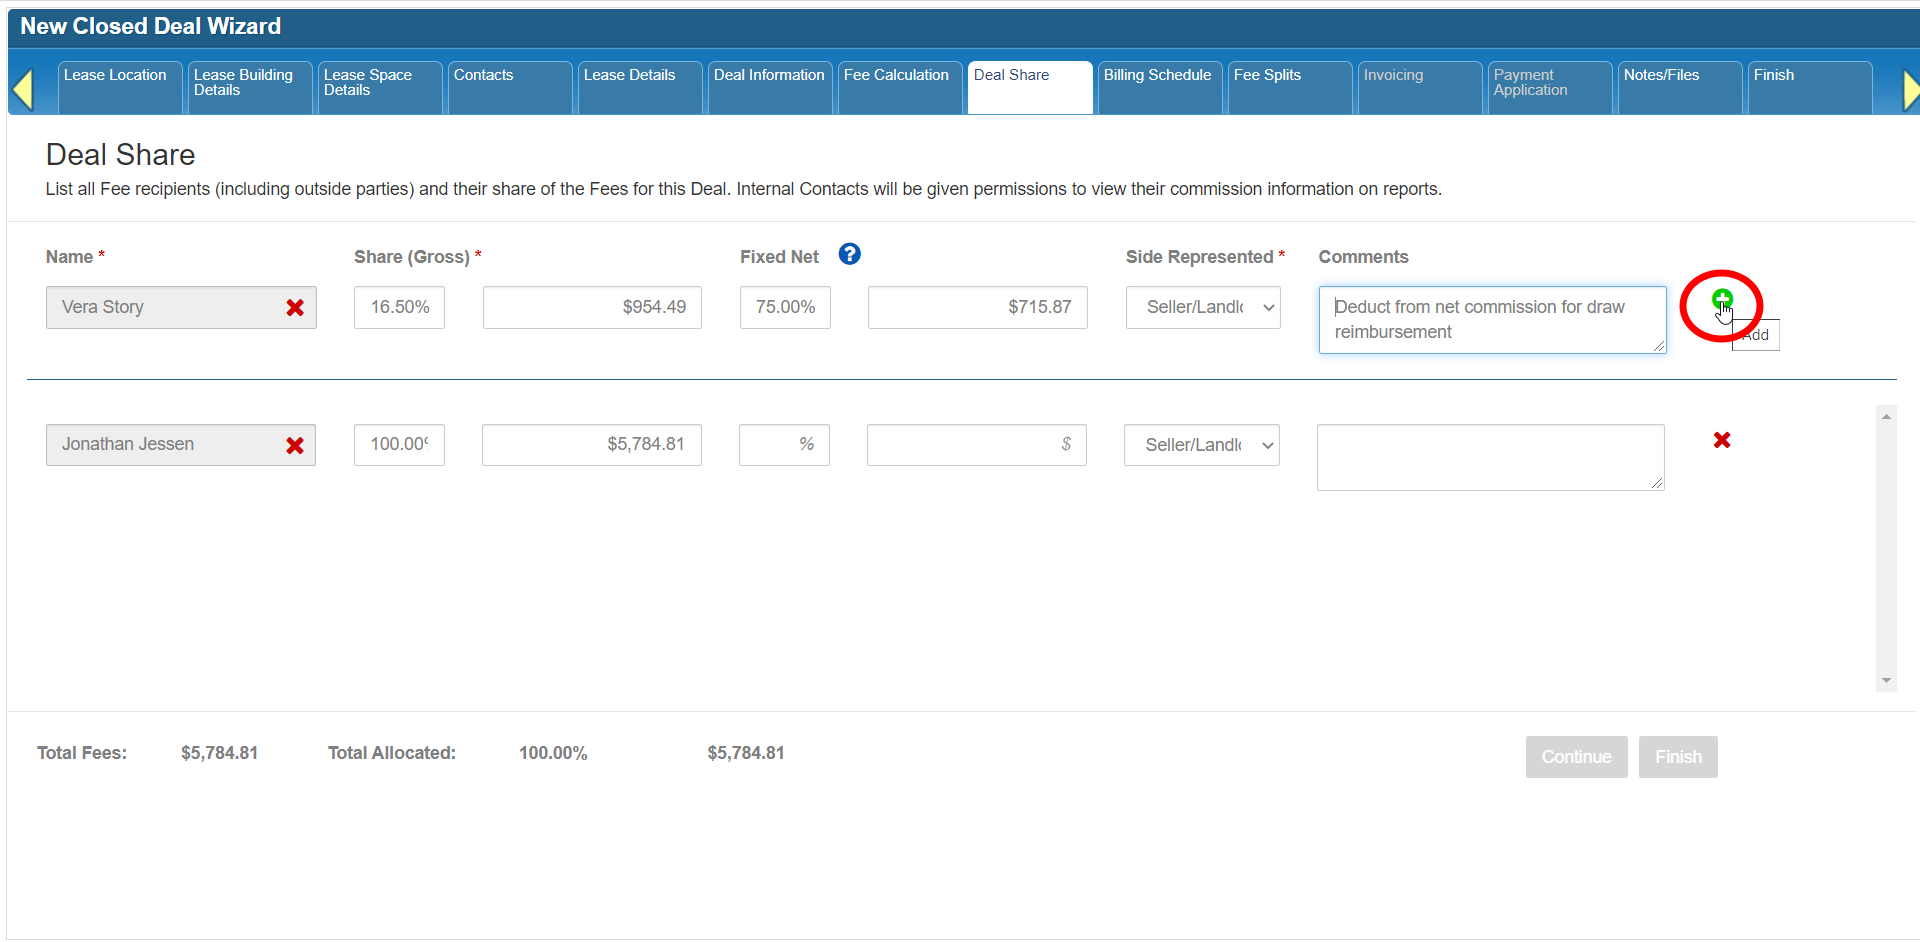
Click the green plus icon on the right to add this new information.
You should now see it listed below.
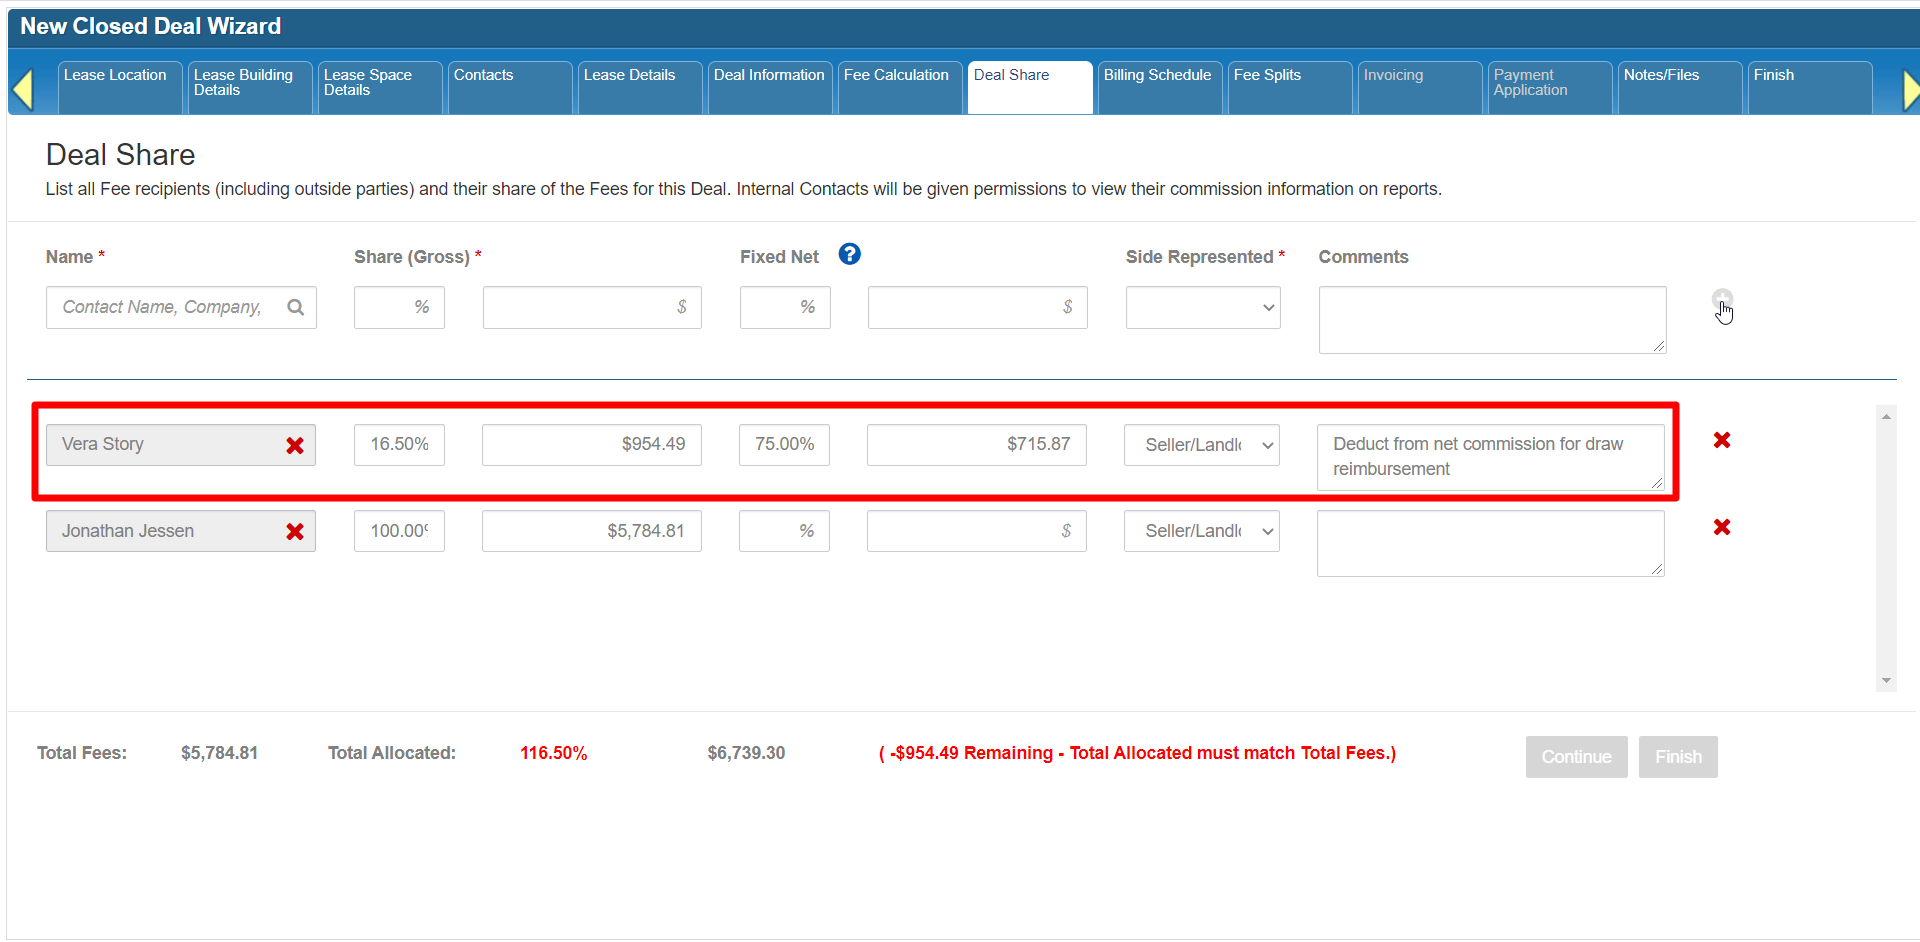
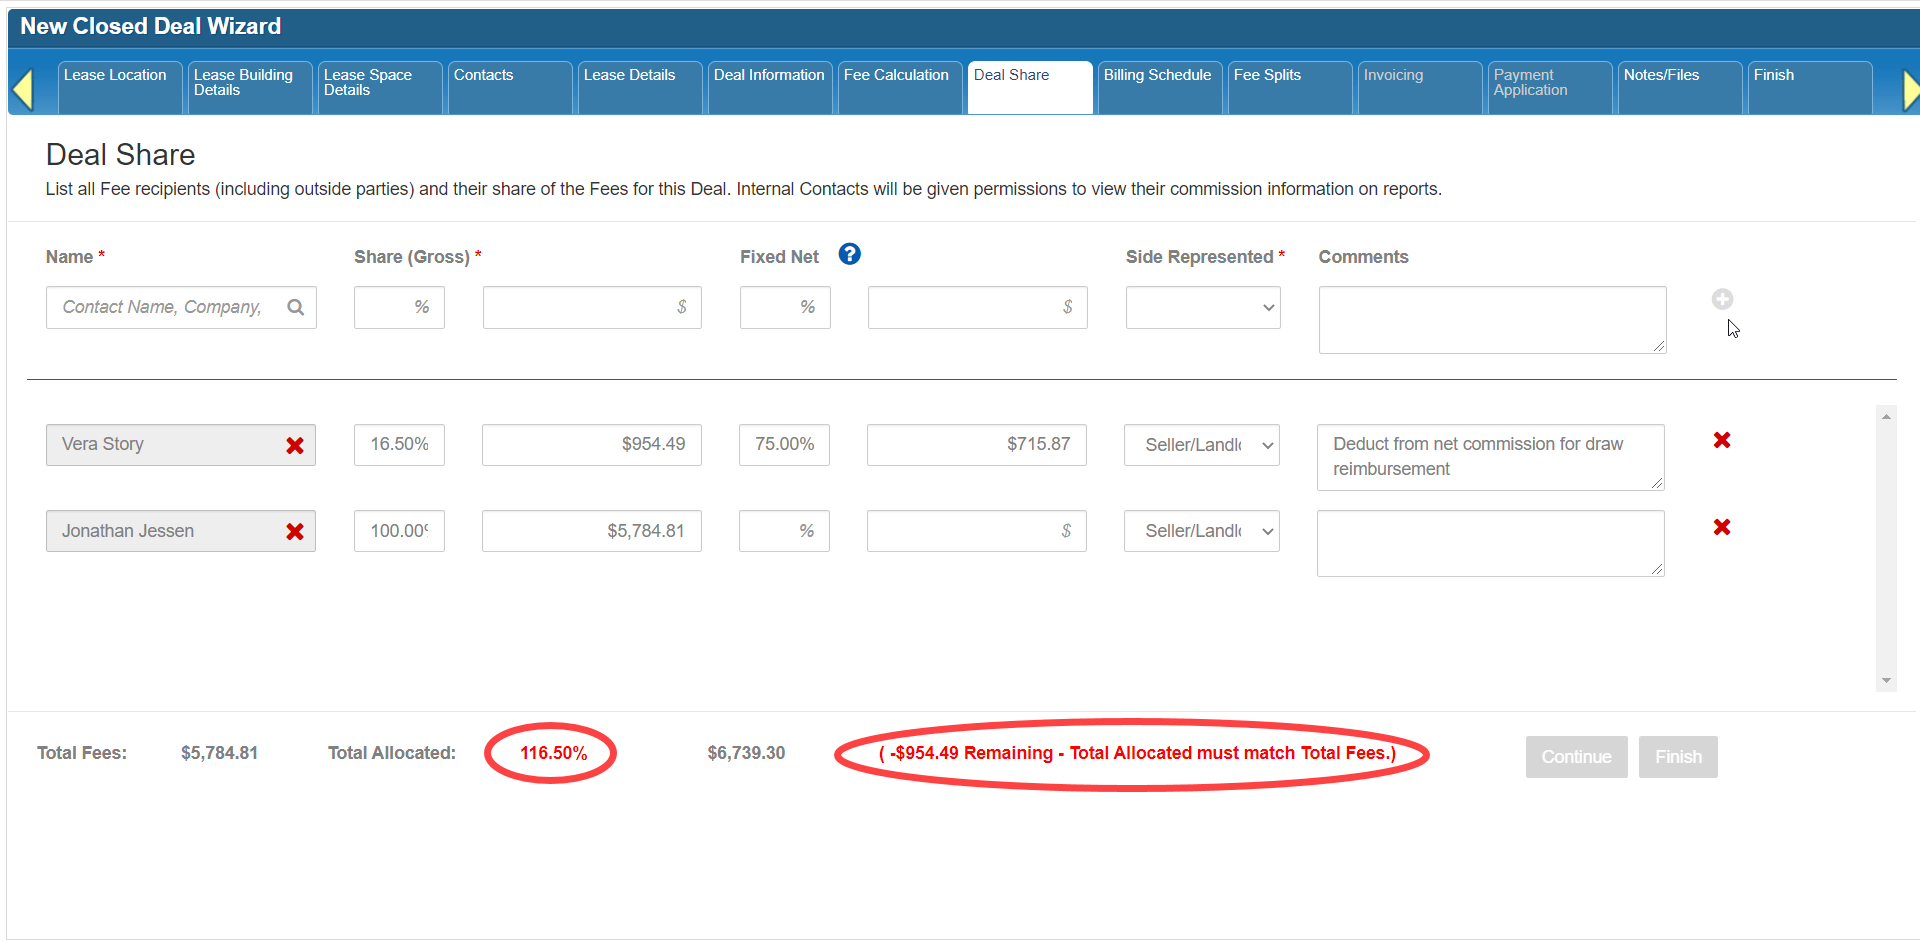
Notice that the total percent allocated is red, and that there is a difference between the Total Fee and Total Allocated amounts. Make whatever adjustments you need to balance those totals.
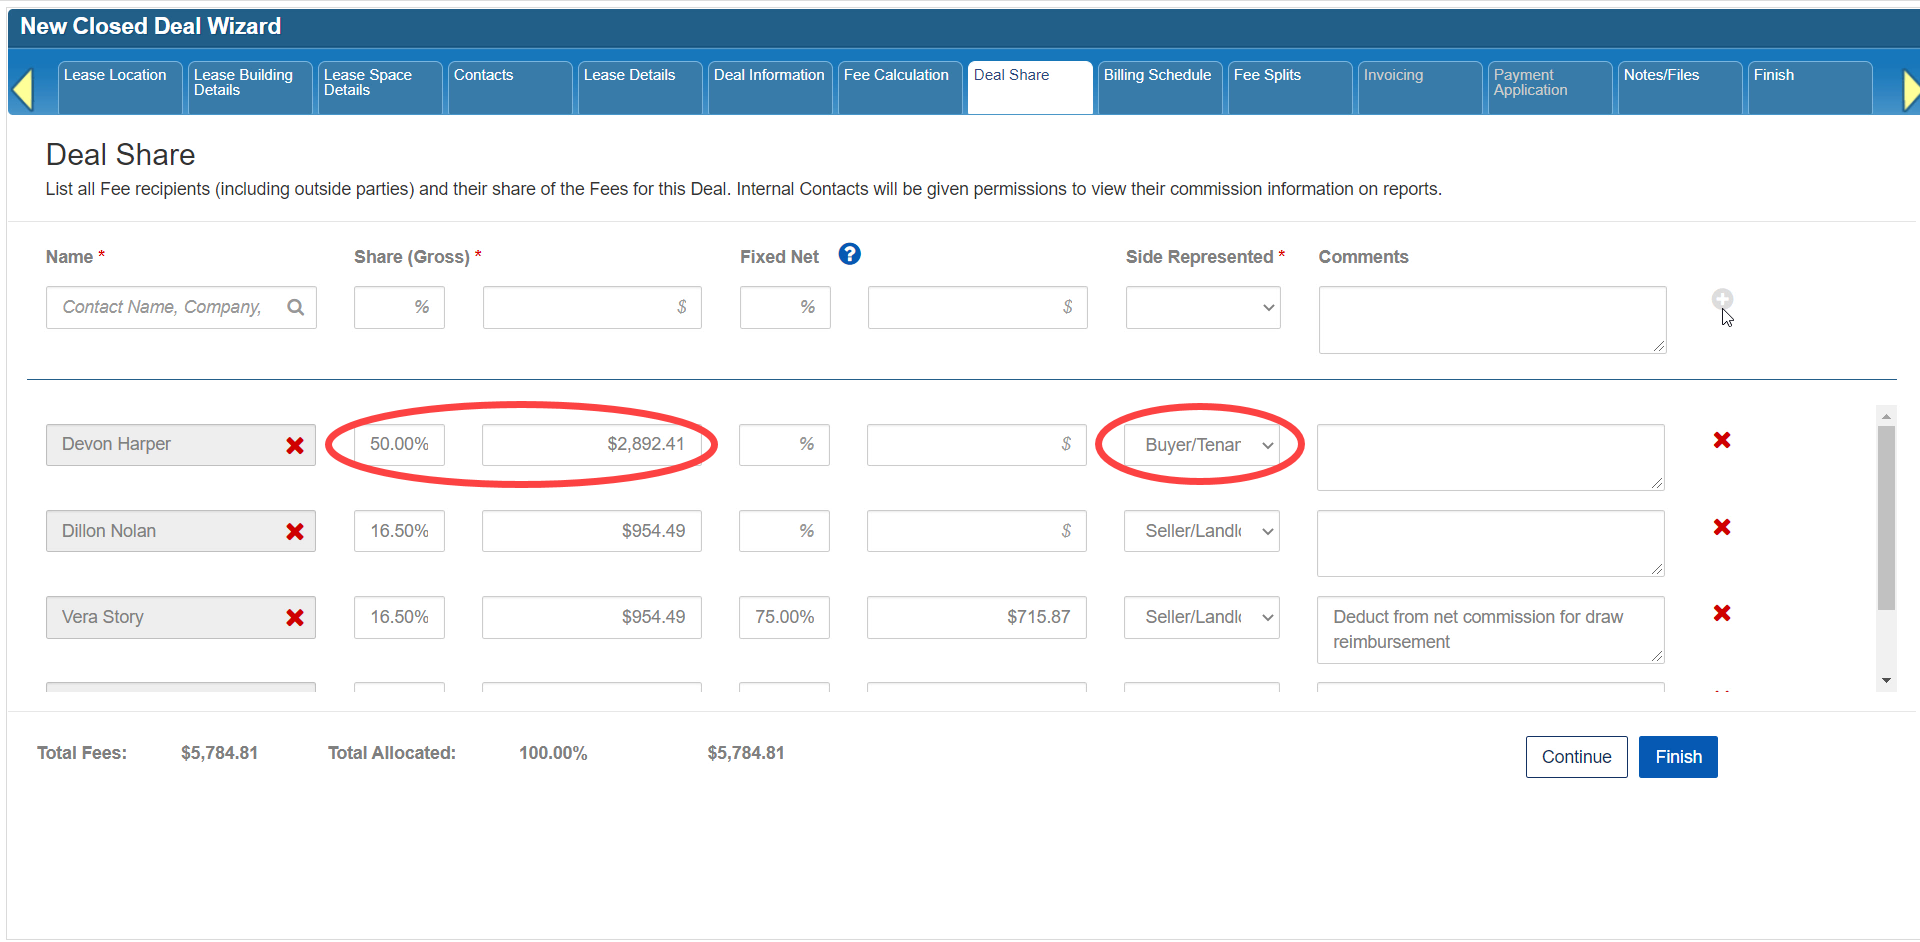
Make sure to also add any outside parties if they are also supposed to receive a portion of the commission or other fees. Remember, you are allocating the entire billable fee amount for this deal.
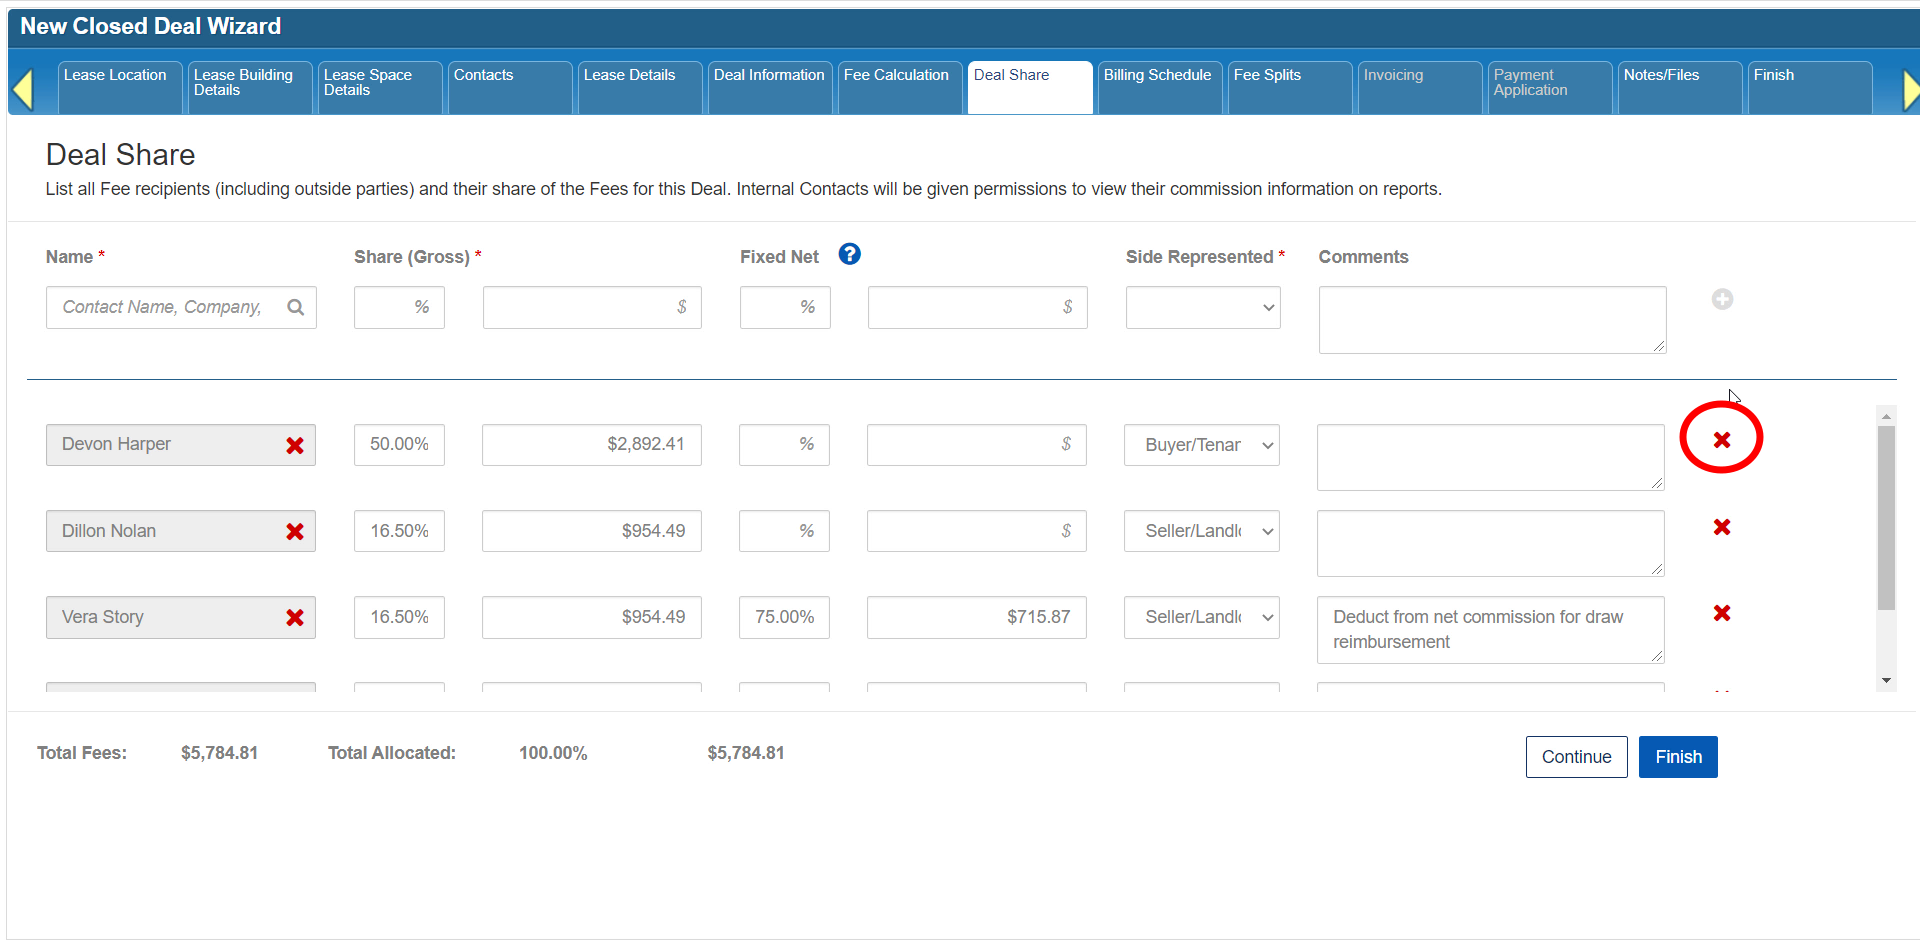
You can also remove any party by clicking on the red [X] icon to the right of that entry.
Once all parties have been added with their allocations and the totals at the bottom match, click Continue to move on to the next step.
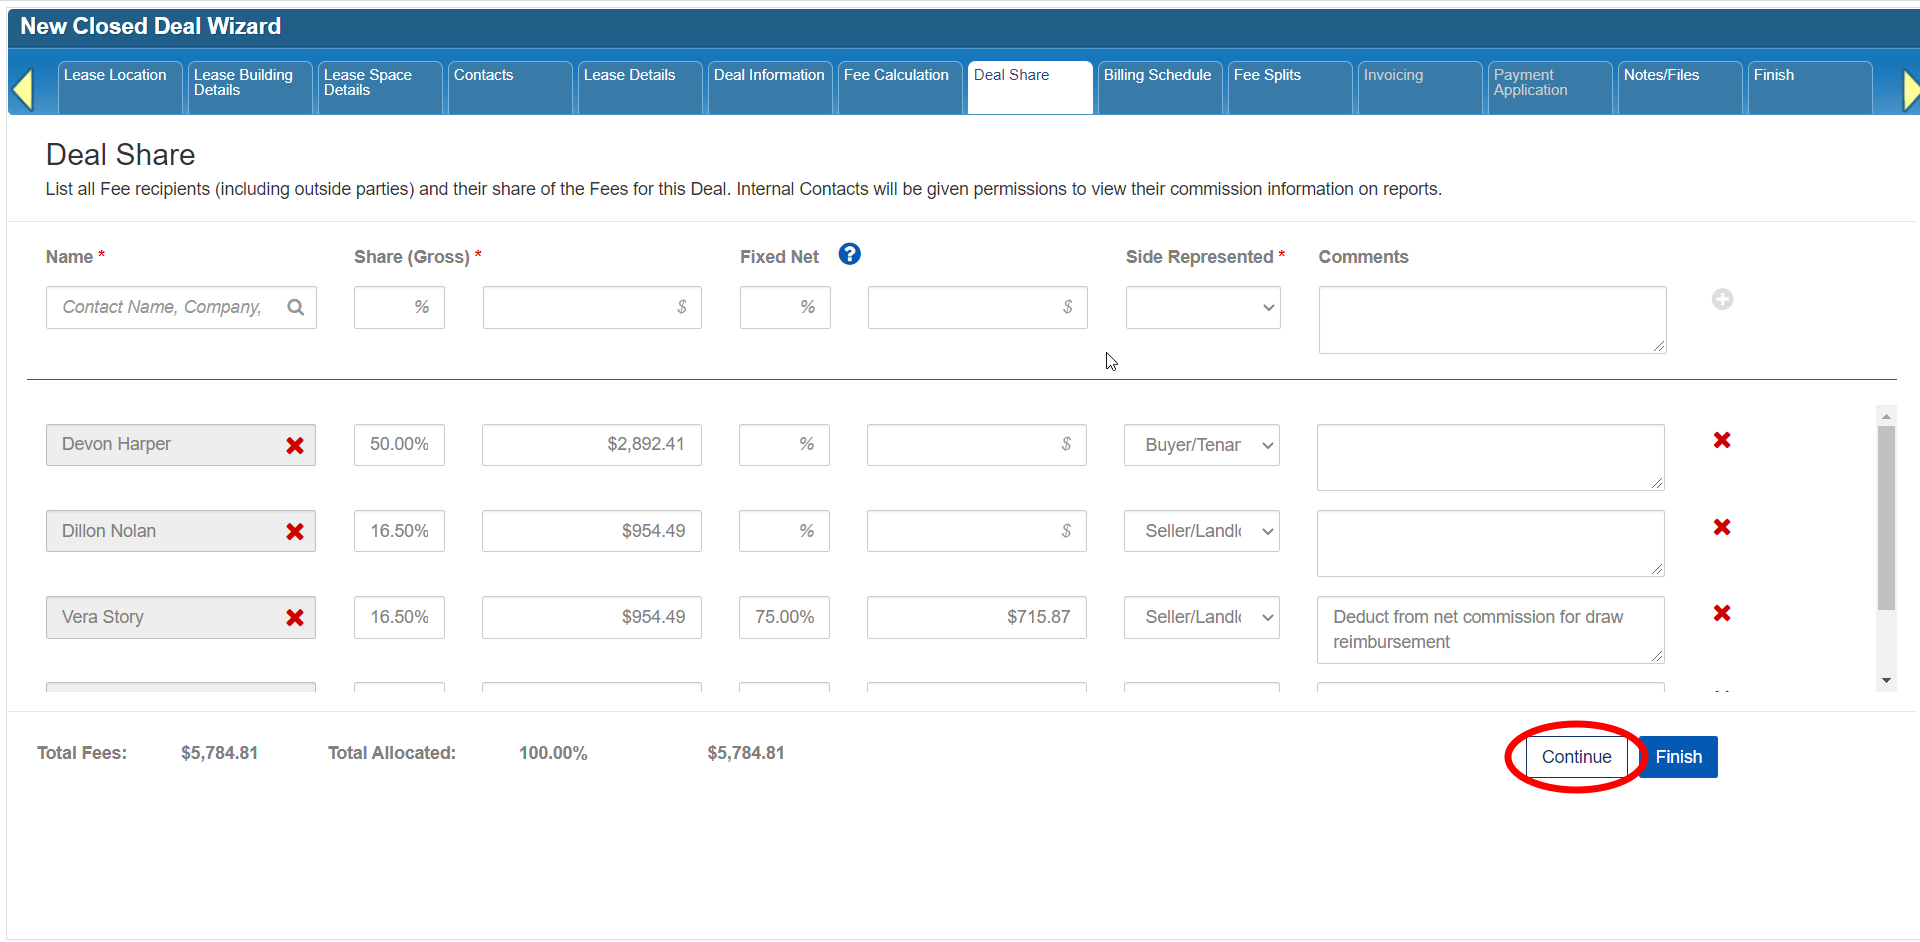
Click here to go to the next tutorial.
Related articles
- How to create a new Closed Deal: Part 2 - New Closed Deal Modal
- How to create a new Closed Deal: Part 3 - Workflow Navigation
- How to create a new Closed Deal: Part 4 - Property
- How to create a new Closed Deal: Part 5 - Space
- How to create a new Closed Deal: Part 6 - Contacts
- How to create a new Closed Deal: Part 7 - Lease Details
- How to create a new Closed Deal: Part 8 - Deal Information
- How to create a new Closed Deal: Part 9 - Fee Calculation
- How to create a new Closed Deal: Part 10 - Fee Splits
- How to create a new Closed Deal: Part 11 - Invoicing
- How to create a new Closed Deal: Part 12 - Payments
- How to create a new Closed Deal: Part 13 - Notes/Files
- How to create a new Closed Deal: Part 14 - Link Project
- How to create a new Closed Deal: Part 15 - Deal Share
- How to create a new Closed Deal: Part 16 - Billing Schedule
- How to create a new Closed Deal: Part 17 - Net Adjustments
- How to create a new Closed Deal: Part 18 - Annuity Schedule
- How to create a new Closed Deal: Part 19 - Sale Details
- How to create a new Closed Deal: Part 20 - Other Starting Points
© 2023 CoStar Group
Attachments:
 CBA - Entering a Closed Deal - 14 Link Project (Time 0_05_11;08)b.png (image/png)
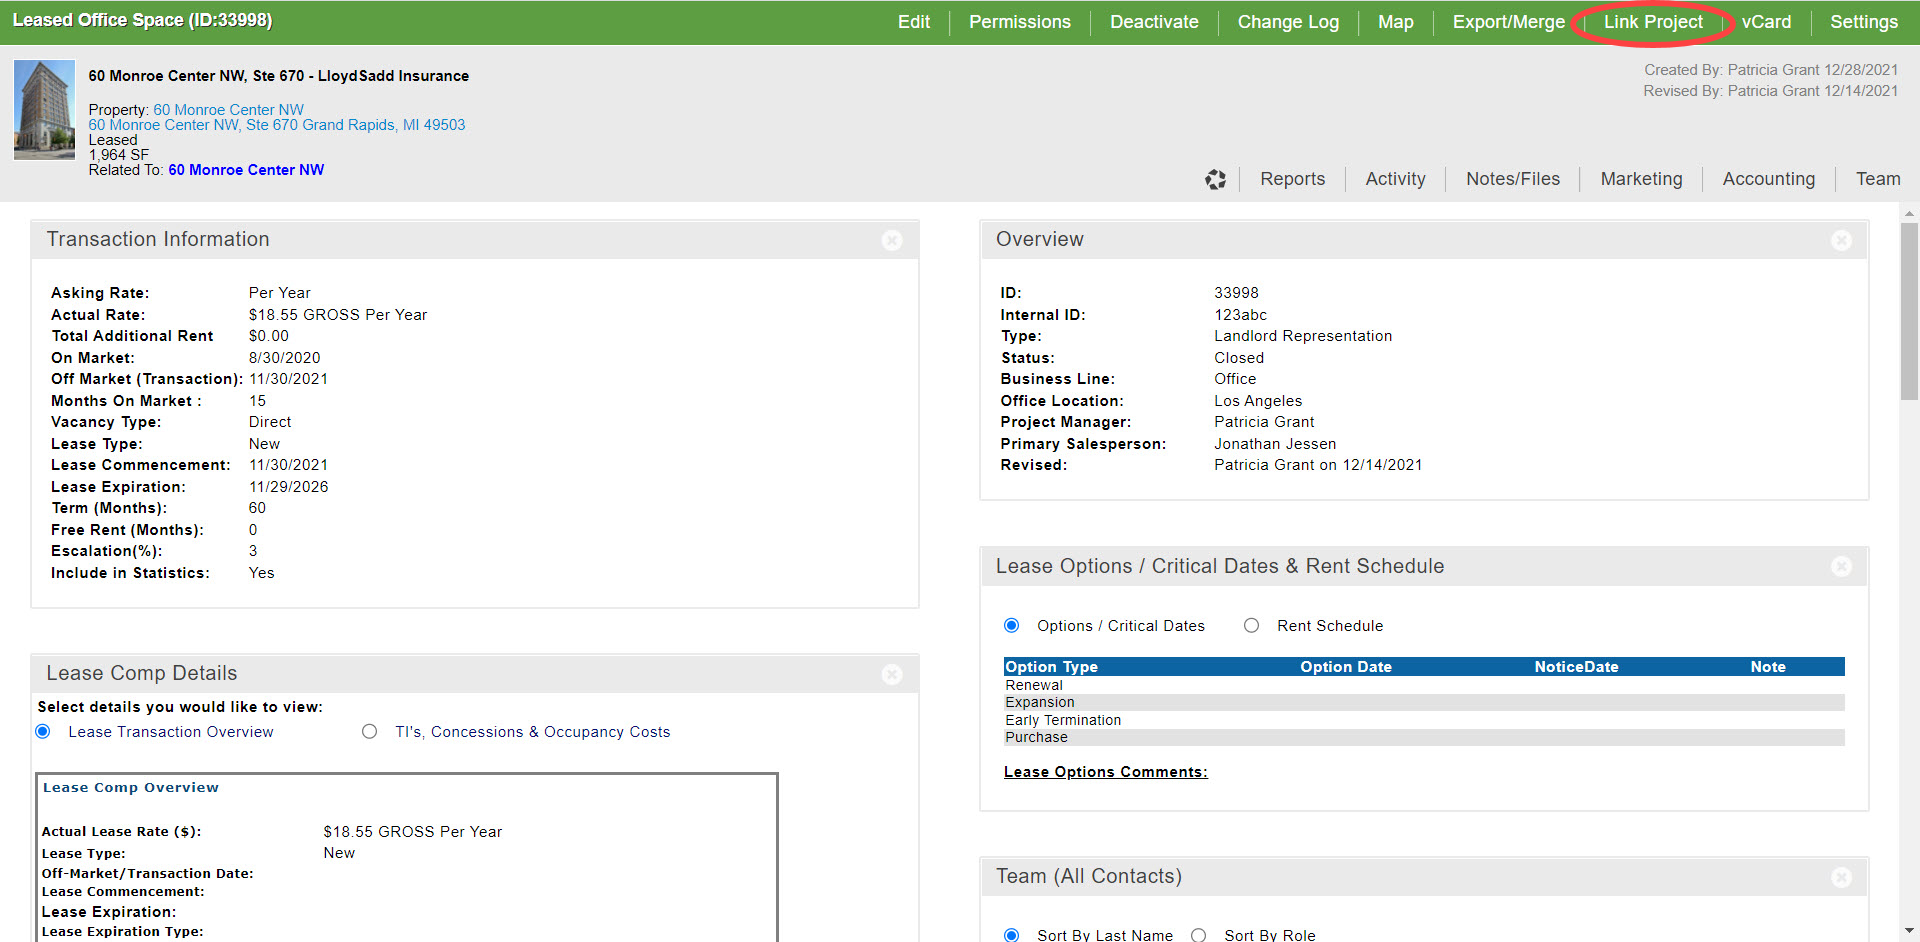 CBA - Entering a Closed Deal - 14 Link Project (Time 0_05_01;15)b.png (image/png)
 CBA - Entering a Closed Deal - 14 Link Project (Time 0_04_57;04)b.png (image/png)
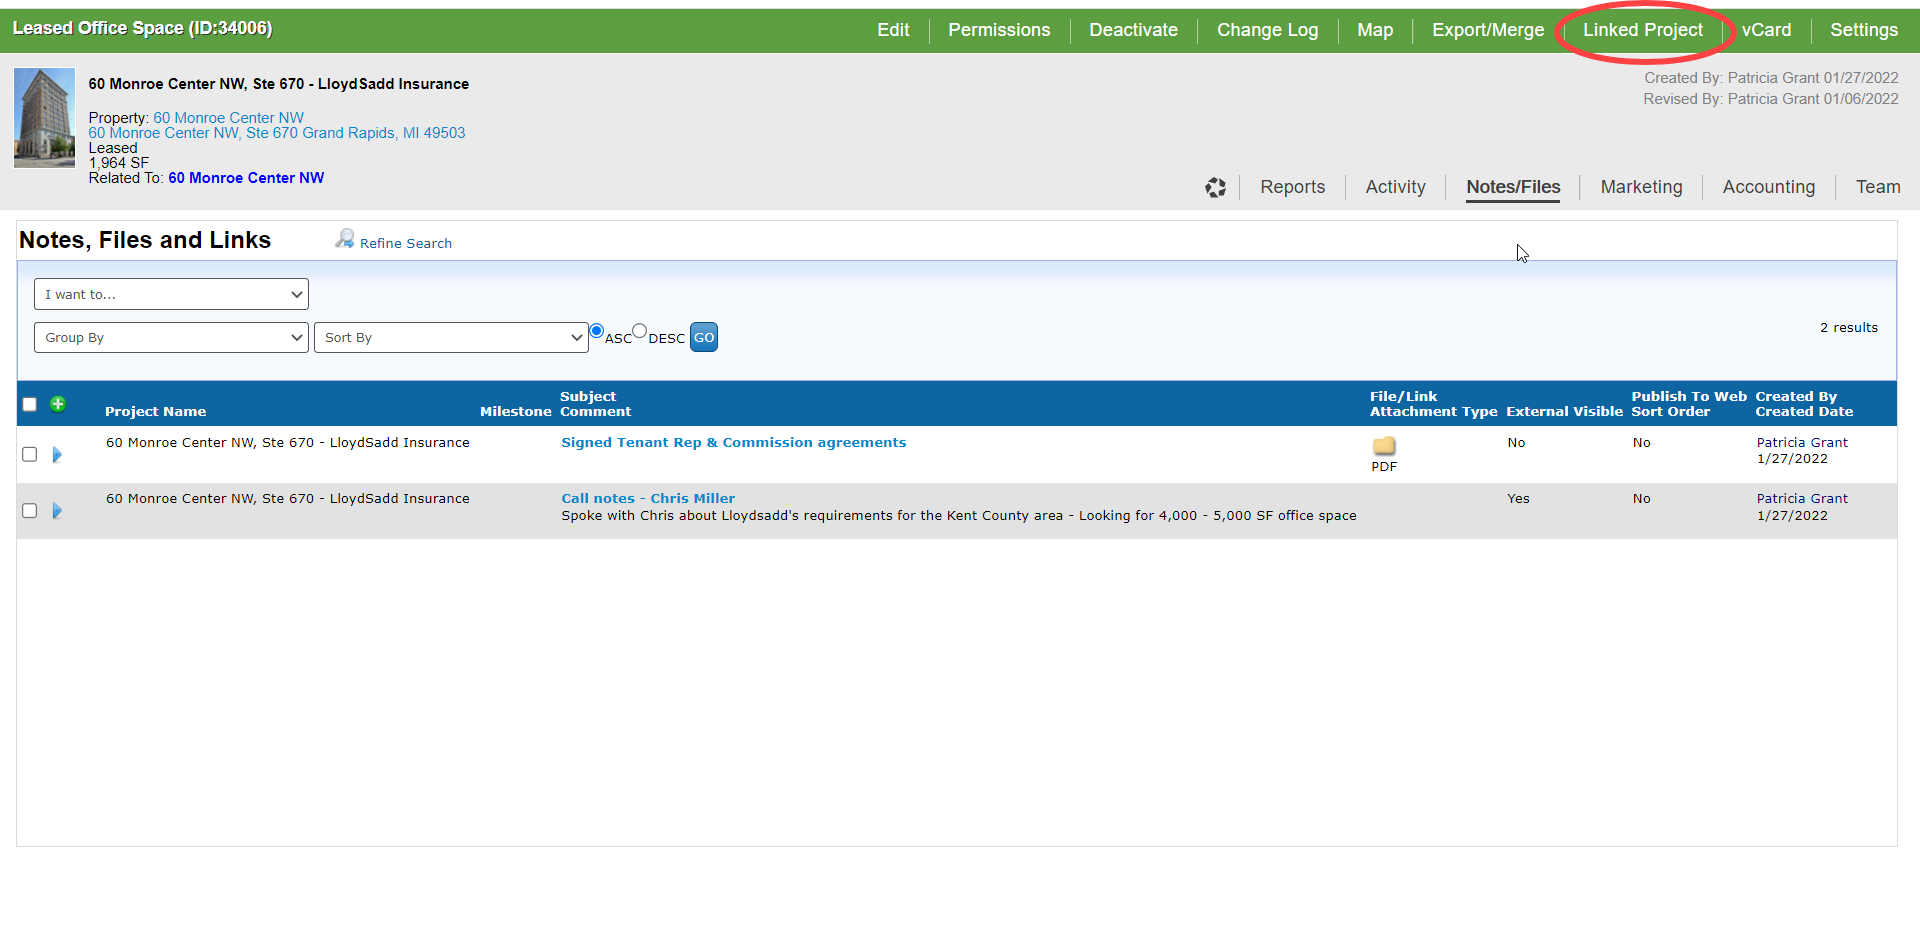 CBA - Entering a Closed Deal - 14 Link Project (Time 0_04_37;16)b.png (image/png)
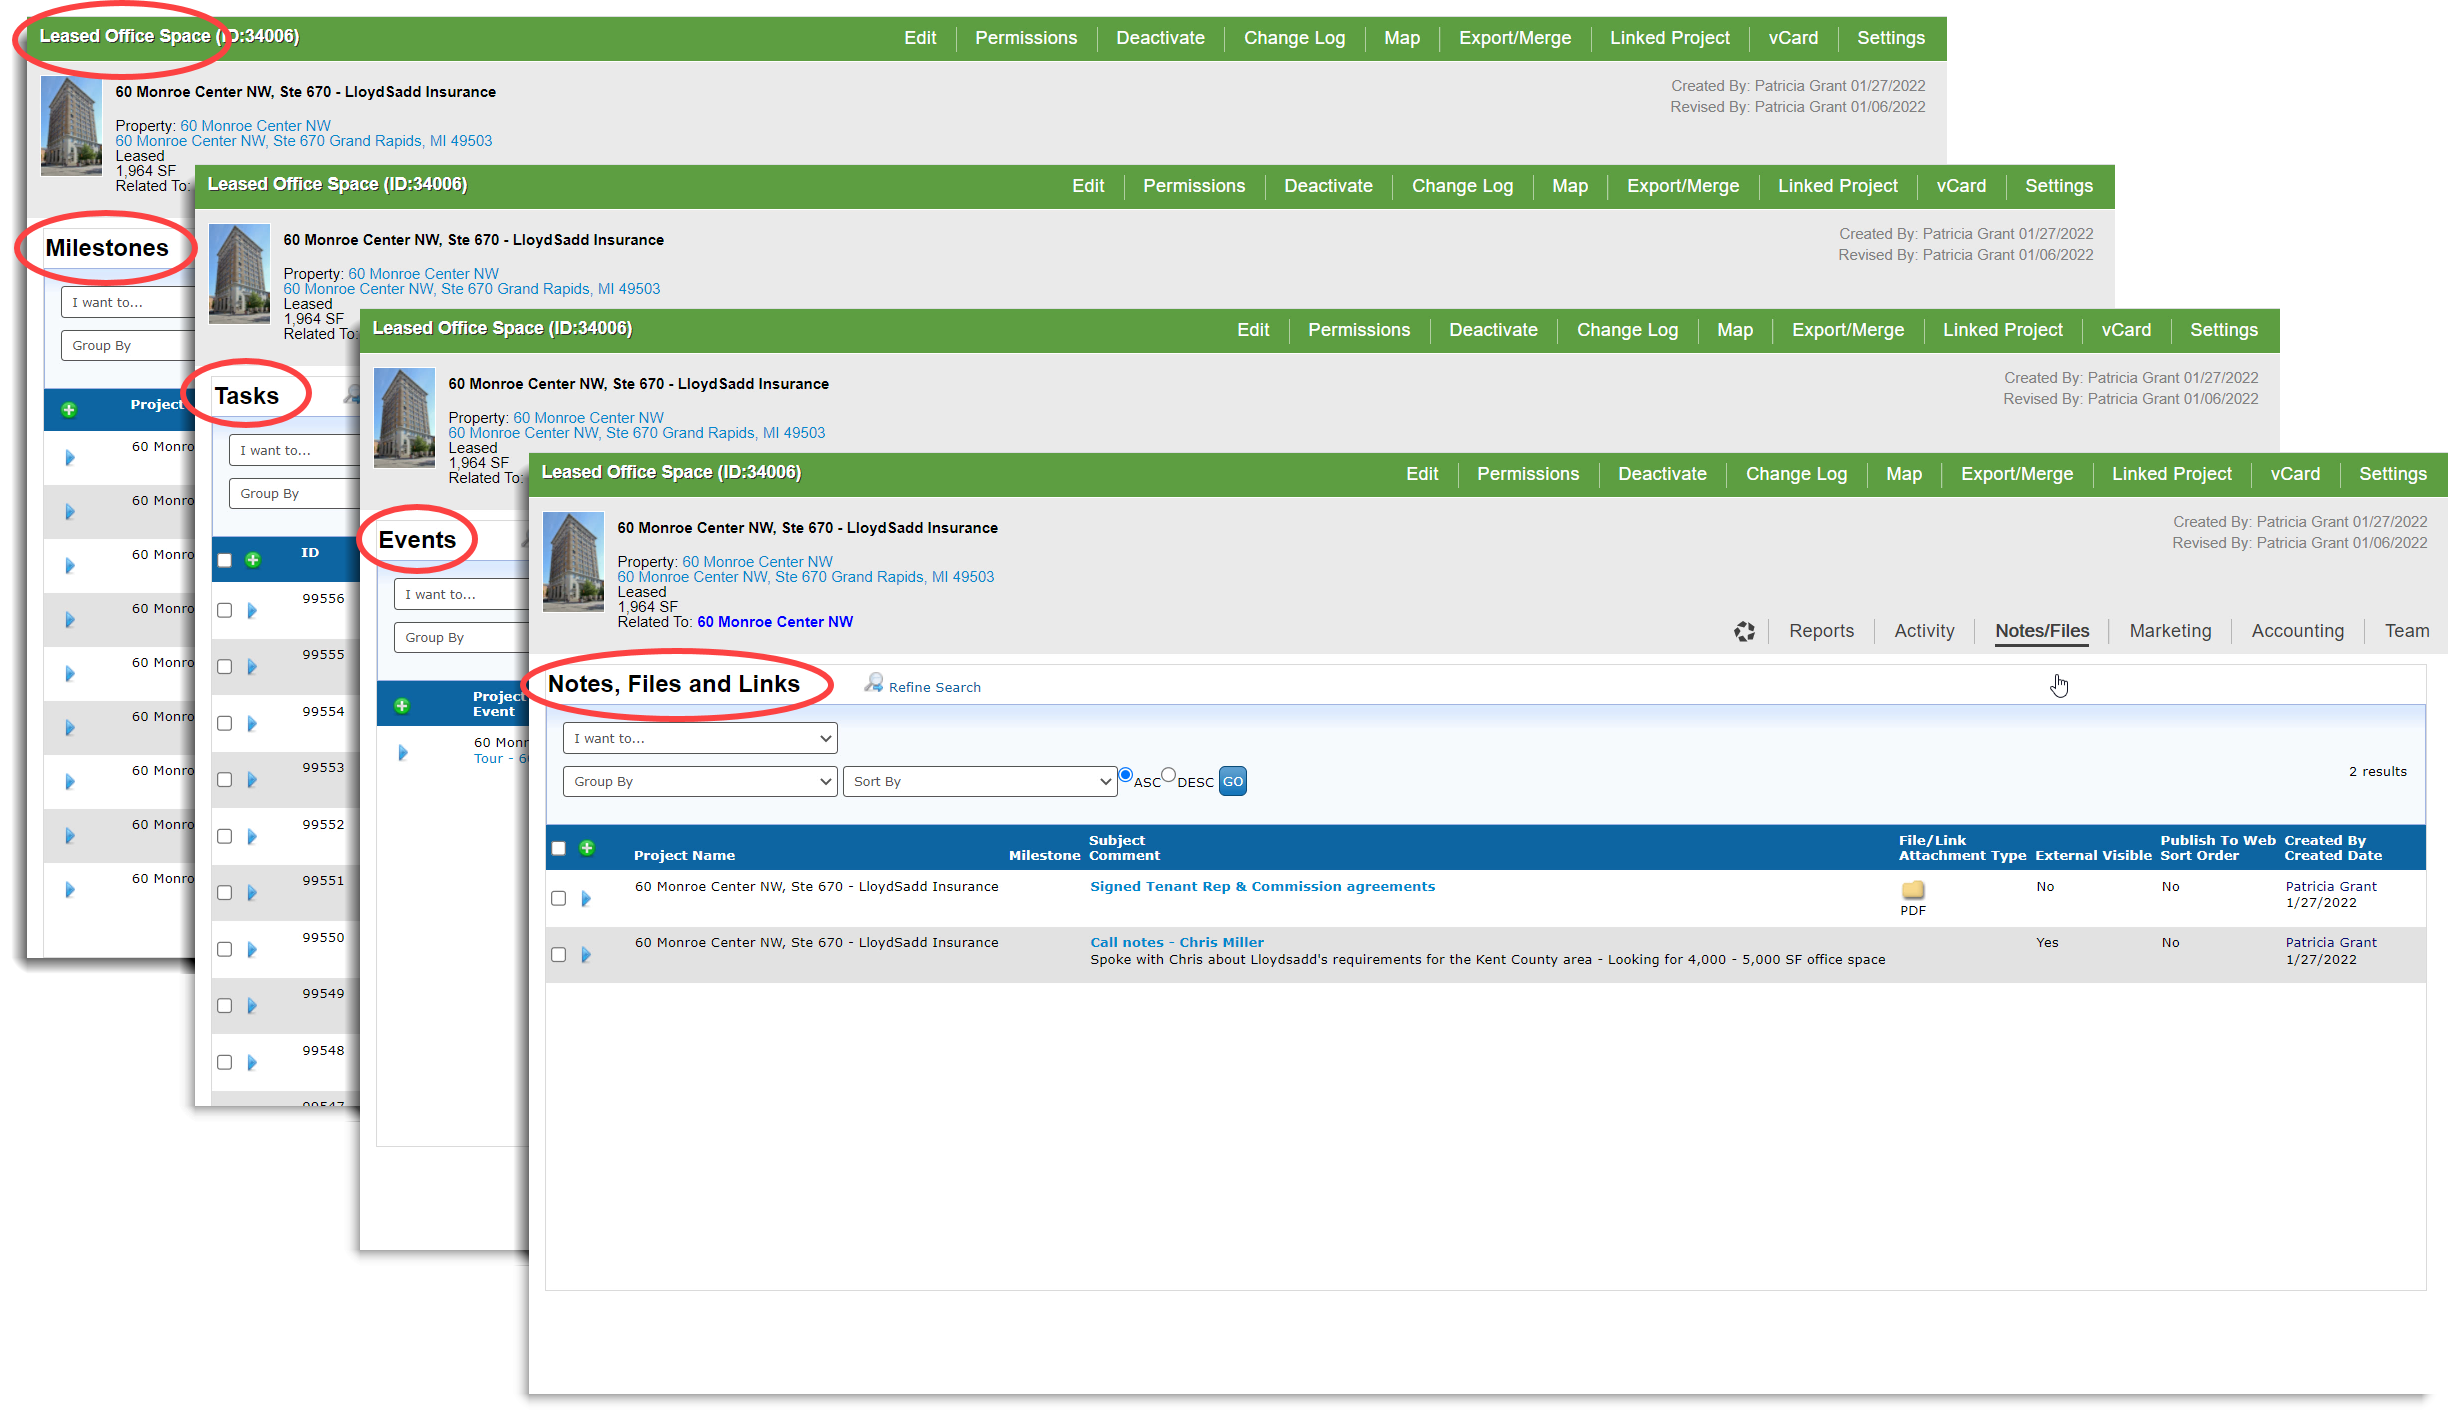 CBA - Entering a Closed Deal - 14 Link Project (Time 0_04_25;04)b.png (image/png)
 CBA - Entering a Closed Deal - 14 Link Project (Time 0_04_21;11).png (image/png)
 CBA - Entering a Closed Deal - 14 Link Project (Time 0_04_12;18).png (image/png)
 2022-01-07_16-29-19.jpg (image/jpeg)
 CBA - Entering a Closed Deal - 14 Link Project (Time 0_03_38;09).png (image/png)
 CBA - Entering a Closed Deal - 14 Link Project (Time 0_03_34;09).png (image/png)
 CBA - Entering a Closed Deal - 14 Link Project (Time 0_03_14;12).png (image/png)
 CBA - Entering a Closed Deal - 14 Link Project (Time 0_03_07;19).png (image/png)
 CBA - Entering a Closed Deal - 14 Link Project (Time 0_02_39;25).png (image/png)
 CBA - Entering a Closed Deal - 14 Link Project (Time 0_02_31;06).png (image/png)
 CBA - Entering a Closed Deal - 14 Link Project (Time 0_02_26;25).png (image/png)
 CBA - Entering a Closed Deal - 14 Link Project (Time 0_02_25;06).png (image/png)
 CBA - Entering a Closed Deal - 14 Link Project (Time 0_02_19;21).png (image/png)
 CBA - Entering a Closed Deal - 14 Link Project (Time 0_02_13;06).png (image/png)
 CBA - Entering a Closed Deal - 14 Link Project (Time 0_01_55;09).png (image/png)
 CBA - Entering a Closed Deal - 14 Link Project (Time 0_01_49;16).png (image/png)
 CBA - Entering a Closed Deal - 14 Link Project (Time 0_01_33;00).png (image/png)
 CBA - Entering a Closed Deal - 14 Link Project (Time 0_01_23;07)b.png (image/png)
 CBA - Entering a Closed Deal - 14 Link Project (Time 0_01_13;06).png (image/png)
 CBA - Entering a Closed Deal - 14 Link Project (Time 0_00_59;28).png (image/png)
 CBA - Entering a Closed Deal - 14 Link Project (Time 0_00_46;20).png (image/png)
 CBA - Entering a Closed Deal - 14 Link Project (Time 0_00_32;23)b.png (image/png)
 CBA - Entering a Closed Deal - 14 Link Project (Time 0_00_27;08).png (image/png)
 CBA - Entering a Closed Deal - 12 Payment (Time 0_05_15;25).png (image/png)
 CBA - Entering a Closed Deal - 12 Payment (Time 0_05_09;25).png (image/png)
 CBA - Entering a Closed Deal - 12 Payment (Time 0_05_05;16).png (image/png)
 CBA - Entering a Closed Deal - 12 Payment (Time 0_04_54;23).png (image/png)
 CBA - Entering a Closed Deal - 12 Payment (Time 0_04_47;09).png (image/png)
 CBA - Entering a Closed Deal - 12 Payment (Time 0_04_34;28).png (image/png)
 CBA - Entering a Closed Deal - 12 Payment (Time 0_04_22;24).png (image/png)
 CBA - Entering a Closed Deal - 12 Payment (Time 0_03_57;09)b.png (image/png)
 CBA - Entering a Closed Deal - 12 Payment (Time 0_03_57;09).png (image/png)
 CBA - Entering a Closed Deal - 12 Payment (Time 0_03_44;25).png (image/png)
 CBA - Entering a Closed Deal - 12 Payment (Time 0_03_29;27).png (image/png)
 CBA - Entering a Closed Deal - 12 Payment (Time 0_03_18;23).png (image/png)
 CBA - Entering a Closed Deal - 12 Payment (Time 0_03_15;06).png (image/png)
 CBA - Entering a Closed Deal - 12 Payment (Time 0_03_00;15).png (image/png)
 CBA - Entering a Closed Deal - 12 Payment (Time 0_02_46;02).png (image/png)
 CBA - Entering a Closed Deal - 12 Payment (Time 0_02_32;10).png (image/png)
 CBA - Entering a Closed Deal - 12 Payment (Time 0_02_17;16).png (image/png)
 CBA - Entering a Closed Deal - 12 Payment (Time 0_02_06;19).png (image/png)
 CBA - Entering a Closed Deal - 12 Payment (Time 0_02_02;21).png (image/png)
 CBA - Entering a Closed Deal - 12 Payment (Time 0_01_48;26).png (image/png)
 CBA - Entering a Closed Deal - 12 Payment (Time 0_01_39;28).png (image/png)
 CBA - Entering a Closed Deal - 12 Payment (Time 0_01_27;13).png (image/png)
 CBA - Entering a Closed Deal - 12 Payment (Time 0_01_16;20).png (image/png)
 CBA - Entering a Closed Deal - 12 Payment (Time 0_00_57;13).png (image/png)
 CBA - Entering a Closed Deal - 12 Payment (Time 0_00_42;22).png (image/png)
 CBA - Entering a Closed Deal - 11 Invoicing (Time 0_04_49;26).png (image/png)
 CBA - Entering a Closed Deal - 10 Fee Splits (Time 0_09_01;07).png (image/png)
 CBA - Entering a Closed Deal - 10 Fee Splits (Time 0_08_56;13).png (image/png)
 CBA - Entering a Closed Deal - 10 Fee Splits (Time 0_08_39;23).png (image/png)
 CBA - Entering a Closed Deal - 10 Fee Splits (Time 0_08_29;09).png (image/png)
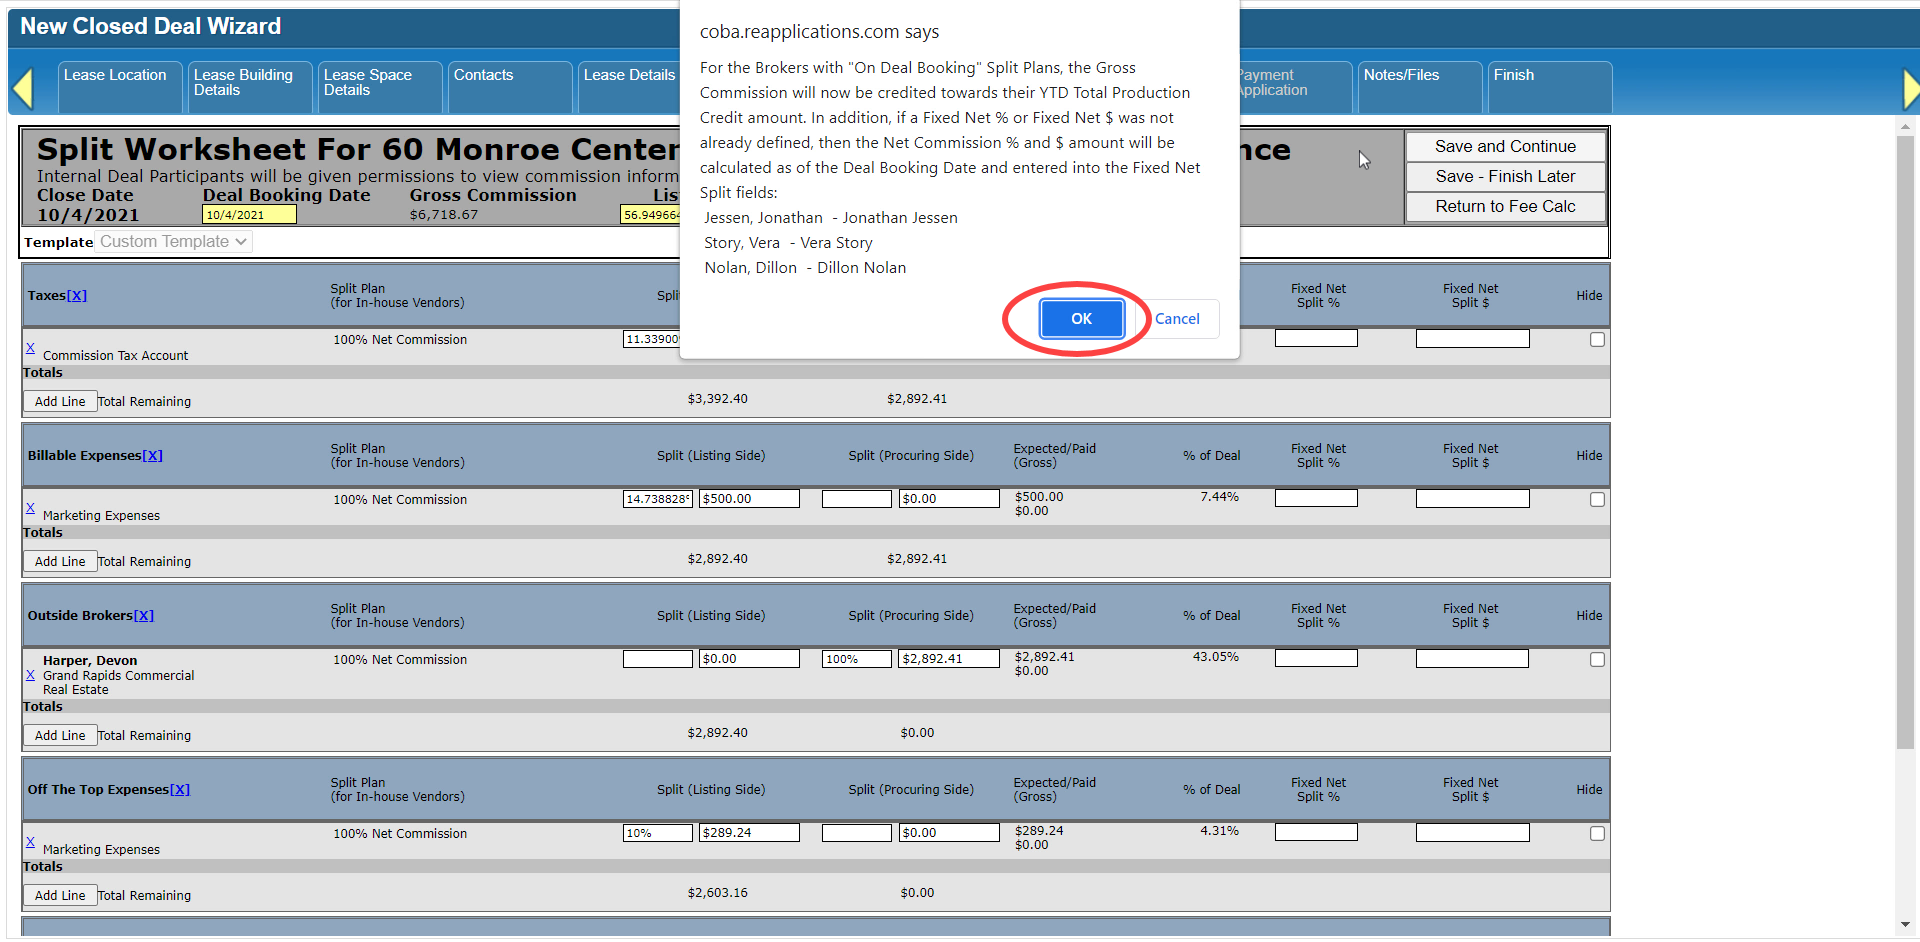 CBA - Entering a Closed Deal - 10 Fee Splits (Time 0_08_24;02).png (image/png)
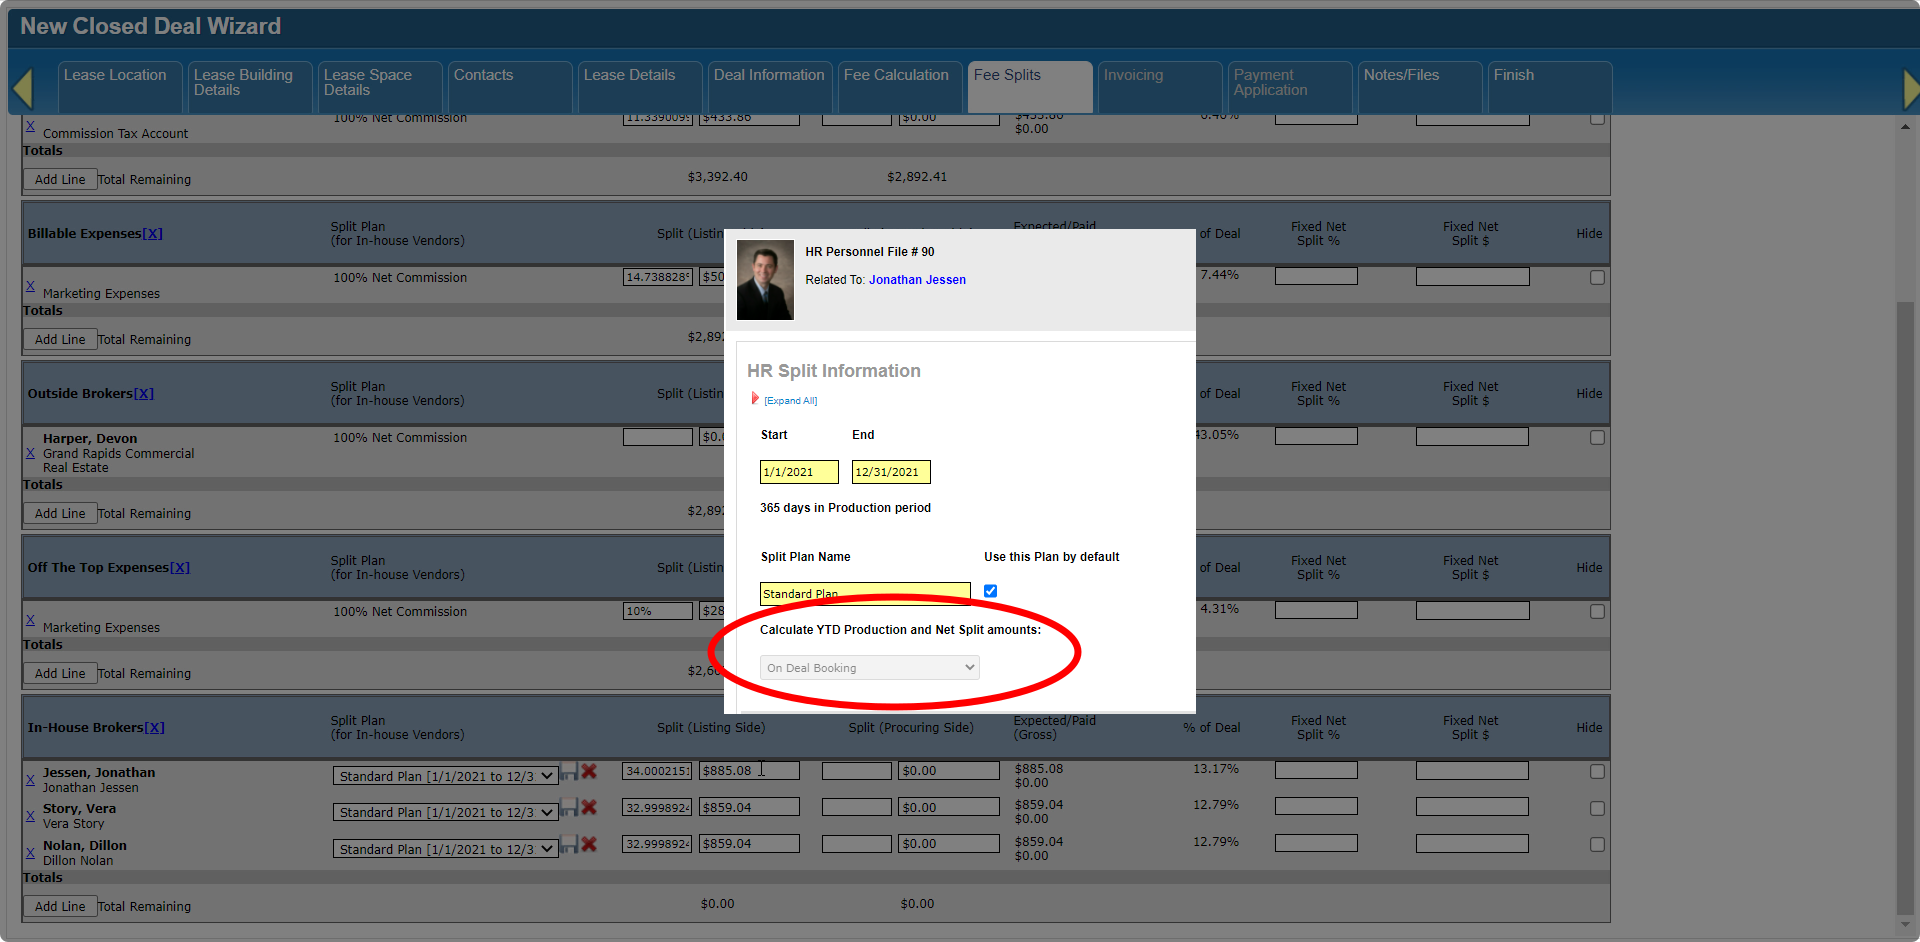 CBA - Entering a Closed Deal - 10 Fee Splits (Time 0_08_09;09).png (image/png)
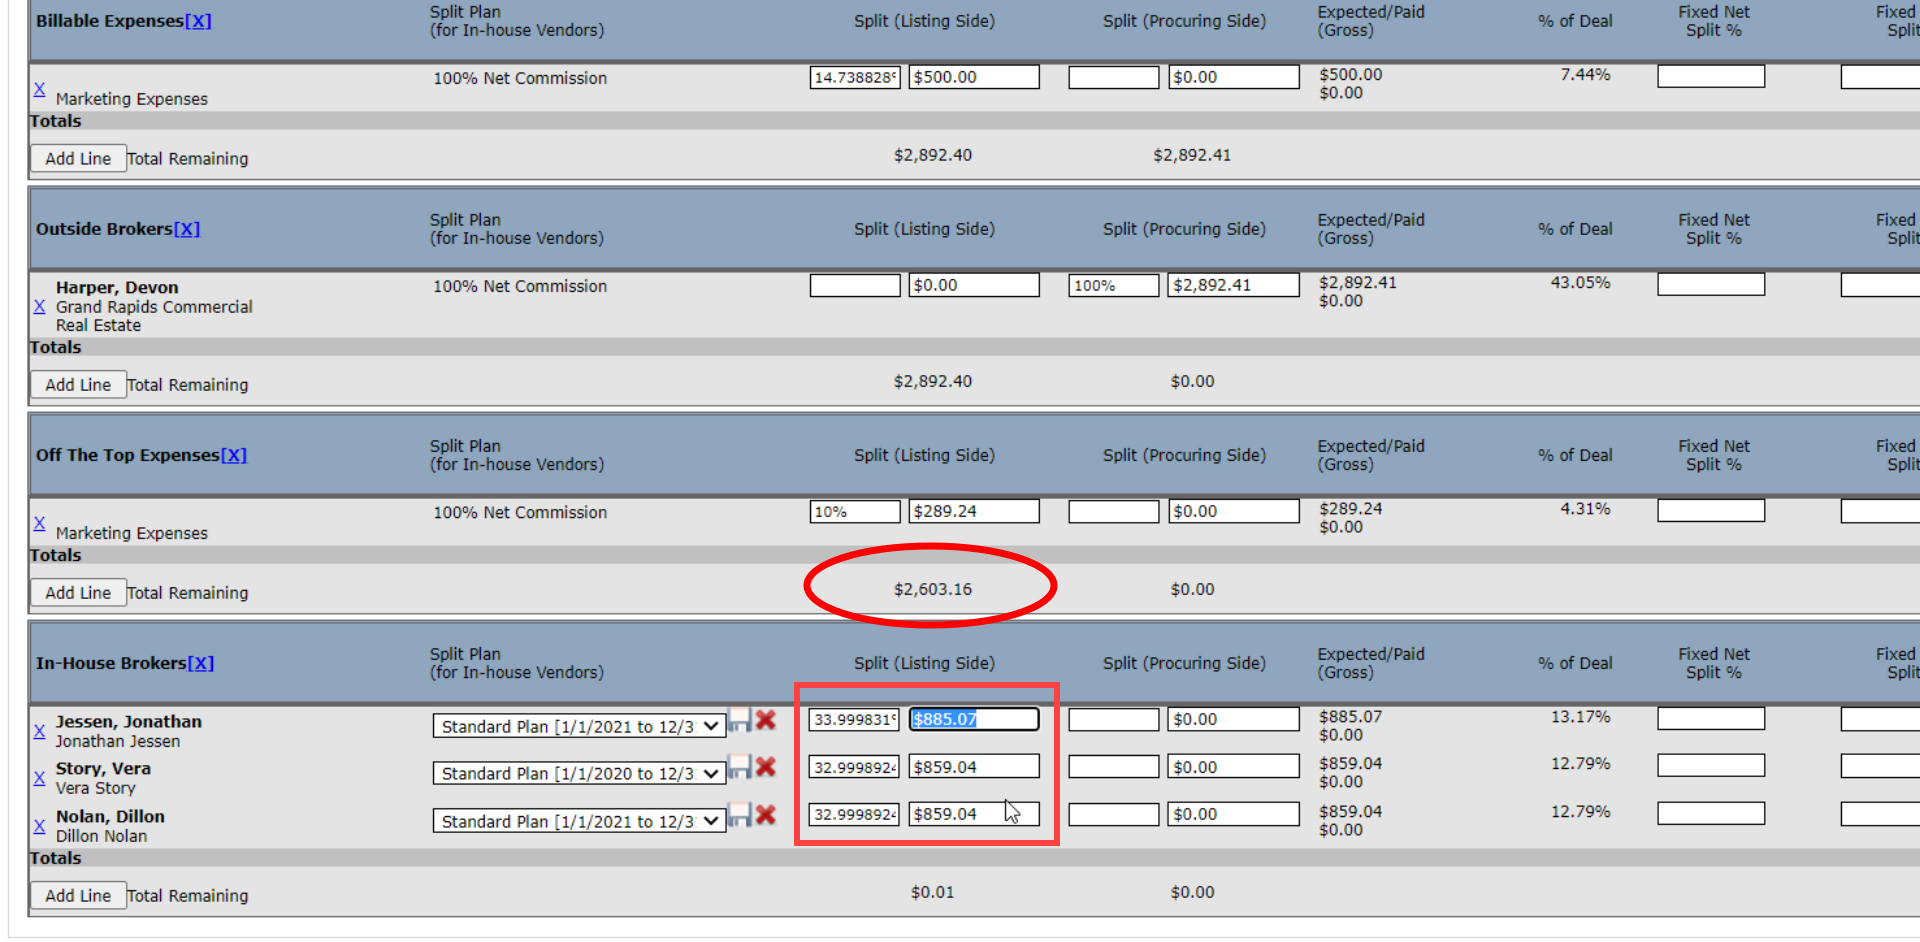 CBA - Entering a Closed Deal - 10 Fee Splits (Time 0_07_51;07).png (image/png)
 CBA - Entering a Closed Deal - 10 Fee Splits (Time 0_07_25;17).png (image/png)
 CBA - Entering a Closed Deal - 10 Fee Splits (Time 0_07_19;24).png (image/png)
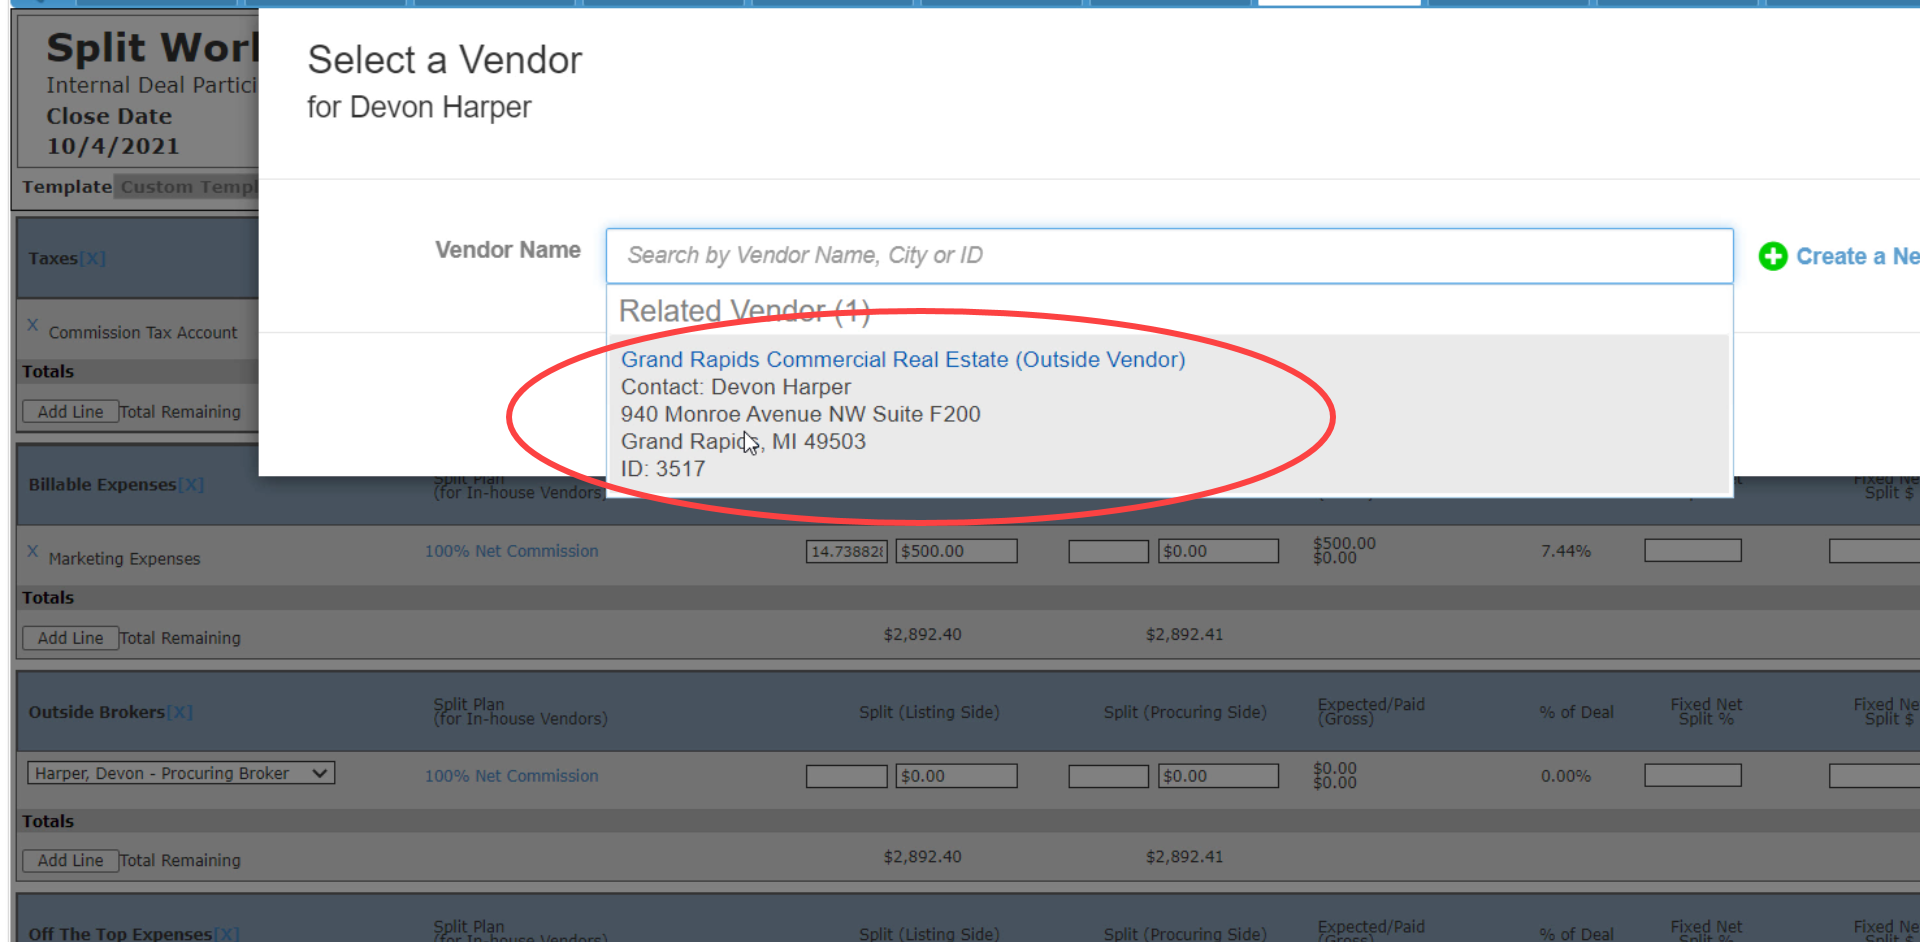 CBA - Entering a Closed Deal - 10 Fee Splits (Time 0_07_17;26).png (image/png)
 CBA - Entering a Closed Deal - 10 Fee Splits (Time 0_07_11;20).png (image/png)
 CBA - Entering a Closed Deal - 10 Fee Splits (Time 0_07_05;27).png (image/png)
 CBA - Entering a Closed Deal - 10 Fee Splits (Time 0_07_01;18).png (image/png)
 CBA - Entering a Closed Deal - 10 Fee Splits (Time 0_06_54;27).png (image/png)
 CBA - Entering a Closed Deal - 10 Fee Splits (Time 0_06_41;22).png (image/png)
 CBA - Entering a Closed Deal - 10 Fee Splits (Time 0_06_28;14).png (image/png)
 CBA - Entering a Closed Deal - 10 Fee Splits (Time 0_06_21;08).png (image/png)
 CBA - Entering a Closed Deal - 10 Fee Splits (Time 0_06_13;20).png (image/png)
 CBA - Entering a Closed Deal - 10 Fee Splits (Time 0_05_49;19).png (image/png)
 CBA - Entering a Closed Deal - 10 Fee Splits (Time 0_05_23;03).png (image/png)
 CBA - Entering a Closed Deal - 10 Fee Splits (Time 0_04_55;09).png (image/png)
 CBA - Entering a Closed Deal - 10 Fee Splits (Time 0_04_36;24).png (image/png)
 CBA - Entering a Closed Deal - 10 Fee Splits (Time 0_04_30;05).png (image/png)
 CBA - Entering a Closed Deal - 10 Fee Splits (Time 0_04_19;14).png (image/png)
 CBA - Entering a Closed Deal - 10 Fee Splits (Time 0_04_14;16)b.png (image/png)
 CBA - Entering a Closed Deal - 10 Fee Splits (Time 0_04_14;16).png (image/png)
 CBA - Entering a Closed Deal - 10 Fee Splits (Time 0_03_53;24).png (image/png)
 CBA - Entering a Closed Deal - 10 Fee Splits (Time 0_03_49;06).png (image/png)
 CBA - Entering a Closed Deal - 10 Fee Splits (Time 0_03_43;16).png (image/png)
 CBA - Entering a Closed Deal - 10 Fee Splits (Time 0_03_19;23).png (image/png)
 CBA - Entering a Closed Deal - 10 Fee Splits (Time 0_03_06;25).png (image/png)
 CBA - Entering a Closed Deal - 10 Fee Splits (Time 0_03_01;27).png (image/png)
 CBA - Entering a Closed Deal - 10 Fee Splits (Time 0_02_48;16).png (image/png)
 CBA - Entering a Closed Deal - 10 Fee Splits (Time 0_02_31;29).png (image/png)
 CBA - Entering a Closed Deal - 10 Fee Splits (Time 0_02_09;19).png (image/png)
 CBA - Entering a Closed Deal - 10 Fee Splits (Time 0_02_02;04).png (image/png)
 CBA - Entering a Closed Deal - 10 Fee Splits (Time 0_01_50;02).png (image/png)
 CBA - Entering a Closed Deal - 10 Fee Splits (Time 0_01_42;05).png (image/png)
 CBA - Entering a Closed Deal - 10 Fee Splits (Time 0_01_28;02).png (image/png)
 CBA - Entering a Closed Deal - 10 Fee Splits (Time 0_01_20;05).png (image/png)
 CBA - Entering a Closed Deal - 10 Fee Splits (Time 0_01_03;21).png (image/png)
 CBA - Entering a Closed Deal - 10 Fee Splits (Time 0_00_50;20).png (image/png)
 CBA - Entering a Closed Deal - 10 Fee Splits (Time 0_00_37;03).png (image/png)
 CBA - Entering a Closed Deal - 10 Fee Splits (Time 0_00_33;01).png (image/png)
 CBA - Entering a Closed Deal - 08 Deal Information (Time 0_03_28;25).png (image/png)
 CBA - Entering a Closed Deal - 08 Deal Information (Time 0_03_14;29).png (image/png)
 CBA - Entering a Closed Deal - 08 Deal Information (Time 0_02_55;26).png (image/png)
 CBA - Entering a Closed Deal - 08 Deal Information (Time 0_02_53;10).png (image/png)
 CBA - Entering a Closed Deal - 08 Deal Information (Time 0_02_38;14).png (image/png)
 CBA - Entering a Closed Deal - 08 Deal Information (Time 0_02_19;07).png (image/png)
 CBA - Entering a Closed Deal - 08 Deal Information (Time 0_02_14;05).png (image/png)
 CBA - Entering a Closed Deal - 08 Deal Information (Time 0_01_55;00).png (image/png)
 CBA - Entering a Closed Deal - 08 Deal Information (Time 0_01_27;04).png (image/png)
 CBA - Entering a Closed Deal - 08 Deal Information (Time 0_01_00;26).png (image/png)
 CBA - Entering a Closed Deal - 08 Deal Information (Time 0_00_52;05).png (image/png)
 CBA - Entering a Closed Deal - 08 Deal Information (Time 0_00_45;08).png (image/png)
 CBA - Entering a Closed Deal - 08 Deal Information (Time 0_00_24;04).png (image/png)
 CBA - Entering a Closed Deal - 06 Contacts (Time 0_03_02;26).png (image/png)
 CBA - Entering a Closed Deal - 06 Contacts (Time 0_03_00;07).png (image/png)
 CBA - Entering a Closed Deal - 06 Contacts (Time 0_02_30;08).png (image/png)
 CBA - Entering a Closed Deal - 06 Contacts (Time 0_02_26;14).png (image/png)
 CBA - Entering a Closed Deal - 06 Contacts (Time 0_02_08;13).png (image/png)
 CBA - Entering a Closed Deal - 06 Contacts (Time 0_01_58;01).png (image/png)
 CBA - Entering a Closed Deal - 06 Contacts (Time 0_01_52;12).png (image/png)
 CBA - Entering a Closed Deal - 06 Contacts (Time 0_01_40;29).png (image/png)
 CBA - Entering a Closed Deal - 06 Contacts (Time 0_01_27;02).png (image/png)
 CBA - Entering a Closed Deal - 06 Contacts (Time 0_01_21;18).png (image/png)
 CBA - Entering a Closed Deal - 06 Contacts (Time 0_00_51;04).png (image/png)
 CBA - Entering a Closed Deal - 06 Contacts (Time 0_00_33;28).png (image/png)
 CBA - Entering a Closed Deal - 04 Property (Time 0_02_52;14).png (image/png)
 CBA - Entering a Closed Deal - 04 Property (Time 0_02_44;24).png (image/png)
 CBA - Entering a Closed Deal - 04 Property (Time 0_02_38;22).png (image/png)
 CBA - Entering a Closed Deal - 04 Property (Time 0_02_19;12).png (image/png)
 CBA - Entering a Closed Deal - 04 Property (Time 0_02_12;07).png (image/png)
 CBA - Entering a Closed Deal - 04 Property (Time 0_02_00;11).png (image/png)
 CBA - Entering a Closed Deal - 04 Property (Time 0_01_40;21).png (image/png)
 CBA - Entering a Closed Deal - 04 Property (Time 0_01_37;08).png (image/png)
 CBA - Entering a Closed Deal - 04 Property (Time 0_01_32;17).png (image/png)
 CBA - Entering a Closed Deal - 04 Property (Time 0_01_25;02).png (image/png)
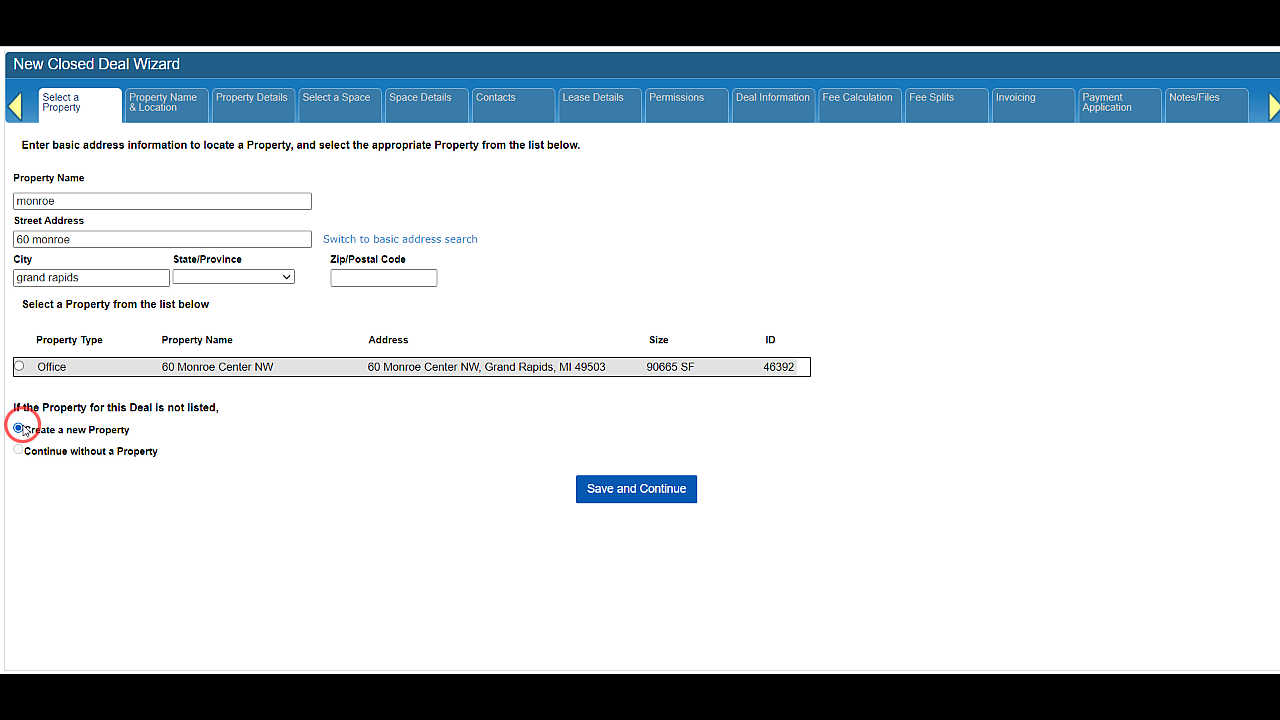 CBA - Entering a Closed Deal - 04 Property (Time 0_01_14;23).png (image/png)
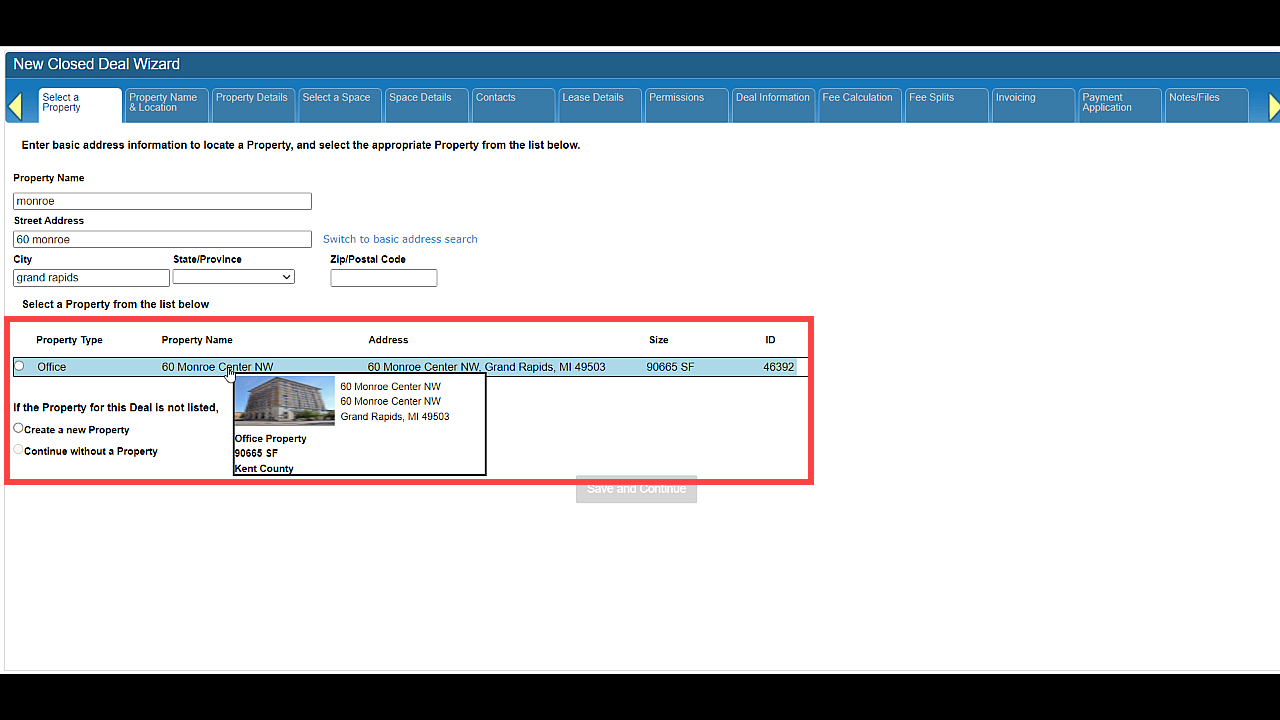 CBA - Entering a Closed Deal - 04 Property (Time 0_00_59;14).png (image/png)
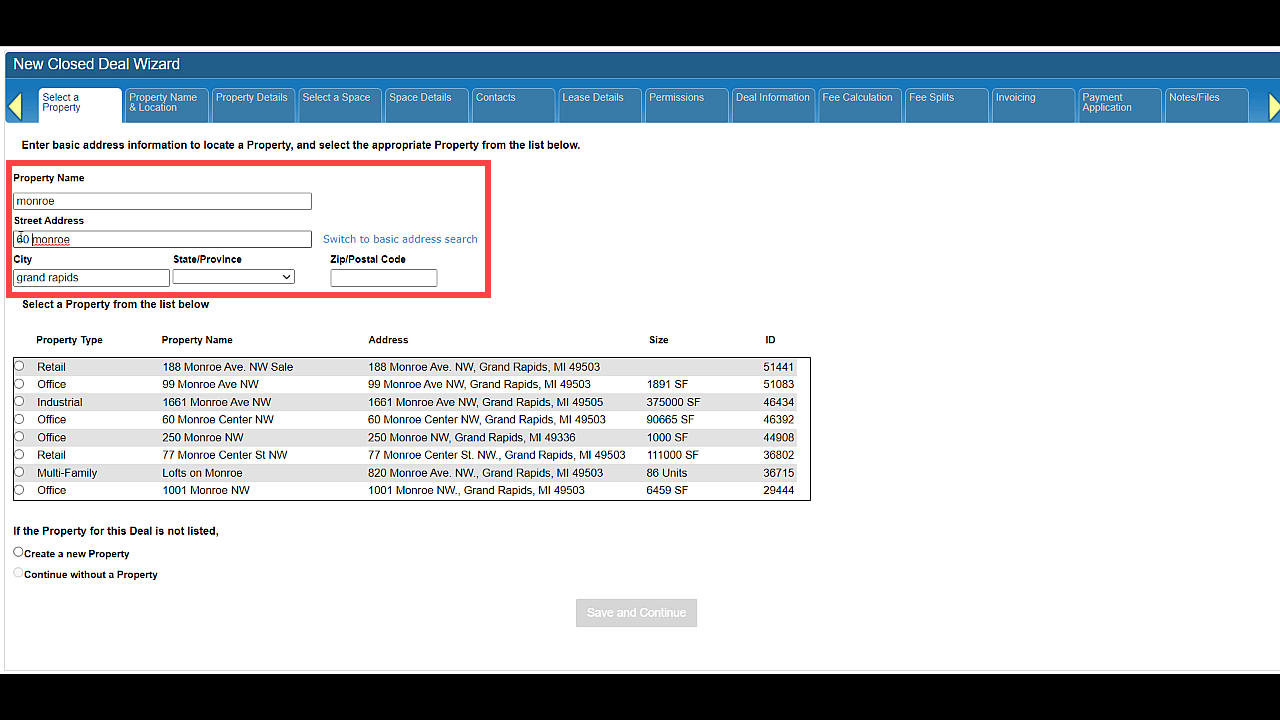 CBA - Entering a Closed Deal - 04 Property (Time 0_00_29;24).png (image/png)
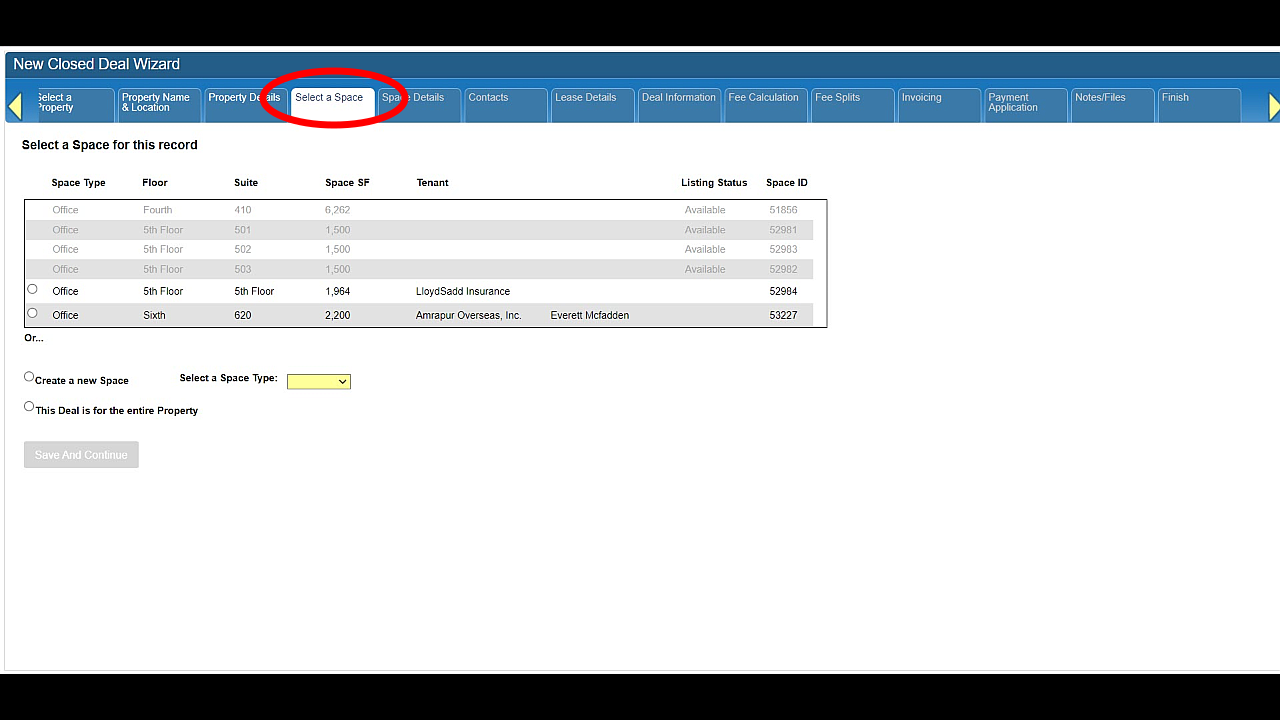 CBA - Entering a Closed Deal - 04 Property (Time 0_00_19;25).png (image/png)
 CBA - Entering a Closed Deal - 02 New Closed Deal Modal all (Time 0_04_23;06).png (image/png)
 CBA - Entering a Closed Deal - 02 New Closed Deal Modal all (Time 0_04_18;08).png (image/png)
 CBA - Entering a Closed Deal - 02 New Closed Deal Modal all (Time 0_03_50;03).png (image/png)
 CBA - Entering a Closed Deal - 02 New Closed Deal Modal all (Time 0_03_28;13).png (image/png)
 CBA - Entering a Closed Deal - 02 New Closed Deal Modal all (Time 0_03_25;09).png (image/png)
 CBA - Entering a Closed Deal - 02 New Closed Deal Modal all (Time 0_02_59;26).png (image/png)
 CBA - Entering a Closed Deal - 02 New Closed Deal Modal all (Time 0_01_27;23).png (image/png)
 CBA - Entering a Closed Deal - 02 New Closed Deal Modal all (Time 0_02_30;26).png (image/png)
 CBA - Entering a Closed Deal - 02 New Closed Deal Modal all (Time 0_02_47;26).png (image/png)
 CBA - Entering a Closed Deal - 02 New Closed Deal Modal all (Time 0_02_43;16).png (image/png)
 CBA - Entering a Closed Deal - 02 New Closed Deal Modal all (Time 0_02_35;01).png (image/png)
 CBA - Entering a Closed Deal - 02 New Closed Deal Modal all (Time 0_02_02;26).png (image/png)
 CBA - Entering a Closed Deal - 02 New Closed Deal Modal all (Time 0_01_54;08).png (image/png)
 CBA - Entering a Closed Deal - 02 New Closed Deal Modal all (Time 0_01_44;04).png (image/png)
 CBA - Entering a Closed Deal - 02 New Closed Deal Modal all (Time 0_01_09;13).png (image/png)
 CBA - Entering a Closed Deal - 02 New Closed Deal Modal all (Time 0_00_31;29).png (image/png)
 CBA - Entering a Closed Deal - 03 Workflow Navigation (Time 0_00_23;29).png (image/png)
 CBA - Entering a Closed Deal - 03 Workflow Navigation (Time 0_00_37;04).png (image/png)
 CBA - Entering a Closed Deal - 03 Workflow Navigation (Time 0_00_48;01).png (image/png)
 CBA - Entering a Closed Deal - 03 Workflow Navigation (Time 0_01_01;06).png (image/png)
 CBA - Entering a Closed Deal - 03 Workflow Navigation (Time 0_01_27;28).png (image/png)
 CBA - Entering a Closed Deal - 05 Space (Time 0_00_21;08).png (image/png)
 CBA - Entering a Closed Deal - 05 Space (Time 0_00_26;10).png (image/png)
 CBA - Entering a Closed Deal - 05 Space (Time 0_00_30;17).png (image/png)
 CBA - Entering a Closed Deal - 05 Space (Time 0_00_42;06).png (image/png)
 CBA - Entering a Closed Deal - 05 Space (Time 0_01_00;08).png (image/png)
 CBA - Entering a Closed Deal - 05 Space (Time 0_01_04;25).png (image/png)
 CBA - Entering a Closed Deal - 05 Space (Time 0_01_11;23).png (image/png)
 CBA - Entering a Closed Deal - 05 Space (Time 0_01_24;18).png (image/png)
 CBA - Entering a Closed Deal - 05 Space (Time 0_02_43;08).png (image/png)
 CBA - Entering a Closed Deal - 05 Space (Time 0_02_48;10).png (image/png)
 CBA - Entering a Closed Deal - 07 Lease Details (Time 0_00_19;09).png (image/png)
 CBA - Entering a Closed Deal - 07 Lease Details (Time 0_01_03;21).png (image/png)
 CBA - Entering a Closed Deal - 07 Lease Details (Time 0_01_26;00).png (image/png)
 CBA - Entering a Closed Deal - 07 Lease Details (Time 0_01_30;17).png (image/png)
 CBA - Entering a Closed Deal - 07 Lease Details (Time 0_01_52;03).png (image/png)
 CBA - Entering a Closed Deal - 07 Lease Details (Time 0_02_08;29).png (image/png)
 CBA - Entering a Closed Deal - 07 Lease Details (Time 0_02_33;17).png (image/png)
 CBA - Entering a Closed Deal - 07 Lease Details (Time 0_02_40;00).png (image/png)
 CBA - Entering a Closed Deal - 07 Lease Details (Time 0_02_59;26).png (image/png)
 CBA - Entering a Closed Deal - 07 Lease Details (Time 0_03_10;18).png (image/png)
 CBA - Entering a Closed Deal - 07 Lease Details (Time 0_03_23;17).png (image/png)
 CBA - Entering a Closed Deal - 07 Lease Details (Time 0_03_28;24).png (image/png)
 CBA - Entering a Closed Deal - 07 Lease Details (Time 0_03_50;07).png (image/png)
 CBA - Entering a Closed Deal - 07 Lease Details (Time 0_03_58;14).png (image/png)
 CBA - Entering a Closed Deal - 07 Lease Details (Time 0_04_05;00).png (image/png)
 CBA - Entering a Closed Deal - 09 Fee Calculation (Time 0_00_50;07).png (image/png)
 CBA - Entering a Closed Deal - 09 Fee Calculation (Time 0_00_46;04).png (image/png)
 CBA - Entering a Closed Deal - 09 Fee Calculation (Time 0_00_28;17).png (image/png)
 CBA - Entering a Closed Deal - 09 Fee Calculation (Time 0_00_21;20).png (image/png)
 CBA - Entering a Closed Deal - 09 Fee Calculation (Time 0_00_19;20).png (image/png)
 CBA - Entering a Closed Deal - 09 Fee Calculation (Time 0_01_01;20).png (image/png)
 CBA - Entering a Closed Deal - 09 Fee Calculation (Time 0_01_31;07).png (image/png)
 CBA - Entering a Closed Deal - 09 Fee Calculation (Time 0_01_41;29).png (image/png)
 CBA - Entering a Closed Deal - 09 Fee Calculation (Time 0_01_45;20).png (image/png)
 CBA - Entering a Closed Deal - 09 Fee Calculation (Time 0_01_59;03).png (image/png)
 CBA - Entering a Closed Deal - 09 Fee Calculation (Time 0_02_26;19).png (image/png)
 CBA - Entering a Closed Deal - 09 Fee Calculation (Time 0_02_41;15).png (image/png)
 CBA - Entering a Closed Deal - 09 Fee Calculation (Time 0_03_19;09).png (image/png)
 CBA - Entering a Closed Deal - 09 Fee Calculation (Time 0_03_25;21).png (image/png)
 CBA - Entering a Closed Deal - 09 Fee Calculation (Time 0_03_40;27).png (image/png)
 CBA - Entering a Closed Deal - 11 Invoicing (Time 0_00_27;14).png (image/png)
 CBA - Entering a Closed Deal - 11 Invoicing (Time 0_00_53;21).png (image/png)
 CBA - Entering a Closed Deal - 11 Invoicing (Time 0_01_00;06).png (image/png)
 CBA - Entering a Closed Deal - 11 Invoicing (Time 0_01_06;10).png (image/png)
 CBA - Entering a Closed Deal - 11 Invoicing (Time 0_01_14;14).png (image/png)
 CBA - Entering a Closed Deal - 11 Invoicing (Time 0_01_17;06).png (image/png)
 CBA - Entering a Closed Deal - 11 Invoicing (Time 0_01_32;13).png (image/png)
 CBA - Entering a Closed Deal - 11 Invoicing (Time 0_01_38;20).png (image/png)
 CBA - Entering a Closed Deal - 11 Invoicing (Time 0_01_47;01).png (image/png)
 CBA - Entering a Closed Deal - 11 Invoicing (Time 0_01_57;12).png (image/png)
 CBA - Entering a Closed Deal - 11 Invoicing (Time 0_02_05;23).png (image/png)
 CBA - Entering a Closed Deal - 11 Invoicing (Time 0_02_17;23).png (image/png)
 CBA - Entering a Closed Deal - 11 Invoicing (Time 0_02_24;27).png (image/png)
 CBA - Entering a Closed Deal - 11 Invoicing (Time 0_02_28;27).png (image/png)
 CBA - Entering a Closed Deal - 11 Invoicing (Time 0_02_41;23).png (image/png)
 CBA - Entering a Closed Deal - 11 Invoicing (Time 0_02_51;27).png (image/png)
 CBA - Entering a Closed Deal - 11 Invoicing (Time 0_02_51;27)b.png (image/png)
 CBA - Entering a Closed Deal - 11 Invoicing (Time 0_03_07;01).png (image/png)
 CBA - Entering a Closed Deal - 11 Invoicing (Time 0_03_27;19).png (image/png)
 CBA - Entering a Closed Deal - 11 Invoicing (Time 0_03_30;19).png (image/png)
 CBA - Entering a Closed Deal - 11 Invoicing (Time 0_03_38;08).png (image/png)
 CBA - Entering a Closed Deal - 11 Invoicing (Time 0_03_41;15).png (image/png)
 CBA - Entering a Closed Deal - 11 Invoicing (Time 0_03_44;12).png (image/png)
 CBA - Entering a Closed Deal - 11 Invoicing (Time 0_03_57;27).png (image/png)
 CBA - Entering a Closed Deal - 11 Invoicing (Time 0_04_05;12).png (image/png)
 CBA - Entering a Closed Deal - 11 Invoicing (Time 0_04_16;19).png (image/png)
 CBA - Entering a Closed Deal - 11 Invoicing (Time 0_04_27;27).png (image/png)
 CBA - Entering a Closed Deal - 11 Invoicing (Time 0_04_34;19).png (image/png)
 CBA - Entering a Closed Deal - 11 Invoicing (Time 0_04_58;18).png (image/png)
 CBA - Entering a Closed Deal - 11 Invoicing (Time 0_05_05;29).png (image/png)
 CBA - Entering a Closed Deal - 11 Invoicing (Time 0_05_17;29).png (image/png)
 CBA - Entering a Closed Deal - 13 Notes (Time 0_00_21;22).png (image/png)
 CBA - Entering a Closed Deal - 13 Notes (Time 0_00_46;17).png (image/png)
 CBA - Entering a Closed Deal - 13 Notes (Time 0_00_55;19).png (image/png)
 CBA - Entering a Closed Deal - 13 Notes (Time 0_01_01;07).png (image/png)
 CBA - Entering a Closed Deal - 13 Notes (Time 0_01_08;16).png (image/png)
 CBA - Entering a Closed Deal - 13 Notes (Time 0_01_28;22).png (image/png)
 CBA - Entering a Closed Deal - 13 Notes (Time 0_02_06;29).png (image/png)
 CBA - Entering a Closed Deal - 13 Notes (Time 0_02_15;03).png (image/png)
 CBA - Entering a Closed Deal - 13 Notes (Time 0_02_16;23).png (image/png)
 CBA - Entering a Closed Deal - 13 Notes (Time 0_02_35;23).png (image/png)
 CBA - Entering a Closed Deal - 13 Notes (Time 0_02_45;17).png (image/png)
 CBA - Entering a Closed Deal - 13 Notes (Time 0_02_59;02).png (image/png)
 CBA - Entering a Closed Deal - 13 Notes (Time 0_03_06;03).png (image/png)
 CBA - Entering a Closed Deal - 13 Notes (Time 0_03_21;05).png (image/png)
 CBA - Entering a Closed Deal - 13 Notes (Time 0_03_29;19).png (image/png)
 CBA - Entering a Closed Deal - 13 Notes (Time 0_03_37;08).png (image/png)
 CBA - Entering a Closed Deal - 13 Notes (Time 0_03_49;06).png (image/png)
 CBA - Entering a Closed Deal - 13 Notes (Time 0_03_58;16).png (image/png)
 CBA - Entering a Closed Deal - 13 Notes (Time 0_04_15;19).png (image/png)
 CBA - Entering a Closed Deal - 13 Notes (Time 0_04_26;01).png (image/png)
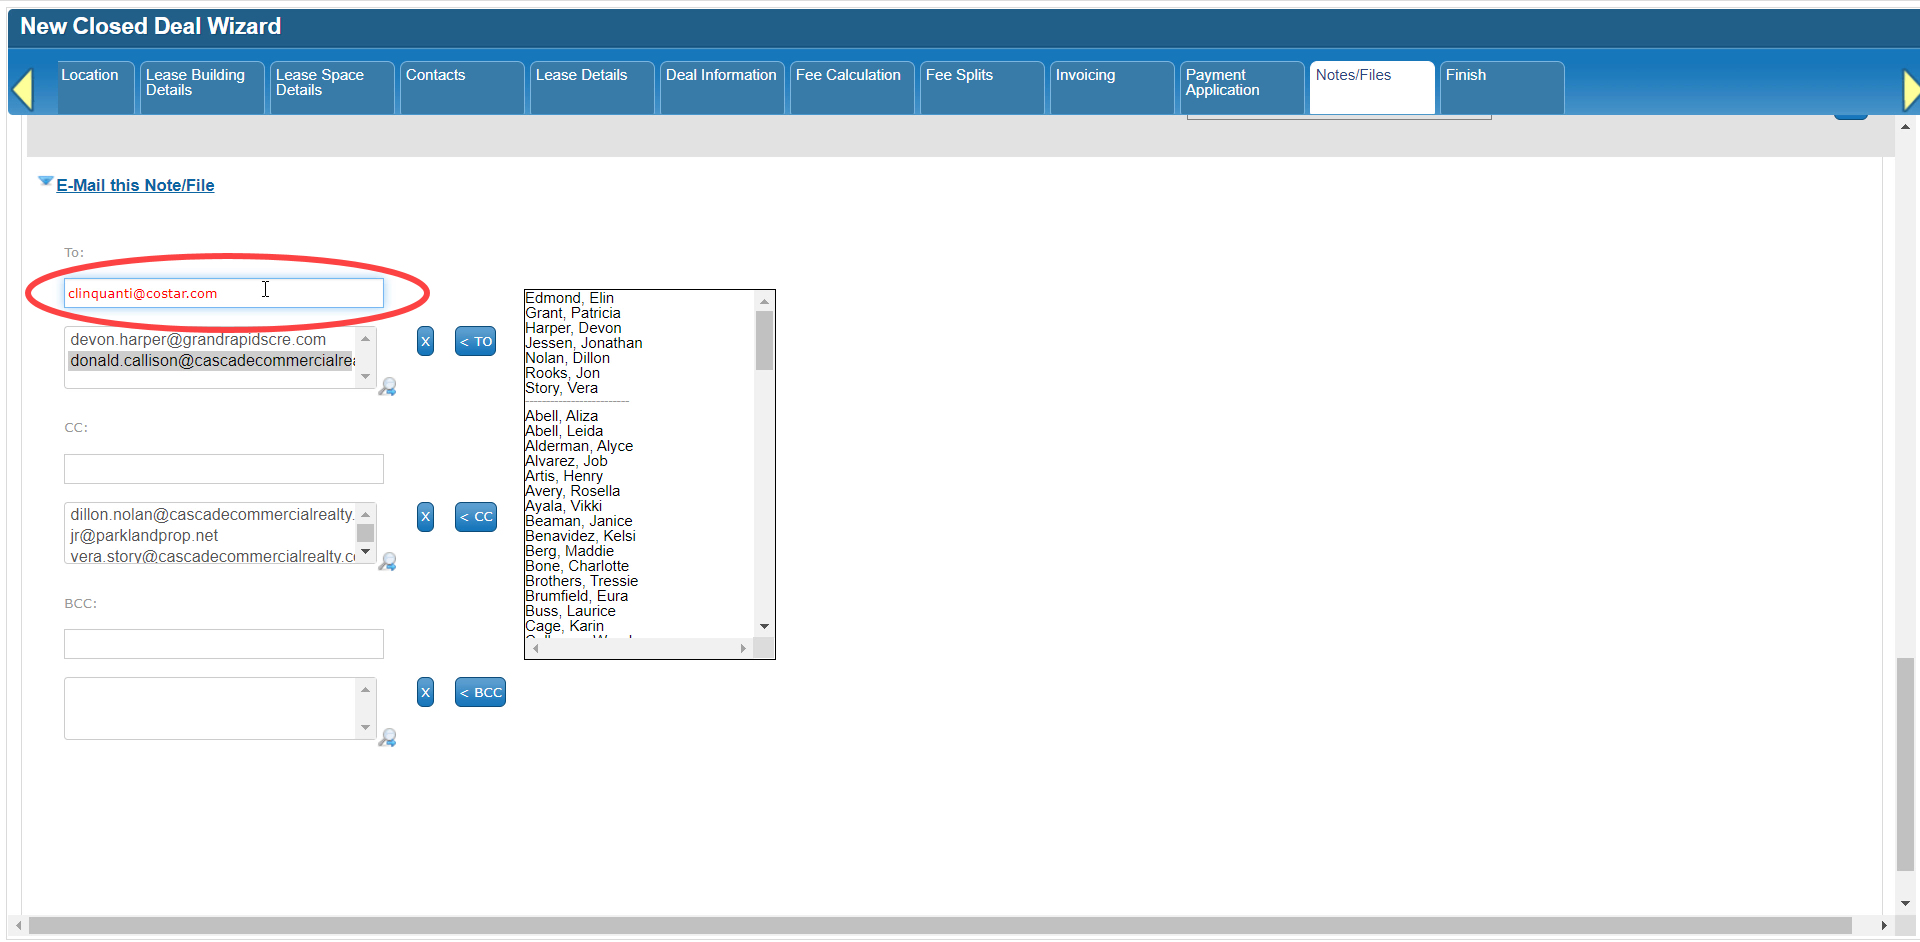 CBA - Entering a Closed Deal - 13 Notes (Time 0_04_35;11).png (image/png)
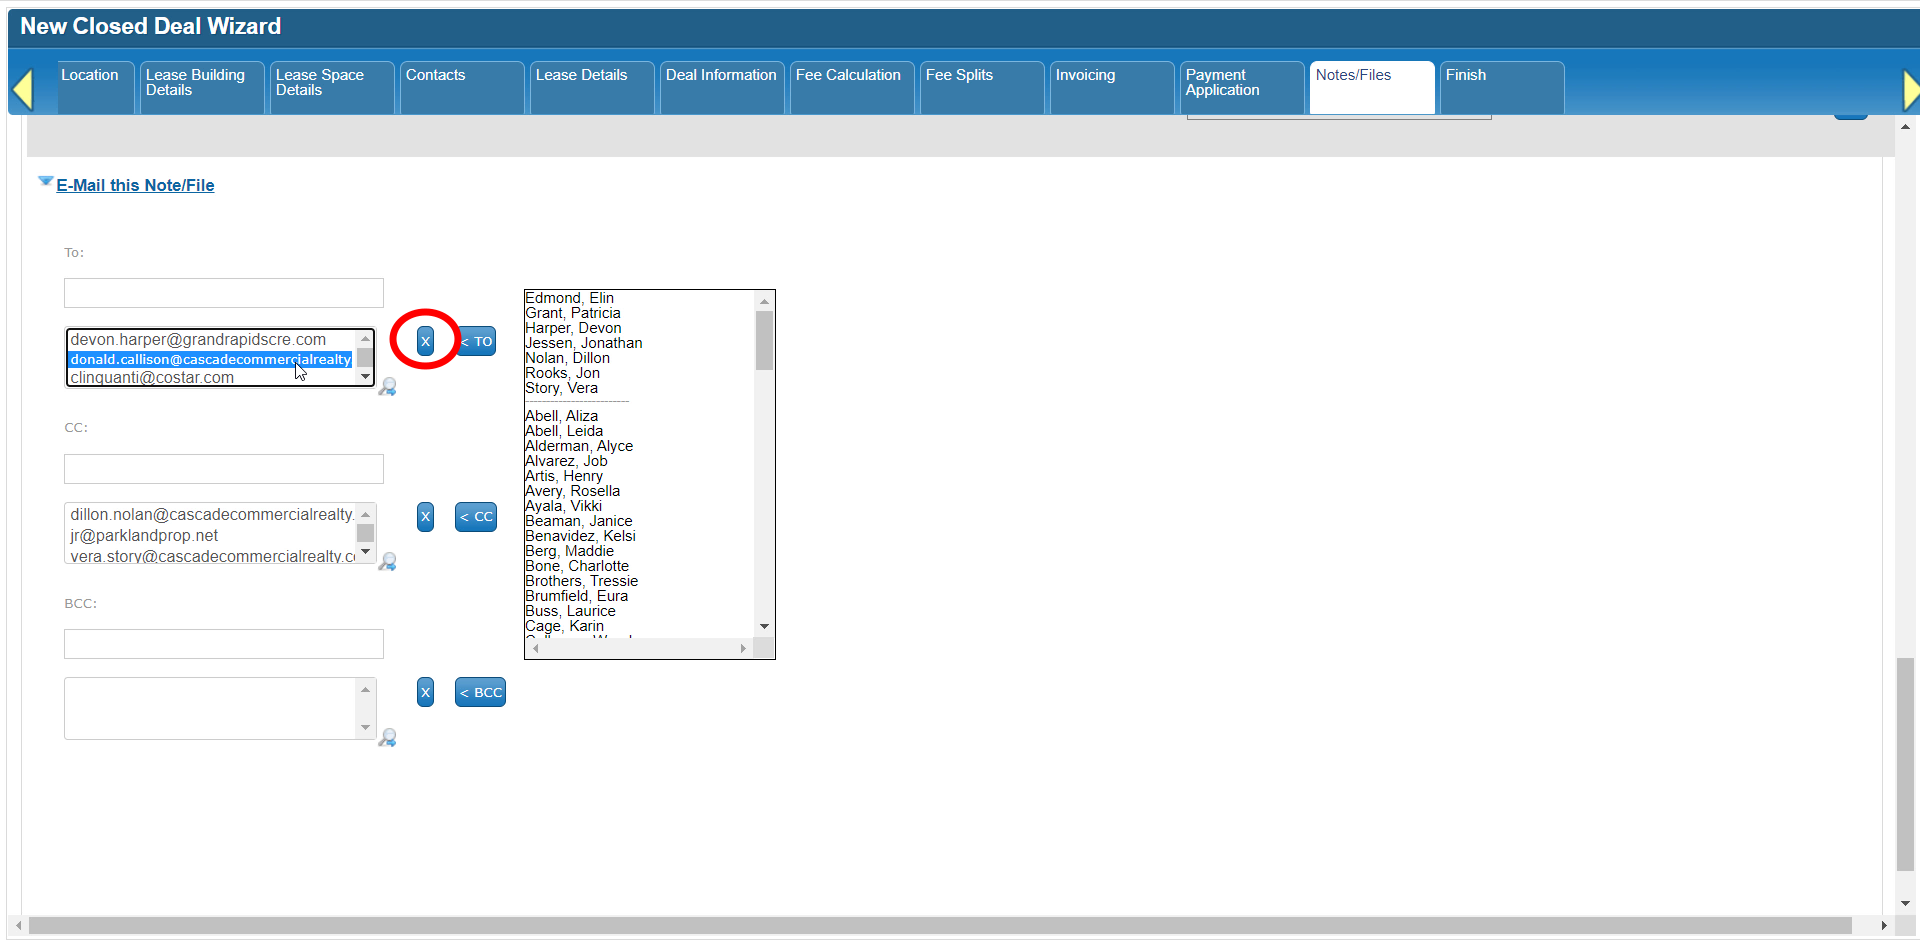 CBA - Entering a Closed Deal - 13 Notes (Time 0_04_43;22).png (image/png)
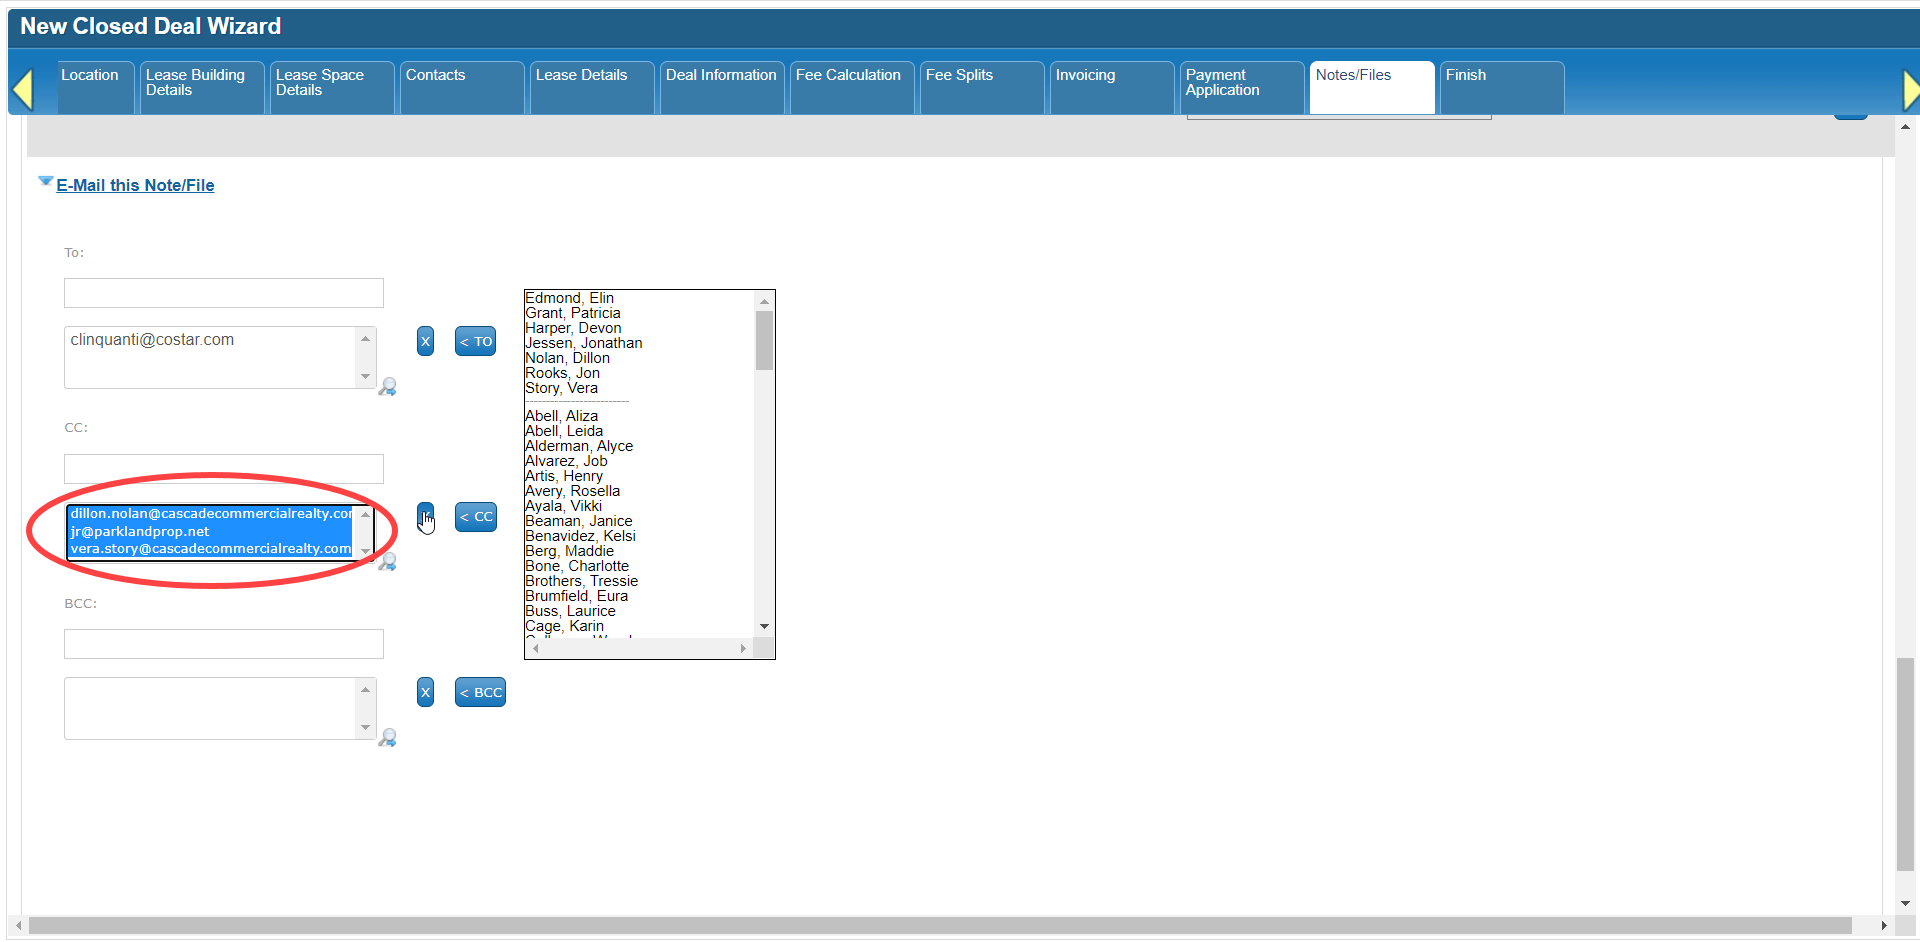 CBA - Entering a Closed Deal - 13 Notes (Time 0_04_50;02).png (image/png)
 CBA - Entering a Closed Deal - 13 Notes (Time 0_04_57;25).png (image/png)
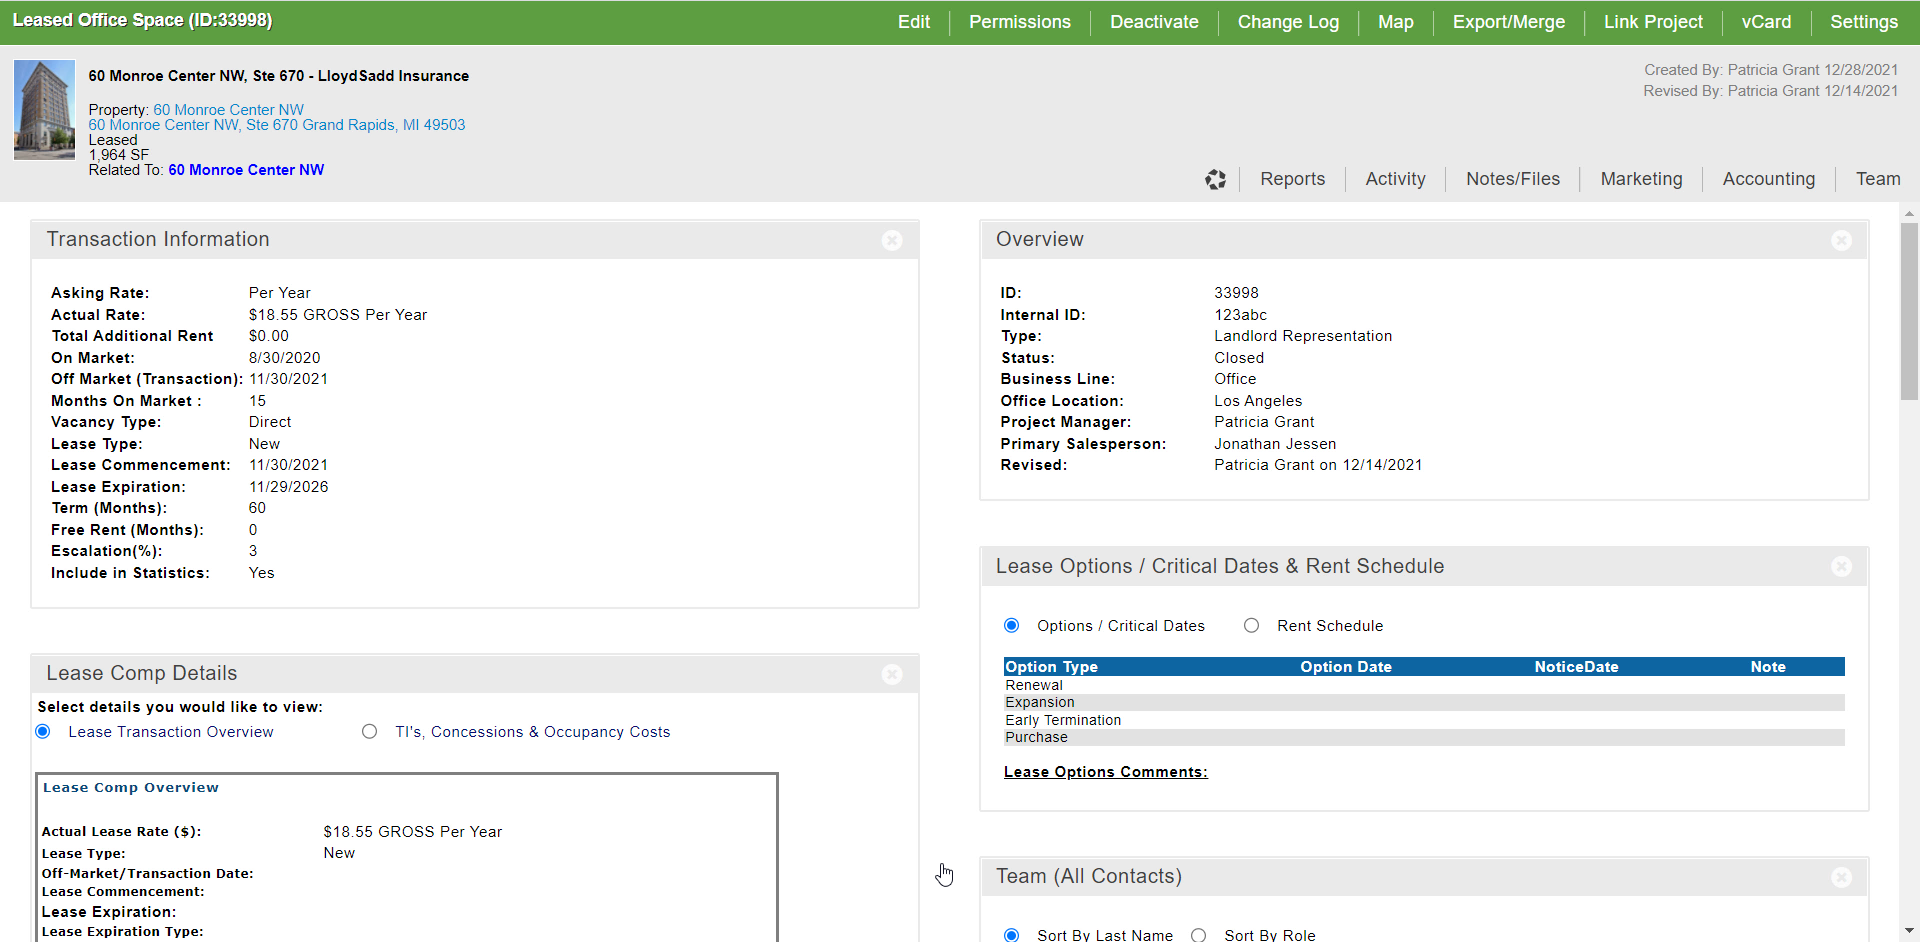 CBA - Entering a Closed Deal - 13 Notes (Time 0_05_10;01).png (image/png)
 CBA - Entering a Closed Deal - 15 Deal Share (Time 0_00_52;19).png (image/png)
CBA - Entering a Closed Deal - 15 Deal Share (Time 0_01_23;08).png (image/png)
CBA - Entering a Closed Deal - 15 Deal Share (Time 0_01_30;11).png (image/png)
CBA - Entering a Closed Deal - 15 Deal Share (Time 0_01_34;21).png (image/png)
CBA - Entering a Closed Deal - 15 Deal Share (Time 0_01_50;00)b.png (image/png)
CBA - Entering a Closed Deal - 15 Deal Share (Time 0_02_00;04).png (image/png)
CBA - Entering a Closed Deal - 15 Deal Share (Time 0_02_07;02).png (image/png)
CBA - Entering a Closed Deal - 15 Deal Share (Time 0_00_52;19).png (image/png)
CBA - Entering a Closed Deal - 15 Deal Share (Time 0_01_23;08).png (image/png)
CBA - Entering a Closed Deal - 15 Deal Share (Time 0_01_30;11).png (image/png)
CBA - Entering a Closed Deal - 15 Deal Share (Time 0_01_34;21).png (image/png)
CBA - Entering a Closed Deal - 15 Deal Share (Time 0_01_50;00)b.png (image/png)
CBA - Entering a Closed Deal - 15 Deal Share (Time 0_02_00;04).png (image/png)
CBA - Entering a Closed Deal - 15 Deal Share (Time 0_02_07;02).png (image/png)
 CBA - Entering a Closed Deal - 15 Deal Share (Time 0_02_07;02)b.png (image/png)
CBA - Entering a Closed Deal - 15 Deal Share (Time 0_02_12;00).png (image/png)
CBA - Entering a Closed Deal - 15 Deal Share (Time 0_02_19;16).png (image/png)
CBA - Entering a Closed Deal - 15 Deal Share (Time 0_02_29;01).png (image/png)
CBA - Entering a Closed Deal - 15 Deal Share (Time 0_02_46;06).png (image/png)
CBA - Entering a Closed Deal - 15 Deal Share (Time 0_03_01;23).png (image/png)
CBA - Entering a Closed Deal - 15 Deal Share (Time 0_03_22;02).png (image/png)
CBA - Entering a Closed Deal - 15 Deal Share (Time 0_03_45;02).png (image/png)
CBA - Entering a Closed Deal - 15 Deal Share (Time 0_03_59;00).png (image/png)
CBA - Entering a Closed Deal - 15 Deal Share (Time 0_04_05;15).png (image/png)
CBA - Entering a Closed Deal - 15 Deal Share (Time 0_04_10;08).png (image/png)
CBA - Entering a Closed Deal - 15 Deal Share (Time 0_04_21;12).png (image/png)
CBA - Entering a Closed Deal - 15 Deal Share (Time 0_04_35;17).png (image/png)
CBA - Entering a Closed Deal - 15 Deal Share (Time 0_04_47;05).png (image/png)
CBA - Entering a Closed Deal - 15 Deal Share (Time 0_04_57;18).png (image/png)
CBA - Entering a Closed Deal - 15 Deal Share (Time 0_02_07;02)b.png (image/png)
CBA - Entering a Closed Deal - 15 Deal Share (Time 0_02_12;00).png (image/png)
CBA - Entering a Closed Deal - 15 Deal Share (Time 0_02_19;16).png (image/png)
CBA - Entering a Closed Deal - 15 Deal Share (Time 0_02_29;01).png (image/png)
CBA - Entering a Closed Deal - 15 Deal Share (Time 0_02_46;06).png (image/png)
CBA - Entering a Closed Deal - 15 Deal Share (Time 0_03_01;23).png (image/png)
CBA - Entering a Closed Deal - 15 Deal Share (Time 0_03_22;02).png (image/png)
CBA - Entering a Closed Deal - 15 Deal Share (Time 0_03_45;02).png (image/png)
CBA - Entering a Closed Deal - 15 Deal Share (Time 0_03_59;00).png (image/png)
CBA - Entering a Closed Deal - 15 Deal Share (Time 0_04_05;15).png (image/png)
CBA - Entering a Closed Deal - 15 Deal Share (Time 0_04_10;08).png (image/png)
CBA - Entering a Closed Deal - 15 Deal Share (Time 0_04_21;12).png (image/png)
CBA - Entering a Closed Deal - 15 Deal Share (Time 0_04_35;17).png (image/png)
CBA - Entering a Closed Deal - 15 Deal Share (Time 0_04_47;05).png (image/png)
CBA - Entering a Closed Deal - 15 Deal Share (Time 0_04_57;18).png (image/png)