This tutorial will go over managing Net Adjustments in the Closed Deal workflow. We’ll cover what Net Adjustments are, how to set them up, and how to distribute them via Payments.
This is an optional step and may not be relevant for your firm’s internal process. If that’s the case, you can ask your System Administrator to hide this tab from the workflow in your user settings.
Instructions
Net Adjustments are transfers of money that are related to this Deal and that affect the final Net amounts to be distributed when a payment is processed. Net Adjustments do not affect the Gross Commission allocation for this Deal, so they don’t have any impact on the Production Credit or Split thresholds for an internal Broker.
They can be useful in many different scenarios. For example: A Broker paying a staff member a bonus from their own Net Commission, a Broker paying off a draw advance, or the firm reimbursing a Broker for a marketing expense.


Any time a portion of the fees for this Deal is meant to be distributed after the Net Commissions are calculated, you should use Net Adjustments.
The Net Adjustments tab is used to set up these post-Net exchanges before applying a Payment.
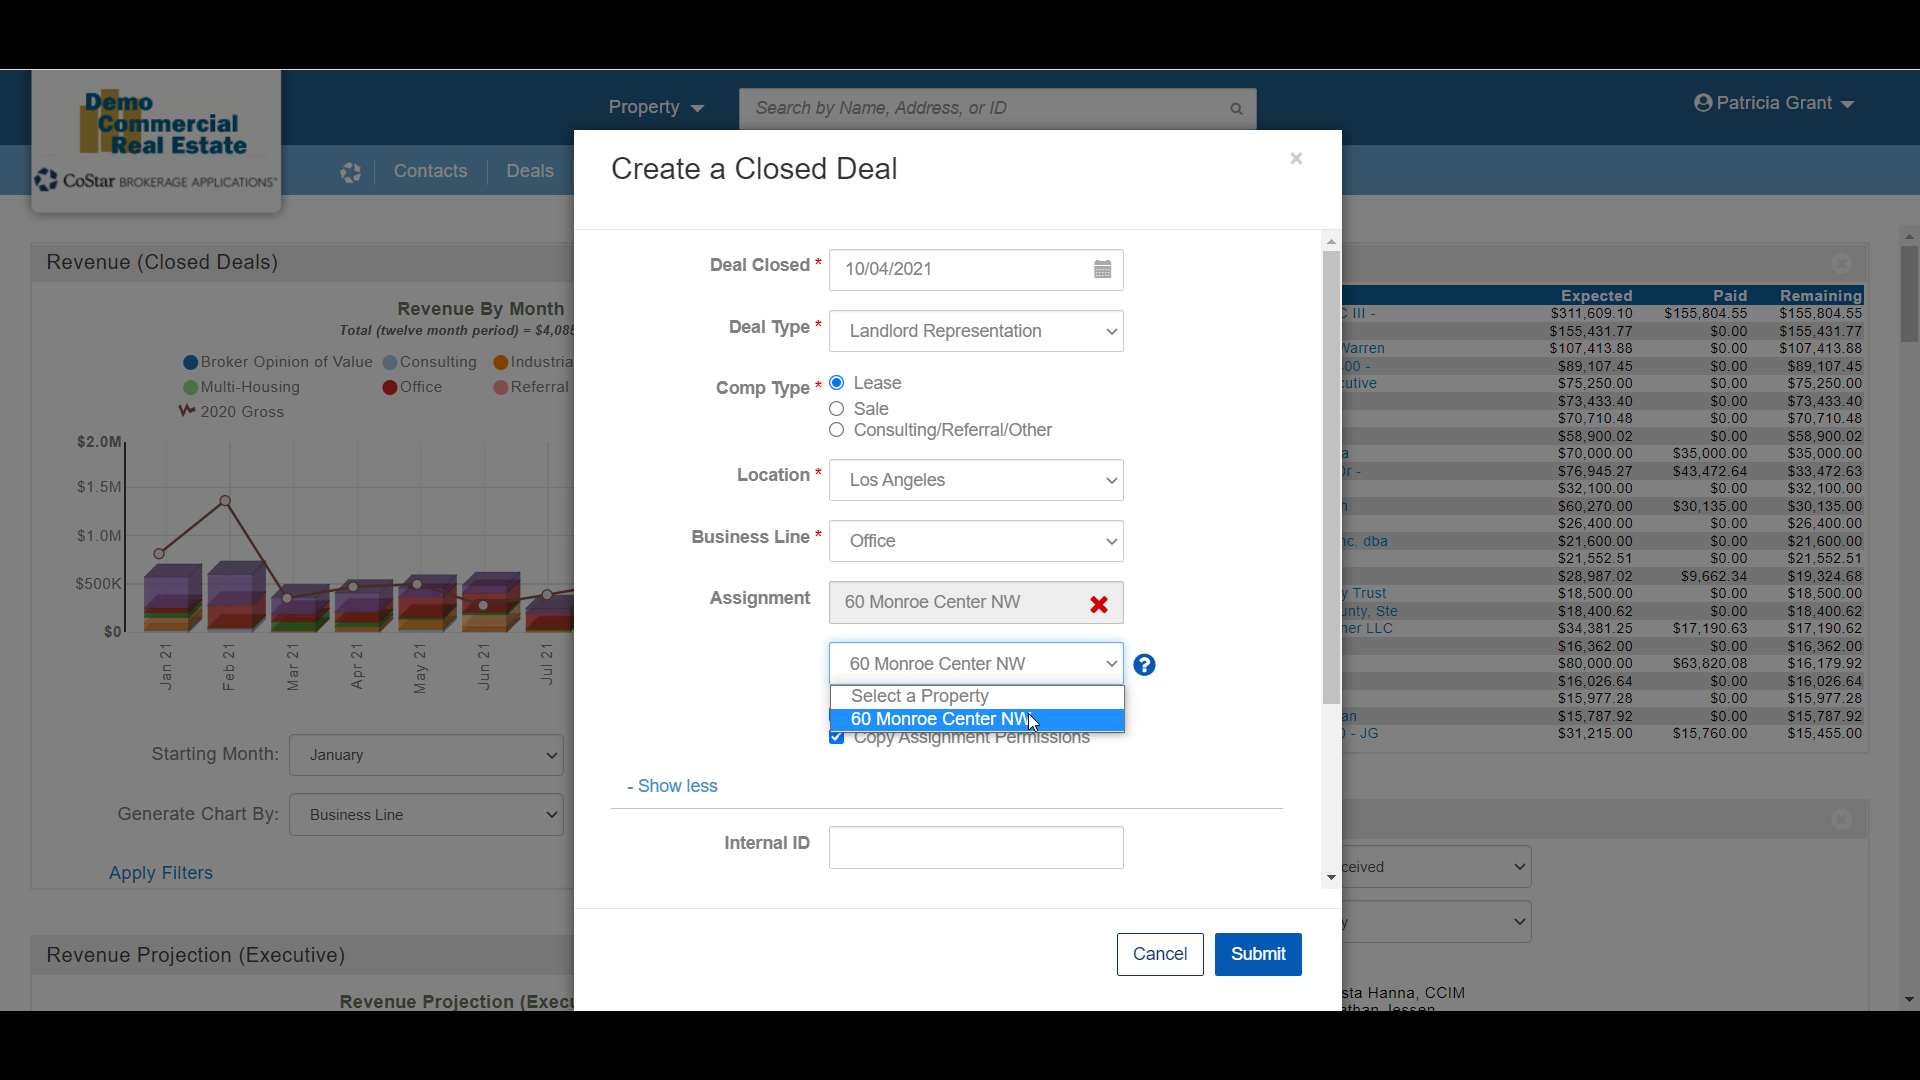
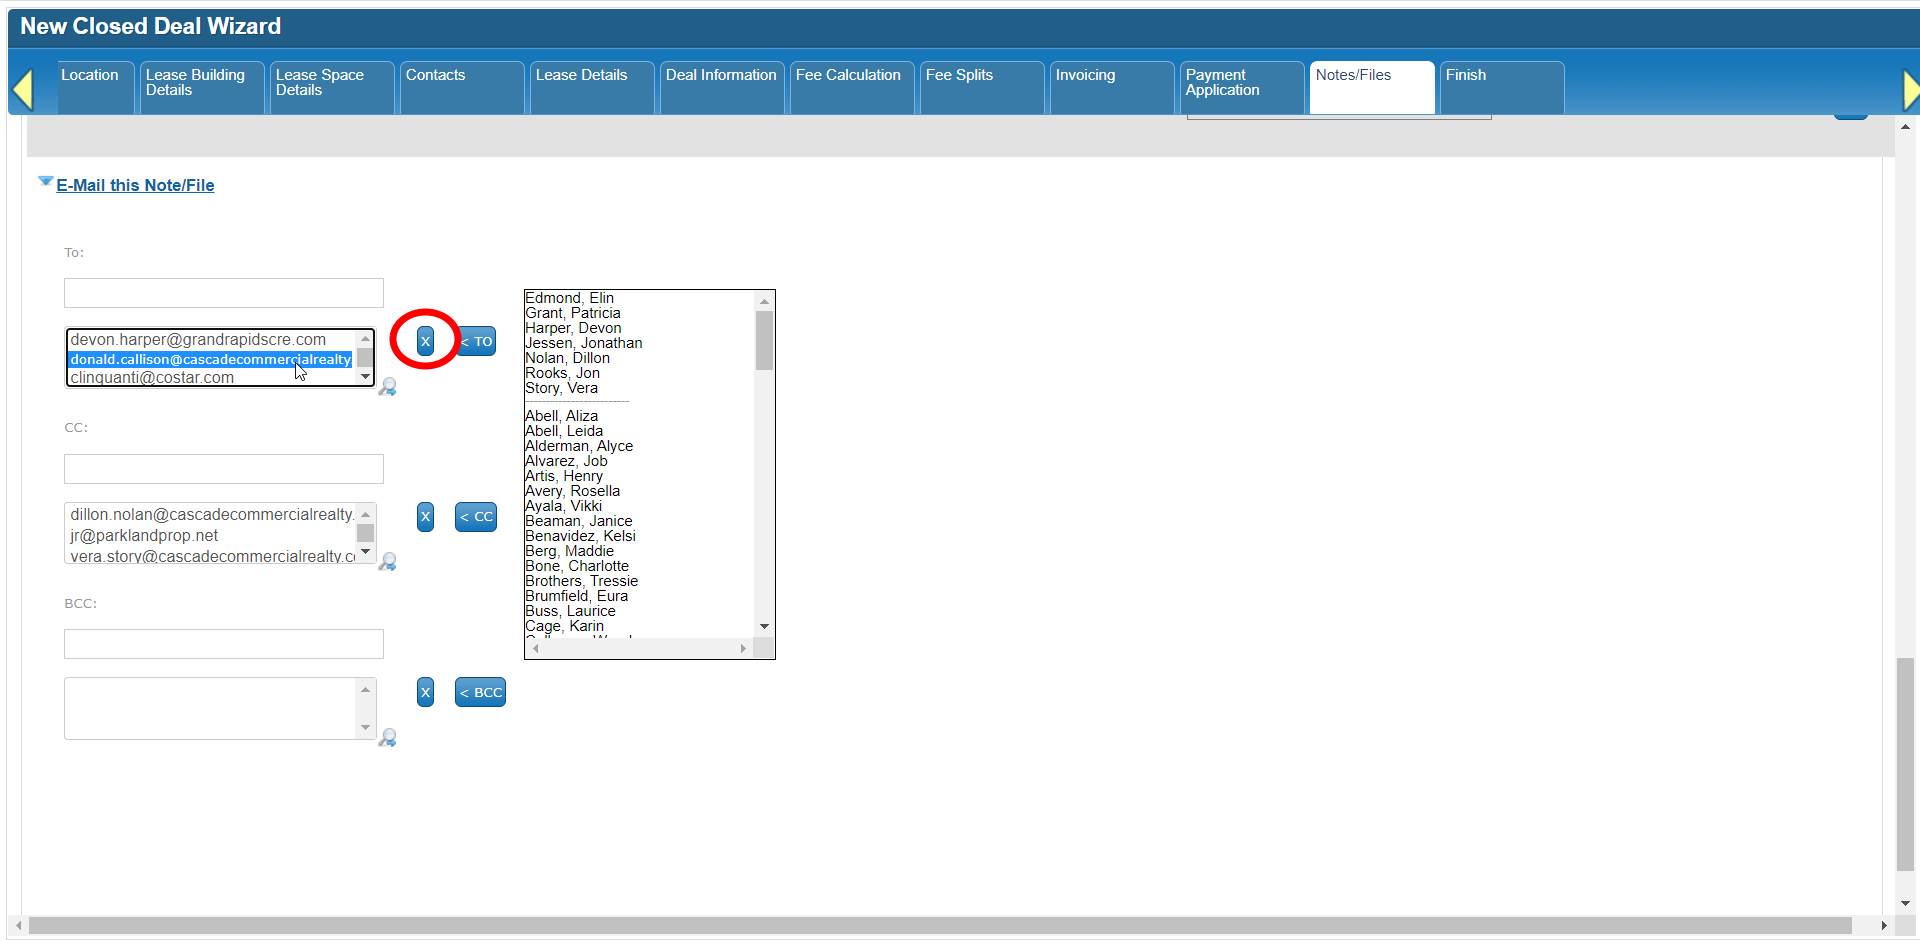
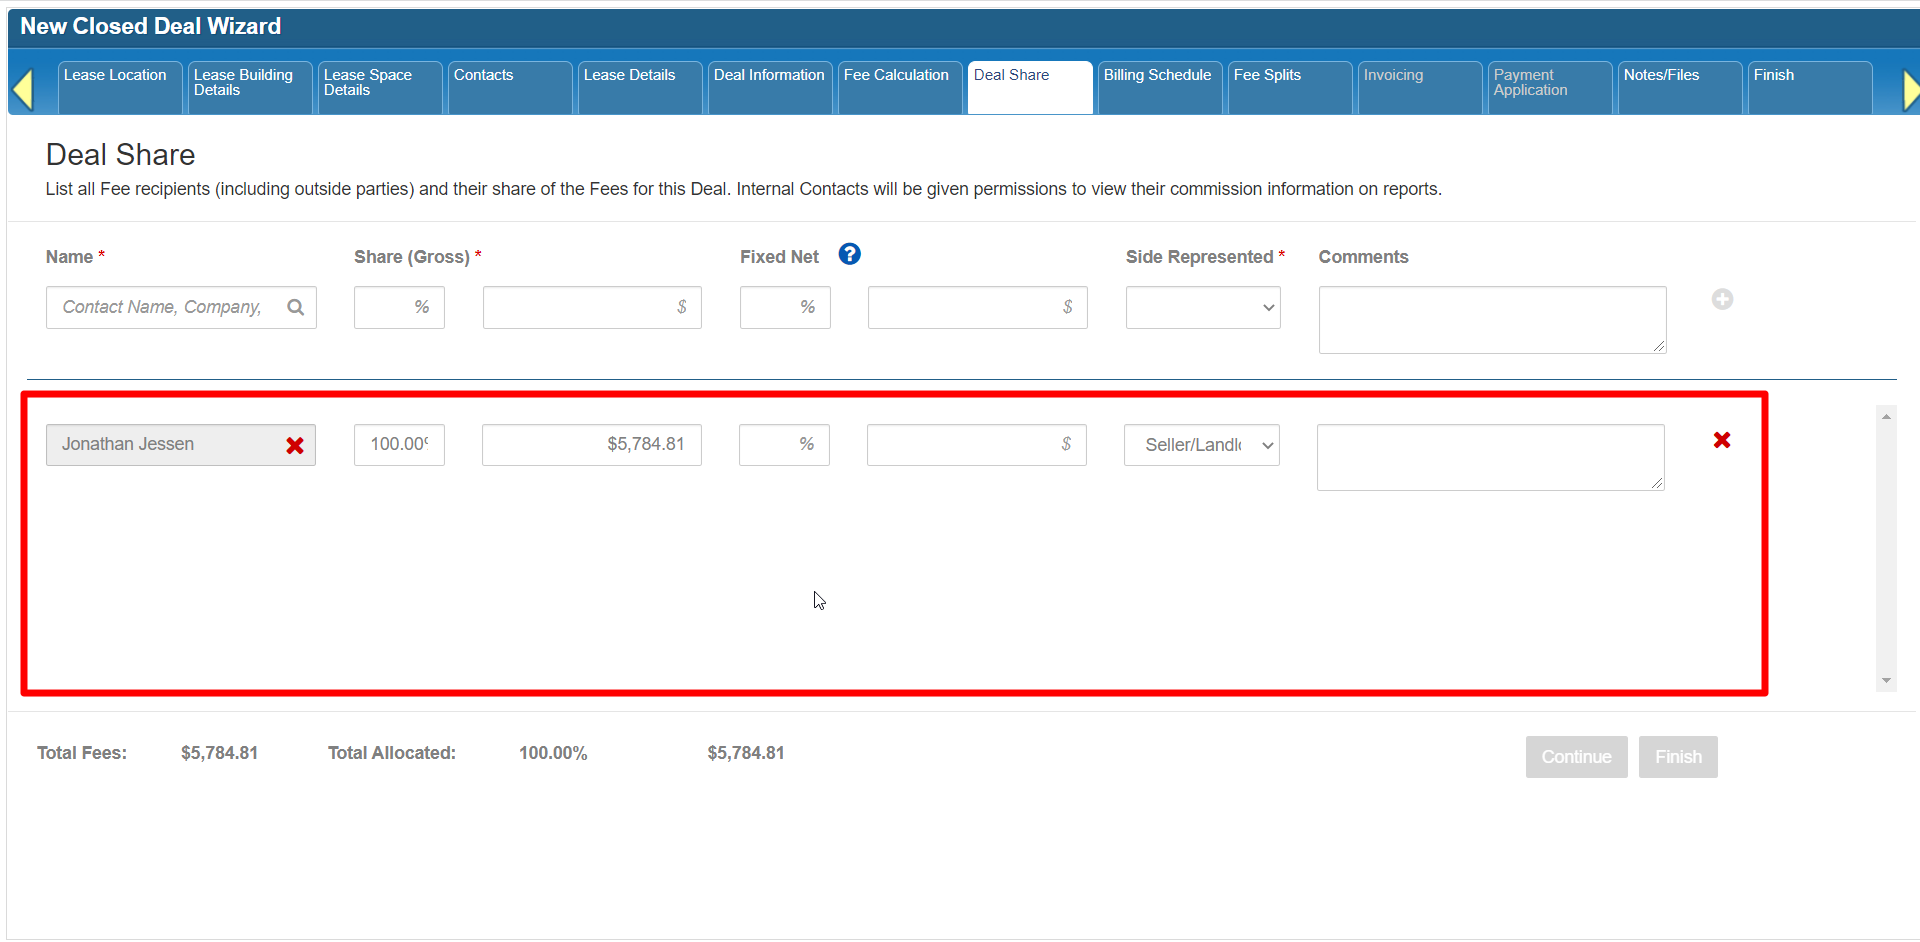
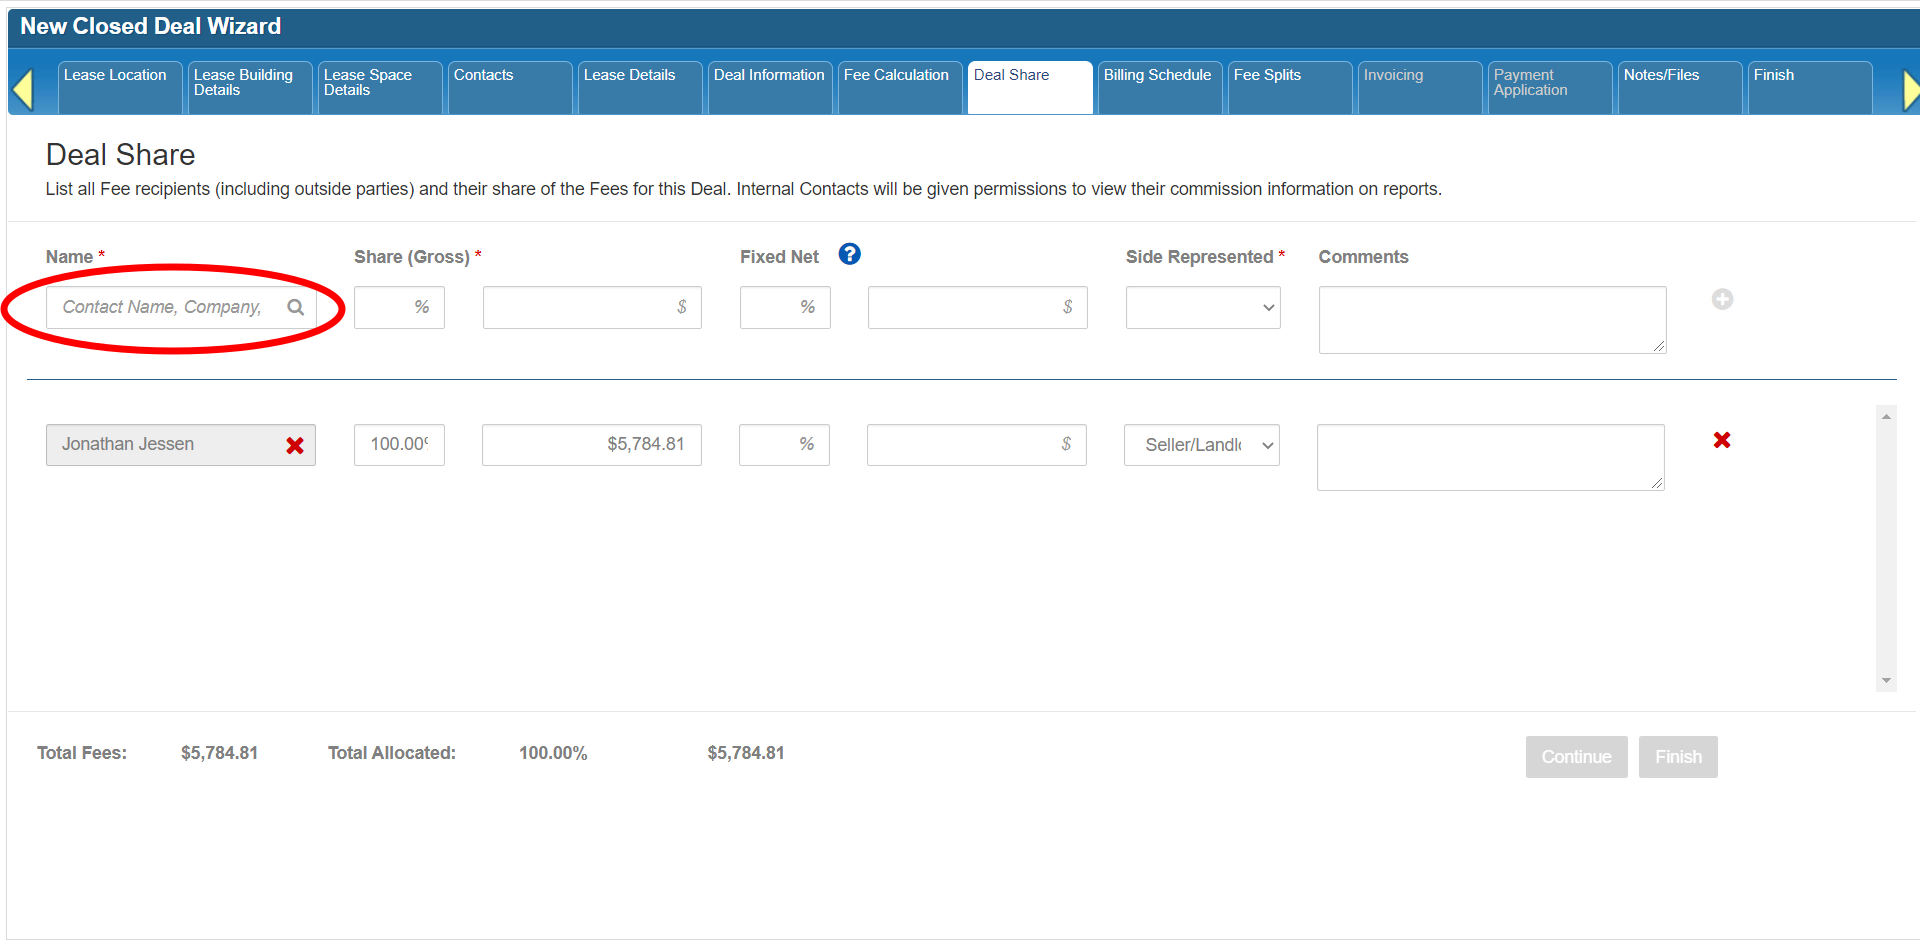
Start by selecting the Payer in the From list and the Payee or Recipient in the To list.

Both lists will include all of the Vendors on the Fee Splits tab, as well as all of the House Accounts in the system.

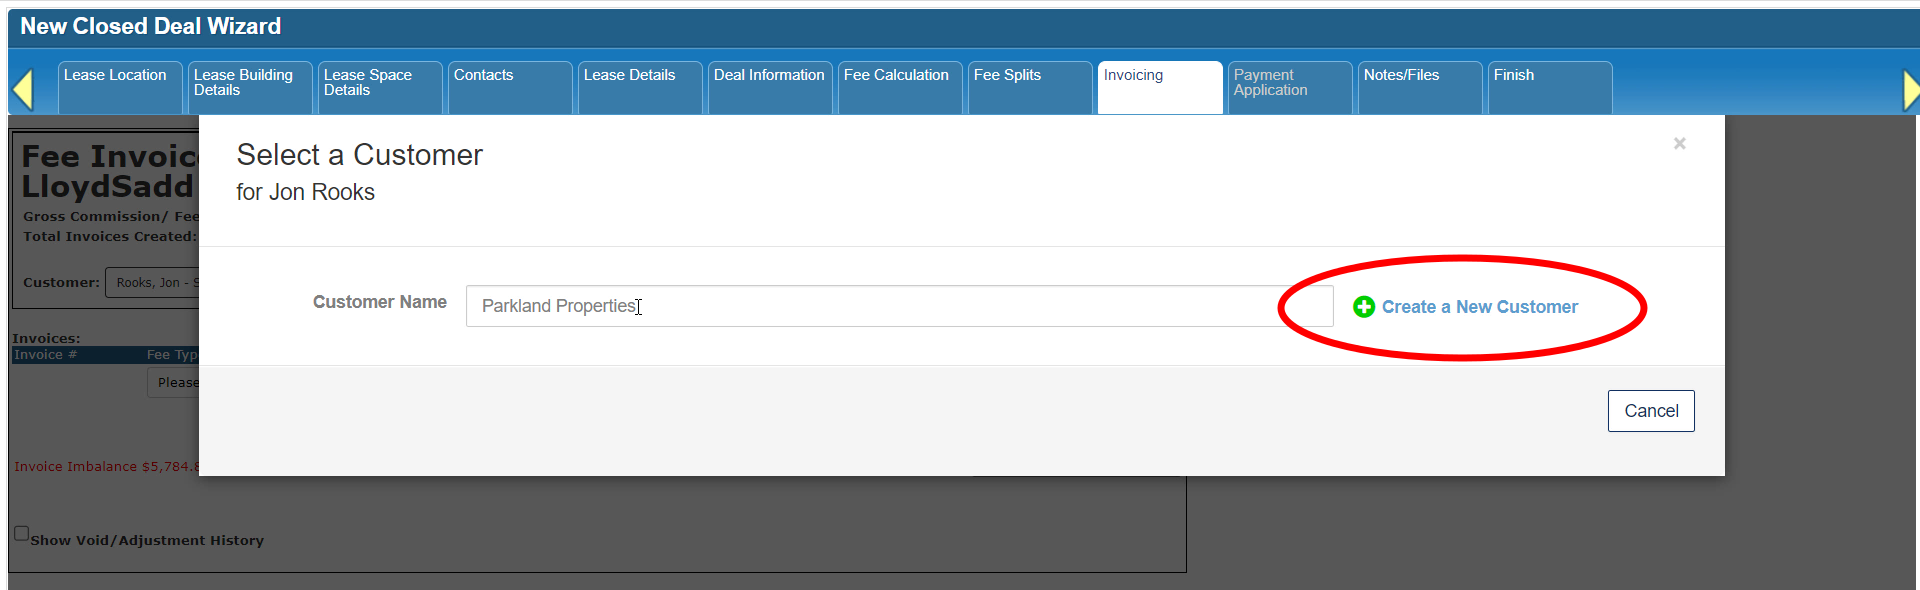
If this Net Adjustment involves another Vendor (such as a staff member who is not getting a Gross Commission on this Deal), use the magnifying glass to search the Vendor database.

Type in their name, city or record ID, then select the right Vendor from the list of results.

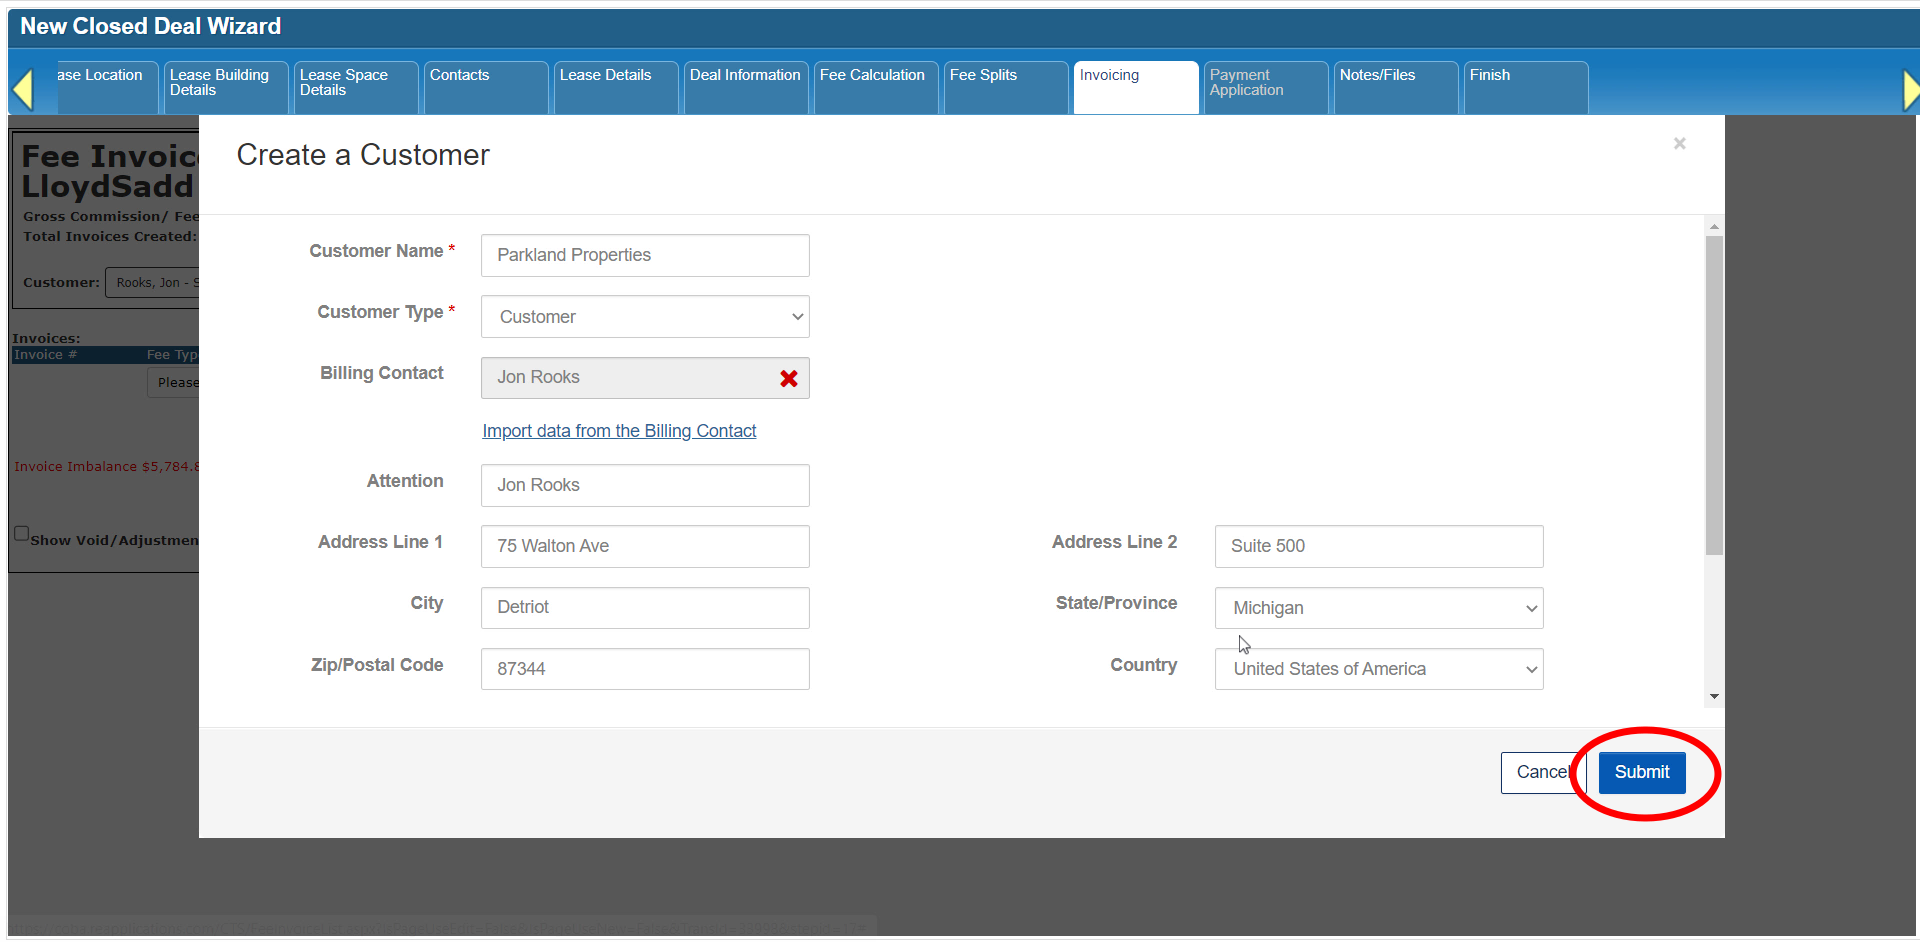
If you don’t see the Vendor you’re looking for, click on the green [+] icon to create a new Vendor.

Fill in the required fields, which are indicated by an asterisk.

The Entity Type plays a role in how that deal participant’s commission split with the firm is normally calculated: Outside Vendors don’t split their commissions with your firm, In-House Vendors always require a Split Plan to determine their split, and Staff Vendors by default will not split their commission with the firm unless a Split Plan has been set up for that contact.

Select the Vendor Type, then search for and select the appropriate Contact record. Internal Contacts are highlighted in yellow.

You can save yourself some time by allowing the system to copy the address and other details from the Contact if they are the same for the Vendor.
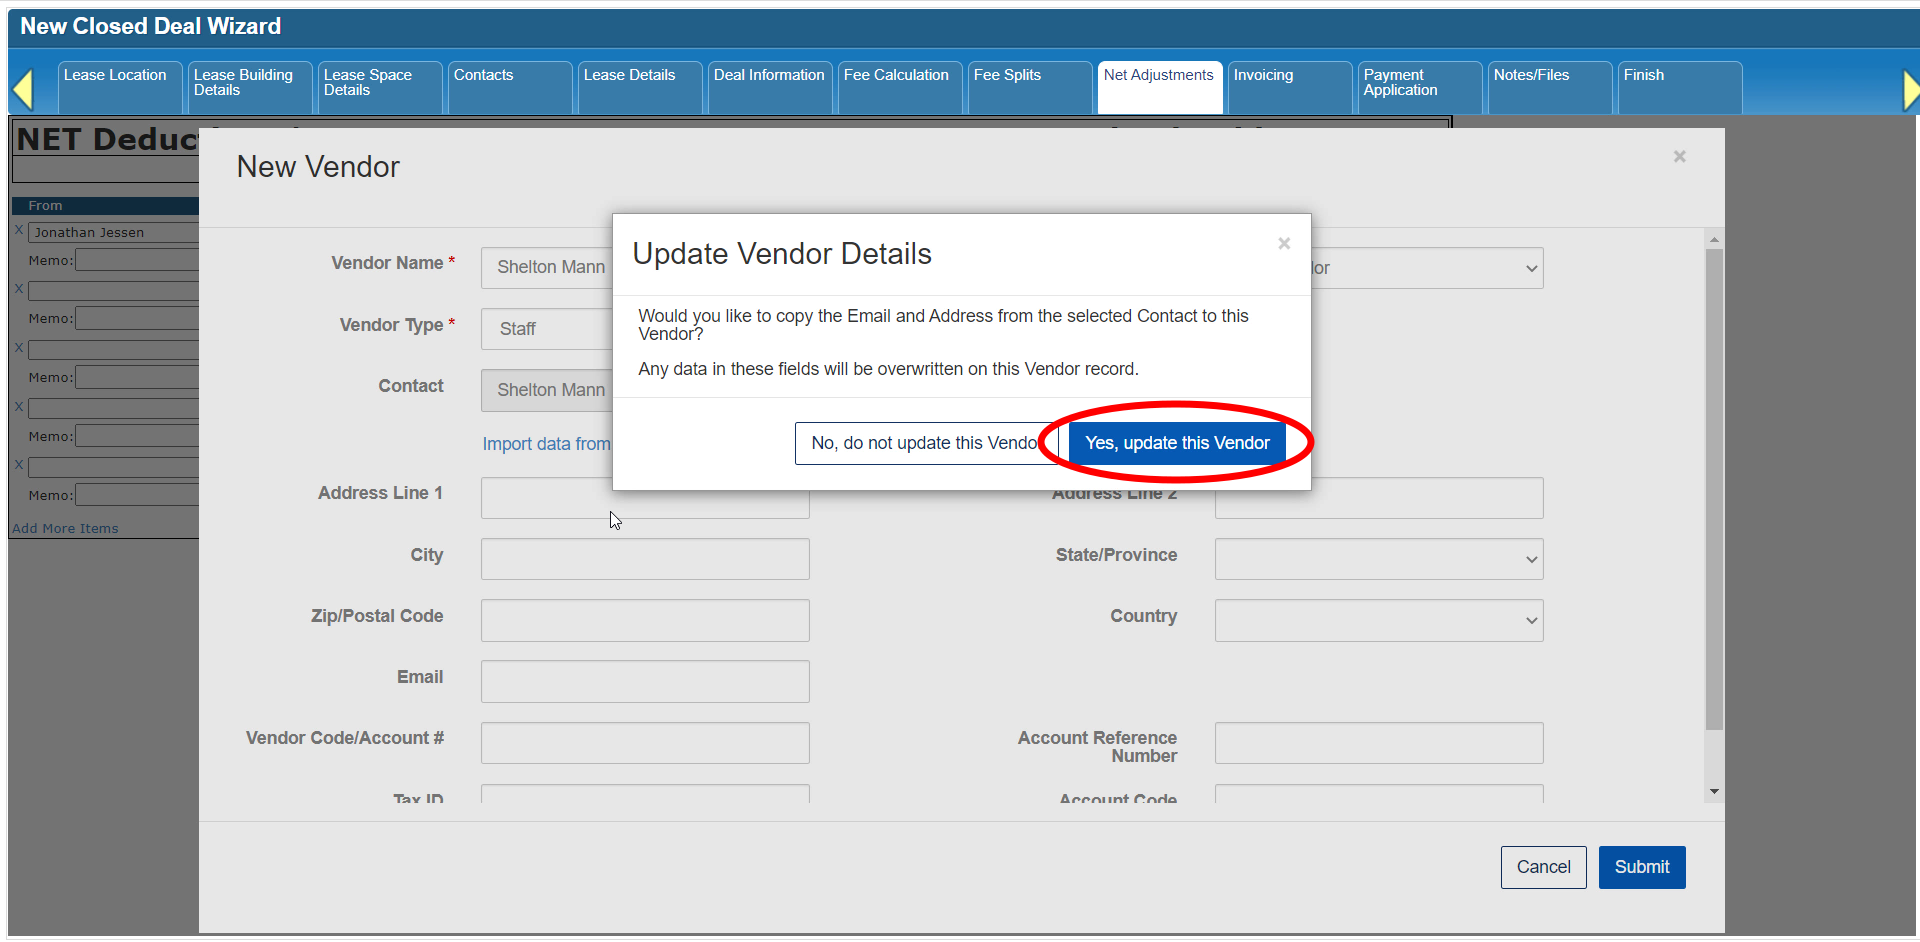
Add any other relevant information as needed, then click Submit.

Your new Vendor will now be added to the Net Adjustments form.

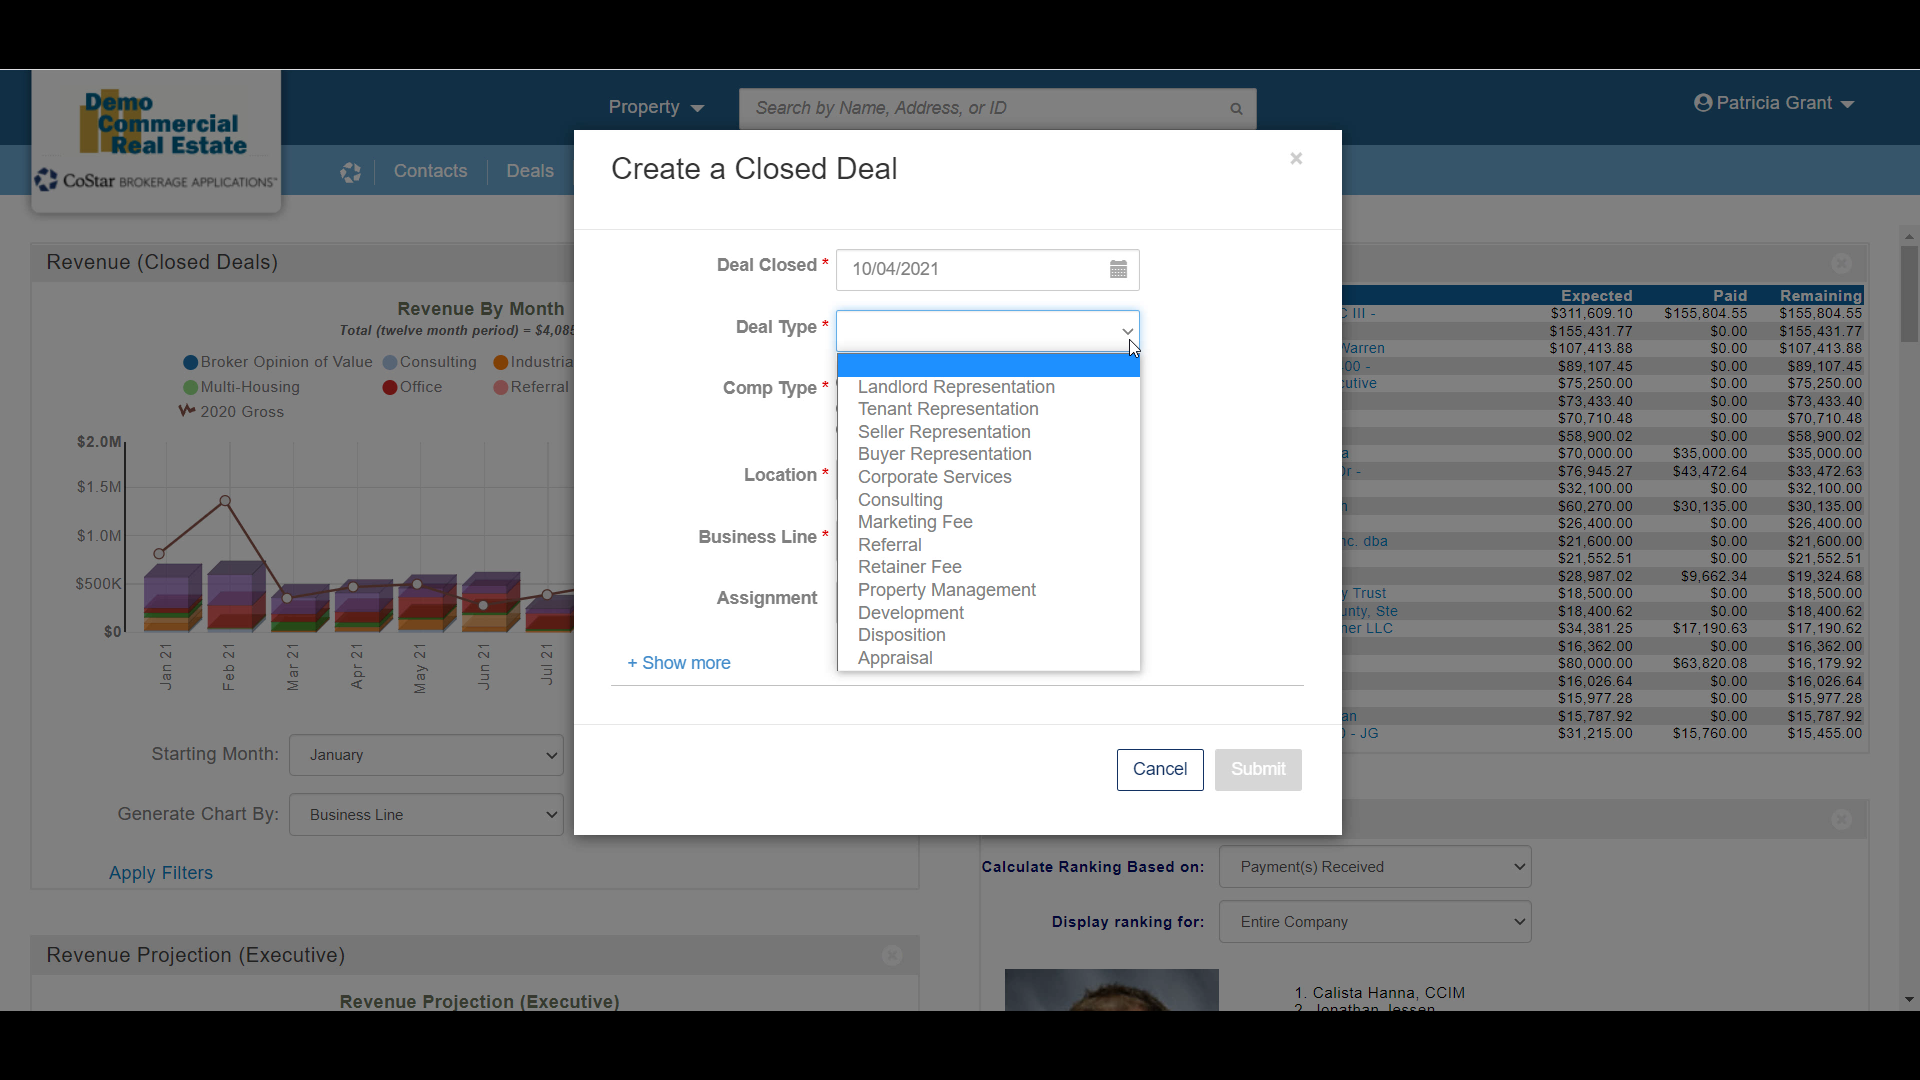
If applicable, select the Type of adjustment.

You now have the option of calculating the adjustment amount as a % of the Gross Commission allocated to the Vendor in the From field, or by entering the amount directly.

Once a payment is applied to this deal, you’ll be able to see how much of this Net Adjustment has been distributed.

The Memo field lets you add any other comments or instructions.

Once you’ve added all of the Net Adjustments for this Deal, click Save and Continue.

To remove an adjustment, click the [X] icon to the left of that adjustment.

Adjustments that are partially or fully applied cannot be removed.

Click the Add More Items option to add more Net Adjustments to this Deal.

To distribute a Net Adjustment, you need to apply a Payment to this Deal. You can learn more about applying payments by going to our tutorial on the Payment Application tab.

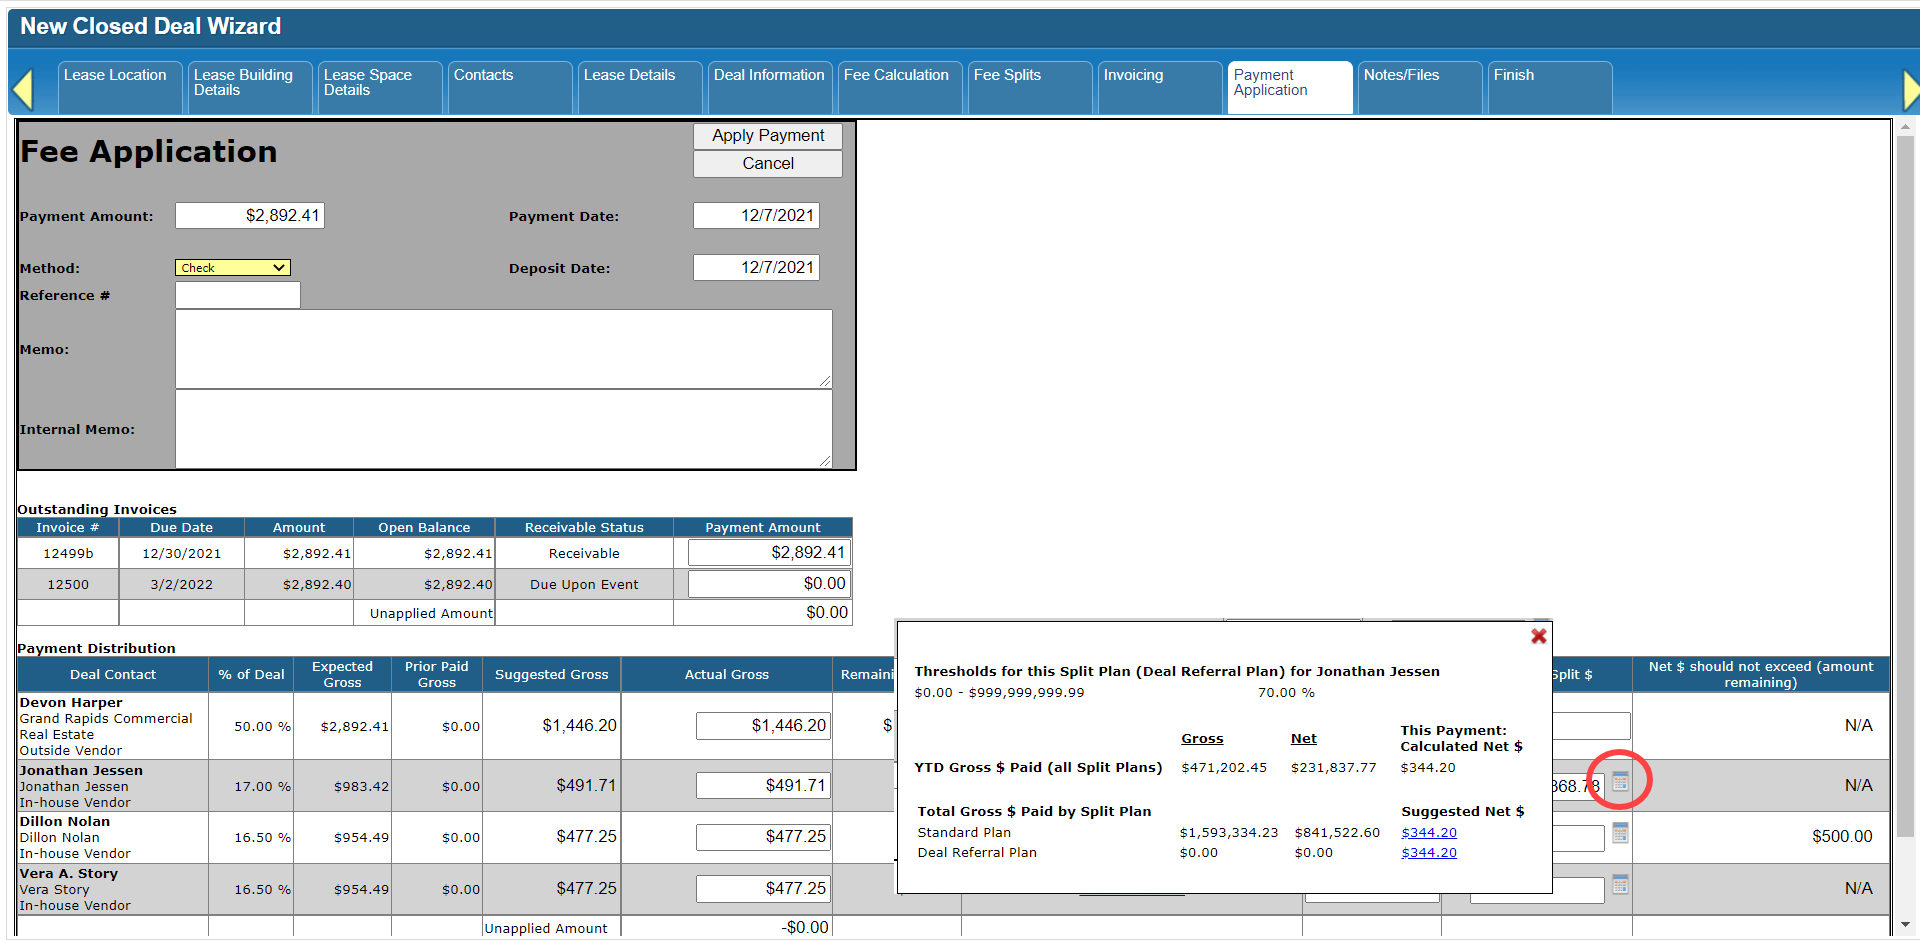
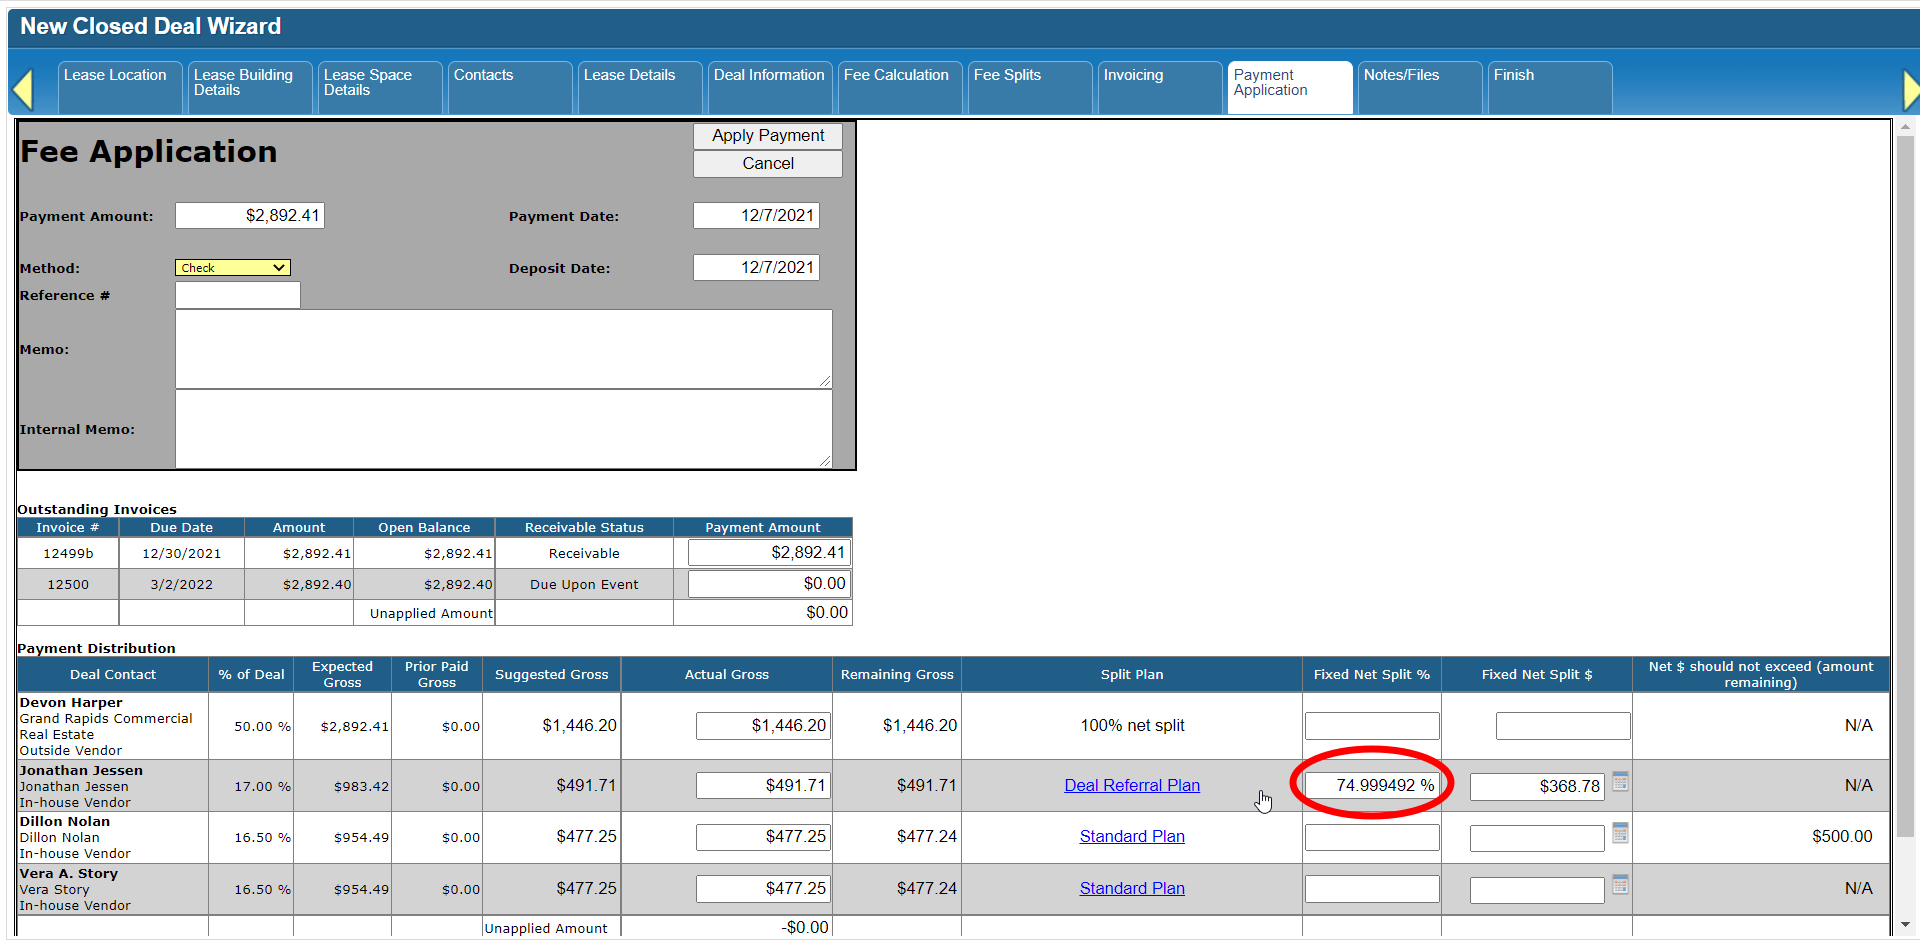
The Payment Application form includes a section at the bottom that lists all Net Adjustments for this Deal.

This list indicates the Payer and Recipient accounts, as well as the Net Adjustment Type, the total Adjustment Amount, and how much of that amount has not been applied or distributed yet.

You can enter either the % or specific Net Adjustment amount to apply with this payment.

The system will calculate how much will be left after this distribution.
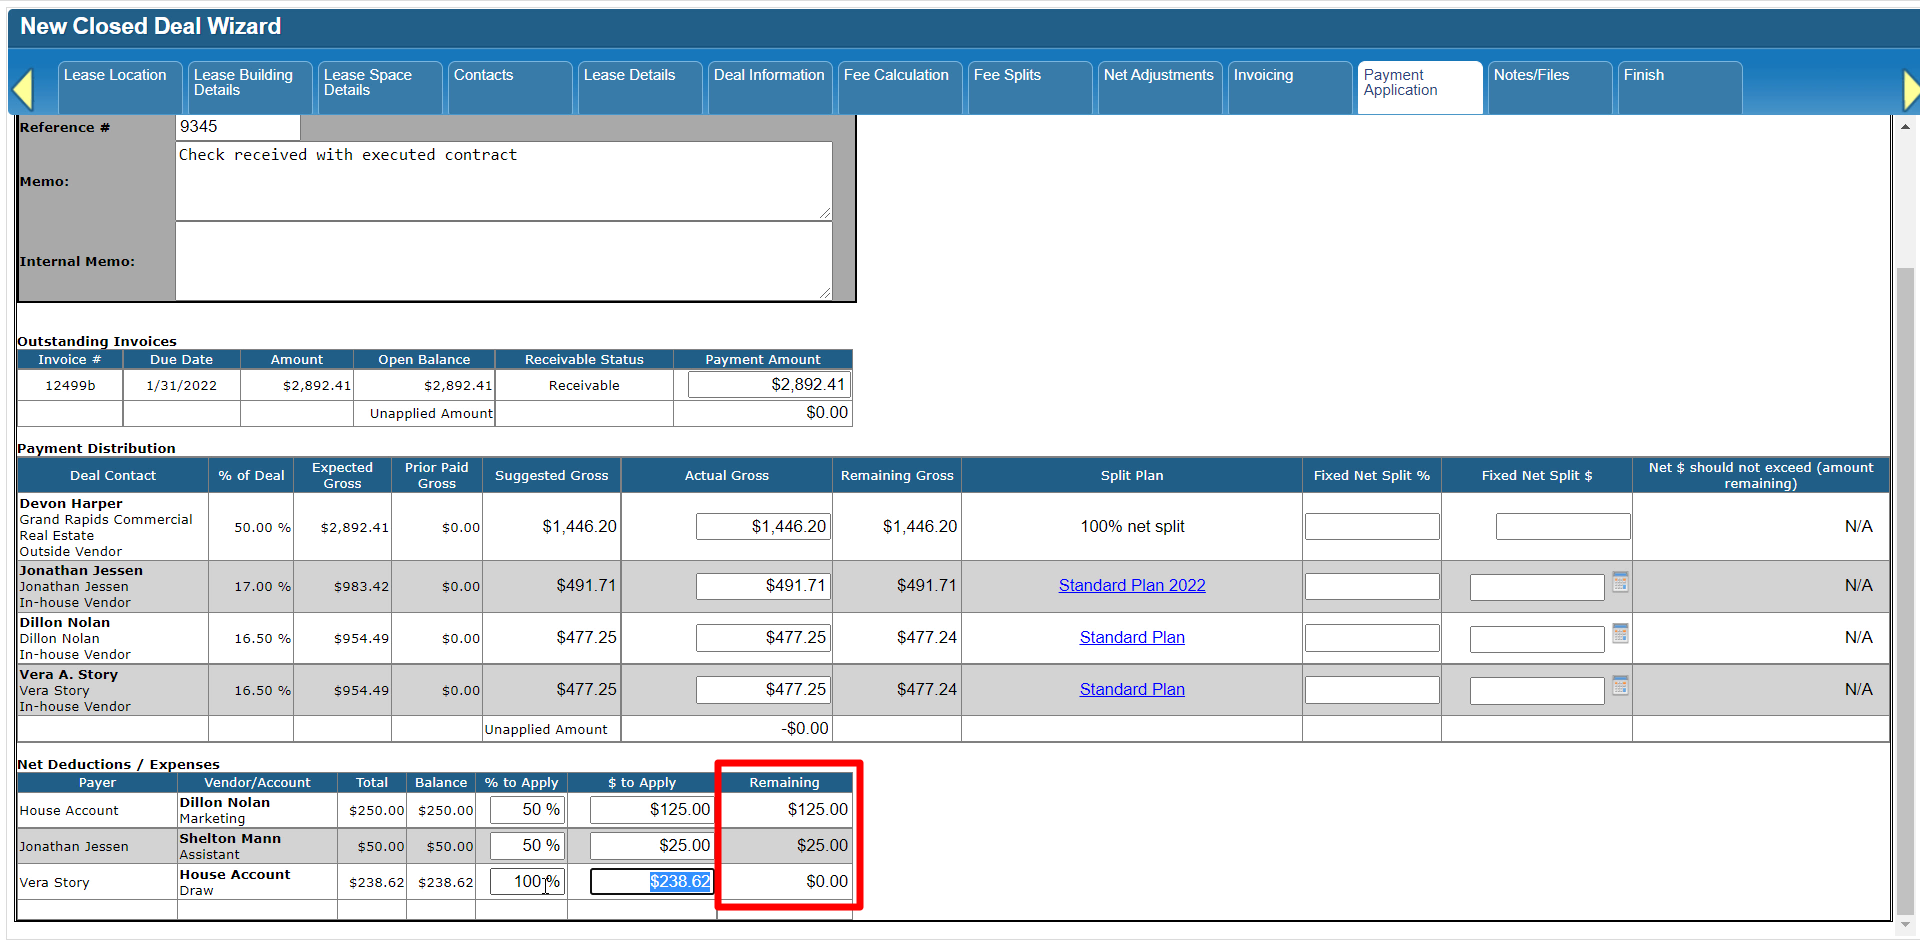
Please note that if the Payer is listed above and is therefore allocated part of the Gross Commission for this Deal, you are not allowed to deduct more from that Payer than the amount they will receive for their Net Commission, after their commission is split with the firm.


If you’re not sure how much their Net Commission will be, click on the calculator icon in their row and look for the Calculated Net amount for this payment.


Once you submit the Payment, the Fee Application report will include a page for each Net Adjustment Payer and Recipient with their Net Adjustment and final distribution amounts.


Click here for the next tutorial.
Related articles
- How to create a new Closed Deal: Part 2 - New Closed Deal Modal
- How to create a new Closed Deal: Part 3 - Workflow Navigation
- How to create a new Closed Deal: Part 4 - Property
- How to create a new Closed Deal: Part 5 - Space
- How to create a new Closed Deal: Part 6 - Contacts
- How to create a new Closed Deal: Part 7 - Lease Details
- How to create a new Closed Deal: Part 8 - Deal Information
- How to create a new Closed Deal: Part 9 - Fee Calculation
- How to create a new Closed Deal: Part 10 - Fee Splits
- How to create a new Closed Deal: Part 11 - Invoicing
- How to create a new Closed Deal: Part 12 - Payments
- How to create a new Closed Deal: Part 13 - Notes/Files
- How to create a new Closed Deal: Part 14 - Link Project
- How to create a new Closed Deal: Part 15 - Deal Share
- How to create a new Closed Deal: Part 16 - Billing Schedule
- How to create a new Closed Deal: Part 17 - Net Adjustments
- How to create a new Closed Deal: Part 18 - Annuity Schedule
- How to create a new Closed Deal: Part 19 - Sale Details
- How to create a new Closed Deal: Part 20 - Other Starting Points
© 2023 CoStar Group